This post may contain affiliate links. Please read our privacy policy.
Hi Everyone! It’s Lindsay, back with a few more cool gift ideas for you. Making your own gifts can help save a little money and you get to show off your creative side, but the absolute best part of making your gifts is: You don’t have to go to the MALL.
I think the cold, gray Ohio weather was getting to me because I was inspired to go BRIGHT and colorful for these fun DIY Graphic tile Coasters and Painted Vases.
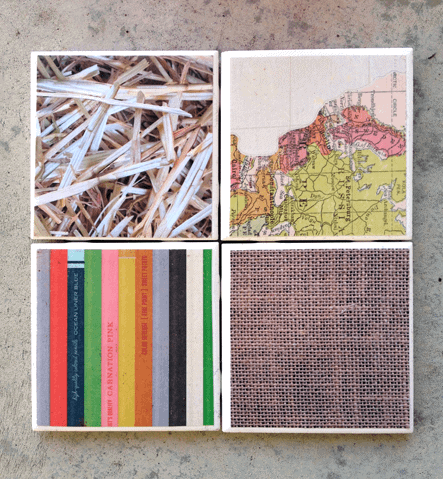
Graphic Tile Coasters
I found this DIY for tile coasters from BluePrintCrafts and thought it could be a great gift for anyone. You can use almost any paper to decorate the coasters, so they can be personalized for all of your friends and family. I used scrapbook paper for my coasters, but you can also use photos (make sure they are printed out on a laser printer, ink might bleed), wrapping paper, construction paper, any paper that strikes your fancy!
This Craft You Will Need:
- Ceramic Tiles, available at Home Depot or Lowe’s for 10-15 cents a piece
- Decorative Paper, cardstock, wrapping paper, scrapbook paper, photos etc..
- Spray Adhesive
- Modge Podge
- Clear Acrylic Spray-make sure it’s waterproof
- Paint Brush/Sponge
- Cork or Felt to put on the bottom of the coasters
- Strong glue such as Gorilla Glue, super glue or, hot glue
How to Assemble:
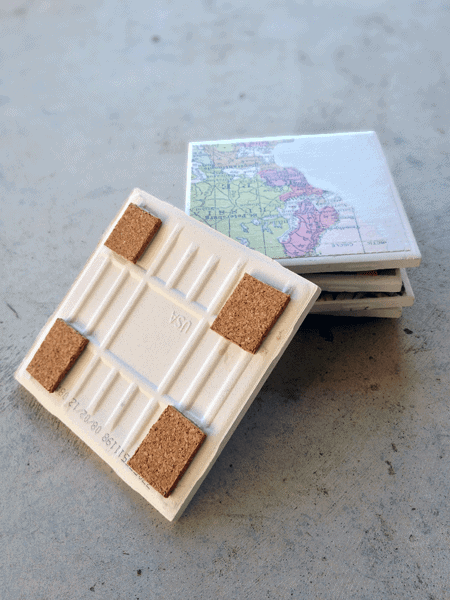
- Make sure tiles are clean and dry and lay them out on newspaper
- Cut squares of the felt or cork and glue to the bottom of the tiles in all four corners
- Cut your decorative paper into squares slightly smaller than the tiles
- Spray adhesive to the back of the paper and press onto tiles, pressing out all air bubbles as you go
- After these are dry, spray one coat of the Clear Acrylic spray over the paper. This creates a seal over the paper so the Modge Podge won’t make the paper bubble.
- When that is dry, add two coats of Modge Podge and let dry
- Add one more coat of the Clear Acrylic spray. This will make a water proof top layer so you won’t get water rings on your coasters.
Striped Painted Vases
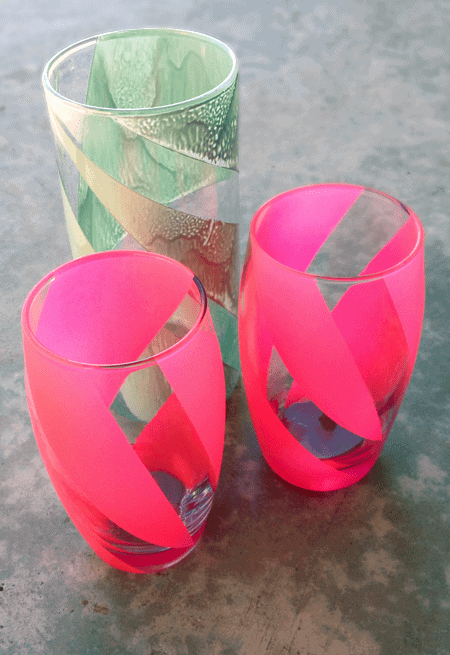
I found this cute craft from Ruffled, and it seemed like it could be a great gift idea and would be really easy to make. The DIY on the blog used rubber bands to create small stripes on the vase… seems easy right? So wrong! I’m not sure what happened, but the rubber bands would shoot off when the spray paint hit them, the paint bled under them and pretty much just made a gigantic mess!
Alright, let’s try this again. The paint came off of the glasses way easier than I imagined with the help of a little paint thinner. For this next try, I taped out my design with painter’s tape. The paint didn’t bleed as much and I think I liked the end result much better than I would have with the rubber bands.
For This Craft You Will Need:
- Smooth glass jars, vases, glasses – whatever you’d like
- Spray paint – I used Krylon Special Purpose in “Glowing Cerise” (best color ever) and Krylon Indoor/Outdoor in “Catalina Mist”
- Clear Acrylic spray (waterproof)
- Painters tape
- A small utility knife or a small kitchen knife
How To Assemble:
- Make sure glasses are clean and dry
- Use the Painters’ tape to make your design and make sure to press out all bubbles or bumps
- Set glasses out on newspaper or drop cloth
- Spray lightly one even coat, let dry and spray a second coat. This will help with drips and insure an even coating.
- When paint is completely dry, spray a light and even coating of the Clear Acrylic Spray. This will help to keep the paint from chipping and washing off.
- When that layer is dry, slowly peel of the painters’ tape.
- Clean up any drips or spots where the paint got under the tape with the utility knife.
Notes:
The Special Purpose spray paint covered more evenly and the way that the Indoor/Outdoor paint dried (even though it wasn’t supposed to) gave a cool texture that I actually really liked. I ended up loving both of the paint finishes, but remember how they will dry when choosing your paint.
We hope you enjoy these gift ideas as much as we do! If you decide to create either of these crafts, or any of the craft projects that we shared with you, please feel free to share your finished product with us on our Facebook page!
Have a craft idea you’d love to share? We’d love to mingle with you on Pinterest too!


Is this a sealant that is safe to use so that you can drink from these? Trying to find one! thank you
have you tried the nail polish on the glasses? Curious if it works. I’m trying it tomorrow and if it’s a success I’ll post it.
Thanks Lea
Lea,
I haven’t tried that. I’d love to know how they turn out! Thanks so much for dropping by.
Lindsay
What an amazing idea! i love to try this. Thanks for sharing this.
Wow! These glasses came out so pretty. I’m putting this project on my to do list!
I made the tiles as gifts for my girlfriends. I did not like the streaks that the modge podge left of I bought a spray can of clear acrylic spray. This makes a much smoother finish but I love the finish. I love the glasses! Going to give these a try.