This post may contain affiliate links. Please read our privacy policy.
This is not going to be a typical post on My Baking Addiction. It’s more of a reminder to take a moment to hug those you love a little tighter.
Last Sunday, food writer, Jennifer Perillo lost her husband, Mikey to a sudden heart attack. Word spread of Jennie’s tremendous loss through social media. I don’t know Jennie personally, simply through our brief emails and tweets – but I sat at my desk feeling heartbroken and helpless. The food blogging community immediately virtually embraced Jennie and her daughters and wanted to step in to help in any way that we could.
On Tuesday, Jennie wrote a post entitled For Mikey, where Jennie made a simple request, “For those asking what they can do to help my healing process, make a peanut butter pie this Friday and share it with someone you love.”
A Facebook group formed and over 800 people signed on to do just that – make a pie to share with our loved ones as a tribute to Mikey.
Again, give those dear to you a little extra lovin’ today, because in Jennie’s words,
“Today is the only guarantee we can count on.”

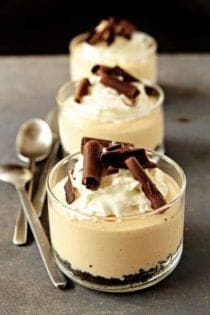
Peanut Butter Pie
Ingredients:
For the crust
16 Oreo cookies
4 tablespoons unsalted butter, melted
For the filling
1 cup heavy cream
8 ounces cream cheese
1 cup creamy-style peanut butter
1 cup confectioner's sugar
1 14-ounce can sweetened condensed milk
1 teaspoon vanilla extract
Directions:
1. Place the Oreo cookies into the bowl of a food processor and pulse into fine crumbs. In a small bowl, combine cookie crumbs and melted butter and stir.
2. Evenly divide the crumbs between your individual serving dishes and press into the bottoms of the dishes to form a crust layer.
2. In the bowl of a stand mixer fitted with the whisk attachment or in a large bowl with an electric mixer, beat the heavy cream until stiff peaks form. Transfer whipped cream to a small bowl and place it into the refrigerator while you prepare the rest of the filling.
3. Place cream cheese and peanut butter the mixing bowl and beat on medium speed until smooth. Reduce speed to low and gradually add in confectioners' sugar until well combined. Add in sweetened condensed milk and vanilla and beat on medium speed until mixture is creamy and smooth. Take care to scrape down the sides of the bowl as needed.
4. Stir in 1/3 of the whipped cream into the filling mixture. Use a rubber spatula to fold in the remaining whipped cream until well blended until no streaks remain.
3. Evenly pipe or spoon the filling into individual serving dishes. Cover with plastic wrap and refrigerate for at least 3 hours before serving. If desired, garnish with whipped cream and chocolate curls.
Notes:
-If you make this into one pie, use this recipe.
-The number of pies you get from this recipe will depend on the size of your individual serving dishes.
-Peanut Butter allergy? Check out Katie's version using almond butter.
Prop Note:
The small glass bowls were purchased from Pier 1. Spoons are from Ikea.
adapted and inspired by Jennie
All images and text ©Follow Jamie on Instagram. We love to see what you're baking from MBA! Be sure to tag @jamiemba and use the hashtag #mbarecipes!


peanut butter pie ? wow, i like this. i can try on my kitchen…
I hope you enjoy it!
WOOOOWWWW Wonderful….
very very nice pie…
Love Pie, and I never try withe butter… hmmm ,, just look at your pictures I can feel how delicious this pie.. hmmm nice to meet you jamie,, I’m from Indonesia too… Nice to visited this page,, so useful for me :)
Thank you so much for your nice comments, Resep!
Hi
I was just wondering when we use the oreos do we scrape the cream middle off the cookie before crushing for the crust? Or does it matter?
Thanks
Kenna-
You use the whole cookie, including the cream center. Thanks for stopping by!
-Jamie
looking good.. so inspiring for indonesia
thx for sharing
You’re welcome! I hope you enjoy it!
They turned out great! I ended up with much more than I anticipated (my dessert cups may be on the smaller side) which was a fun surprise. I froze some, and I think I prefer the slightly frozen texture over just refrigerated, but it’s yummy both ways! Like another person noted, they are pretty sweet, but in general I often lean toward less sweetness, so that one’s on me. I’ll probably decrease the sugar a little bit next time. Overall very satisfied with this recipe – thanks! :-)
I’m so glad you enjoyed it, Katrina!
Hi! At step 3 when you start combining all of the ingredients, are you still using the whisk attachment or do you switch to the paddle?
Hi, Katrina! Either attachment will work. I hope you enjoy the pie!
This is easy, yummy, and fun. Wish I could upload my photo! :)
Thank you, Julia!
Hi, thanks for all the comments and responses. I am making these for a bridal shower, can I make the the day ahead?
Yes, the day before is just fine! Thanks so much for stopping by.
-Jamie
I made these yesterday and they are a peanut butter lovers dream. The Oreo crust added a good balance with the creamy texture of the filling. This made 6 generous sized portions in ramekins for me. It could definately be made into 8 smaller sized servings. By they way, My family loved them! Thank you for sharing your recipe.
So happy to hear that you enjoyed the recipe! Thanks so much for stopping by and leaving your feedback!
-Jamie
Hi! Maybe I’m just missing it, but I’ve looked all over the page and comments and can’t seem to find out how many servings this is intended to make. Did this recipe make three servings the size in your photo? Thanks!
Rachel-
The recipe will make 5-6 servings depending on the size of your serving dishes.
-Jamie