This post may contain affiliate links. Please read our privacy policy.
Hey MBA readers! I have a real treat for you today in the form of a guest post from the lovely and talented Glory, of Glorious Treats. She’s filling in for me today and sharing adorable heart accents just in time for Valentine’s Day! Thanks so much for being here, Glory!
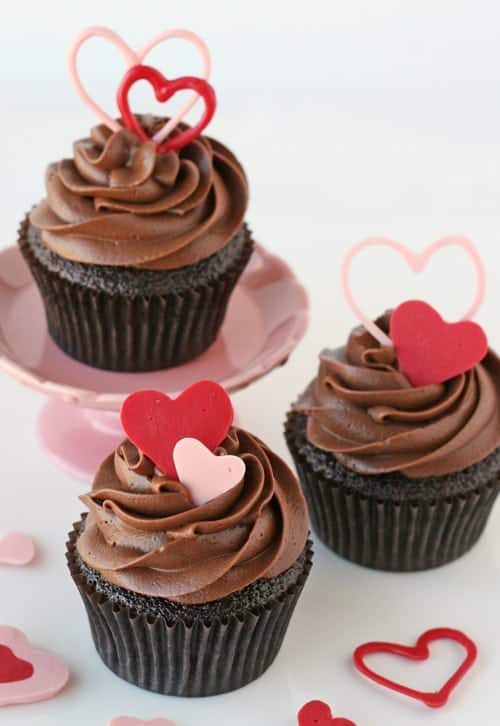
Hi MBA readers! I’m Glory of Glorious Treats, and I’m so happy to be here! I love beautiful and delicious desserts, so needless to say, I love My Baking Addiction! Speaking of love… how about some Valentine’s Day inspired cupcakes?I started with delicious Chocolate Cupcakes, topped with rich Chocolate Cream Cheese Frosting, and dressed them up with easy heart accents.

How To Make Heart Accents
To make the heart accents, you’ll need pink and red candy melts (available in the cake decoration section of any major craft store).
Melt the candy melts in a bowl in the microwave (at 50% power) for 30 second intervals until mostly melted. Stir until fully melted.
Fill a piping bag with melted candy melts (place the bag in a large drinking glass, and fold bag over the rim of the glass to hold the bag open). Snip off the end of the piping bag with scissors.
As an alternative, if you want more intricate designs, you may want to add a piping tip to your bag before adding the candy melts.
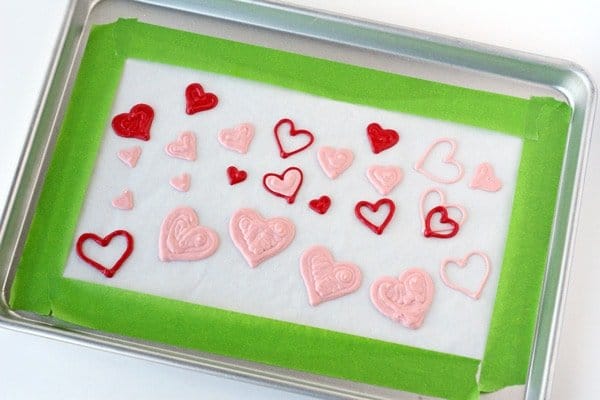
“Draw” your desired shapes (in this case hearts) with the melted candy melts, onto a sheet of parchment paper. To keep the parchment paper in place, use painters tape to tape the paper to a baking sheet (as shown below).

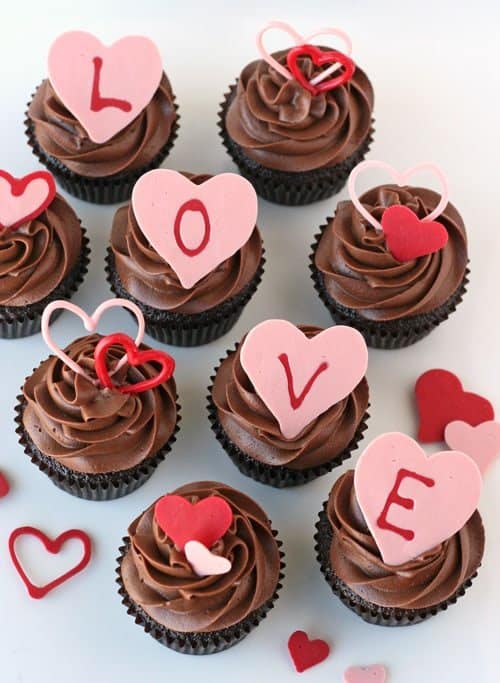
Play around with different designs. If you want a two tone heart (or heart inside a heart), draw one small heart, let it set for 10 minutes or so, then use a second color candy melts to create a larger heart shape on top of the first. When the candy melts have set, you can turn it over to see both hearts. The same idea can be used to include a letter inside of a heart (as shown below). For the word LOVE, I wrote the letters backward (of course this doesn’t apply with the O or V) on the parchment paper. Once the letters had set up a bit (about 10 minutes), I used pink candy melts to make a large heart around, and covering the letters. Once the candy melts had set, peel the shape off of the parchment paper, turn over, and the letter is revealed.

Certainly, this concept could be used to decorate most any flavor cupcake.
Feel free to browse all of MBA’s Cupcake posts ( https://www.mybakingaddiction.com/cupcakes/) and I’m sure you’ll find a few delicious ideas!


i love you all hiouhoijnoihoihoihoihihilhlhlhilhiluhliuhihiulhlkhiulhiuhoihoihjihiuhihilhil
Darn it, I needed this last week, but so late in getting to my email. Pinned for future. So much better than using fondant for hearts!
Love how easy these are – can’t wait to try it!
I’ve done accents like this before with chocolate. Cute idea to incorporate the hearts (I just did swirls and zig-zags).
Great idea though much harder then it looks. I tried it today and could not get the shapes to look right and it took many many tries to get it right but definitely not as pretty as yours. Seems to take a lot practice to learn the right technique.
I use wax paper instead of parchment and print my shapes on printer paper. Put the printed design under the wax paper and then trace the designs/shapes with the melted candy. I am not good at ‘free-handing’ the shapes, etc and this works like a charm!
I love these look beautiful!!
so when we melt, don’t we have to add any shortening? i dodn’t know wht we add it when we make coating for cake pops
thanks