This post may contain affiliate links. Please read our privacy policy.
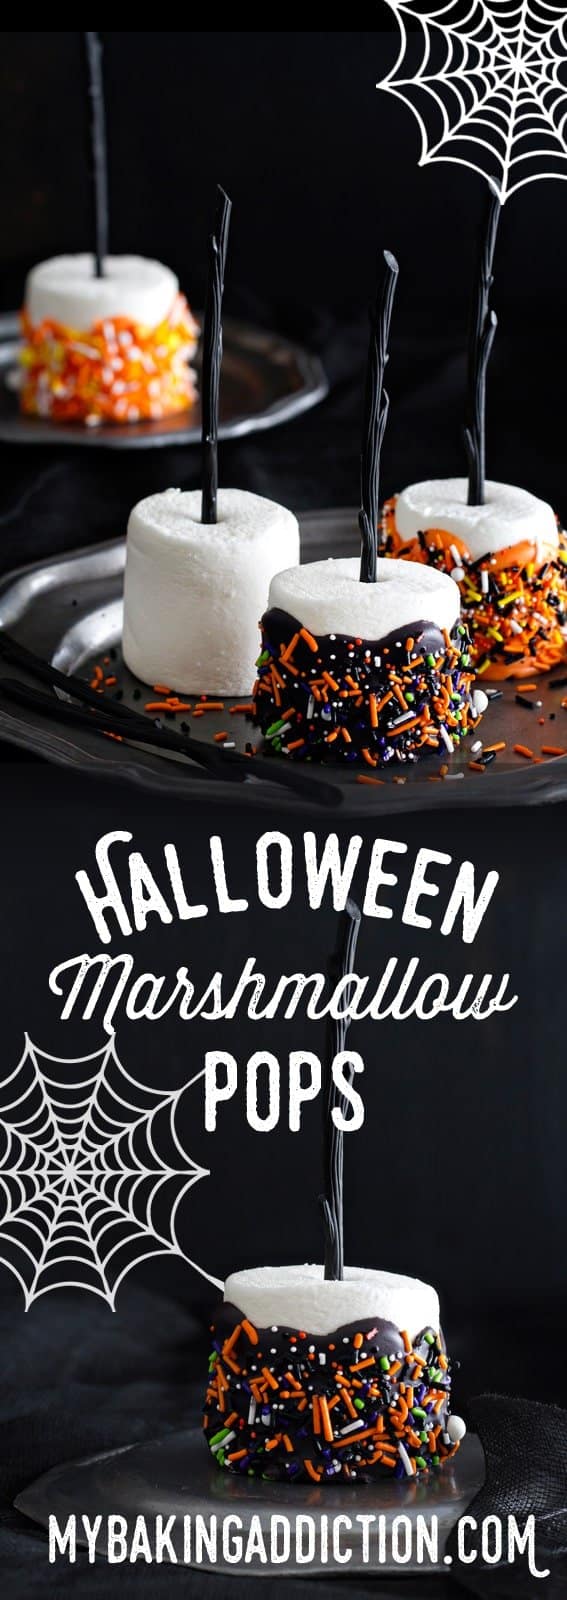
Halloween Marshmallow Pops couldn’t be easier or more festive. Everyone’s going to want one the minute they get to your Halloween party!
This is a sponsored post on behalf of Campfire® Marshmallows. All opinions are my own. Thank you for supporting the brands that continue to make My Baking Addiction possible.
We spent a lot of time at Cedar Point this summer. If you’re not familiar with Cedar Point, it’s an amusement park in Sandusky, Ohio that boasts 71 rides, including 17 roller coasters, kiddie lands, live shows, etc.
It’s also dubbed the Roller Coaster Capital of World, so if coasters are your thang, you probably want to add a visit to Cedar Point to your bucket list, pronto.
Elle fell in love with the place immediately, so we splurged and purchased season passes because we knew we’d get a lot of summer bang for our buck. It’s pretty much the perfect place to take your toddler when you’ve had enough of the water table and Elmo’s World.
She has been obsessed with widing wides (riding rides) since we stepped foot in Kiddie Kingdom.
Although Cedar Point has an amazing selection of rides, their food selection is kind of meh. Sure, there are stand outs like Cheese on a Stick – I mean it’s fried cheese on a stick, how could this possibly be a bad thing? And Salt Water Taffy – which is one of my favorite things on Earth, but other than that, nothing really screams amazing.
Wait… they have Oreo Funnel Cake Fries, so there’s that.
One day we decided to take a stroll through the candy shop to scope out the fresh taffy and I noticed a display of giant marshmallows covered in colorful candy and loads of sprinkles. This is the kind of amusement park food I could get behind.
Of course, I immediately snapped a photo because I knew I wanted to recreate them at home for Halloween.
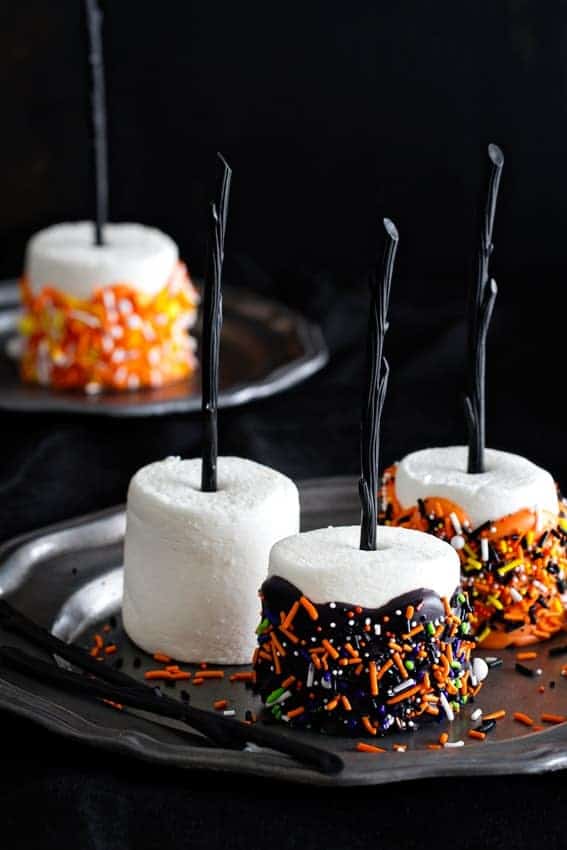
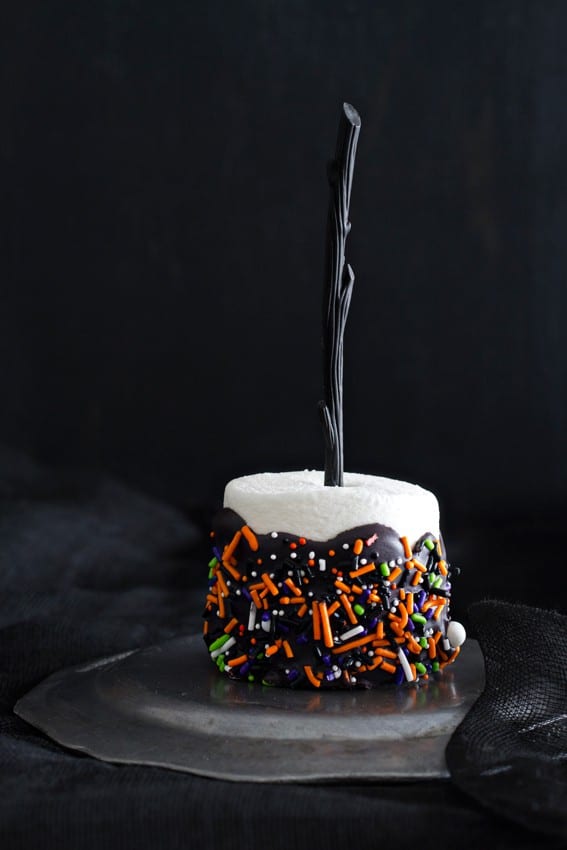
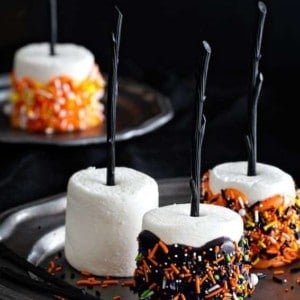
These Halloween Marshmallow Pops are the perfect application for Campfire® Giant Roasters. They lend themselves perfectly to attaching all sorts of delicious candy, making this an easy treat to whip up for your Halloween party.
I love Giant Roasters anyway, because when it comes to s’mores, of the trifecta, marshmallows are the best part as far as I’m concerned. Especially with just a little char on the outside.
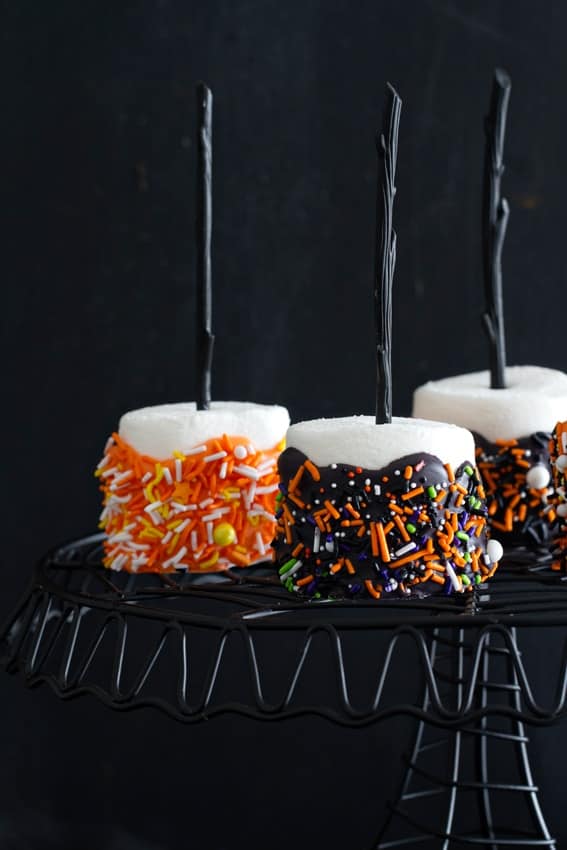
There’s no char here, but that’s okay, because there’s candy! Candy on top of candy. How could that go wrong?
And think of all the different ways you can make these pops festive for different holidays. They’d be exceptionally cute at Christmas time too.
As you may remember, I’m partnering with Emily from Jelly Toast and Campfire® Marshmallows. You’ll see more recipes from us, and even more exciting stuff as the year goes on.
We even created a Marshmallow Madness Pinterest board where we’ll pinning loads of delicious marshmallow recipes for the holidays. Just like this delicious Cranberry Fluff.
If you love marshmallow-y things as much as I do, be sure to check out my S’mores Cookie Cups and these Pumpkin S’mores Bars.
Halloween Marshmallow Pops
Ingredients
- 12 Campfire® Giant Roasters
- 1 10- ounce bag candy melts
- assorted sprinkles
Video
Instructions
- Line a baking sheet with parchment paper or a silicone baking mat.
- Insert a lollipop stick into each Campfire® Giant Roaster.
- Melt candy melts according to package directions.
- Working with one marshmallow at a time, spoon the melted candy over the sides of a marshmallow and allow the excess to drip back into the bowl. Immediately coat with festive sprinkles. Place marshmallow on prepared baking sheet until the candy coating is set.
- Repeat with remaining marshmallows.
Notes
Nutrition
Nutrition information is automatically calculated, so should only be used as an approximation.
You may also like


I’ve made these for years with some add ons to be a s’more. I use the big marshmallows created for s’mores & sucker sticks. Will look for the Wilton twigs. After dipping the marshmallow in the base chocolate I dip the bottom in crushed graham cracker crumbs. I then melt a different color chocolate melt to drizzle over the top of the marshmallow & sometimes add candy sprinkles. Have done red & blue for July 4, orange, yellow, bright green for October & for Christmas red & green. The marshmallow always provides the white.