This post may contain affiliate links. Please read our privacy policy.
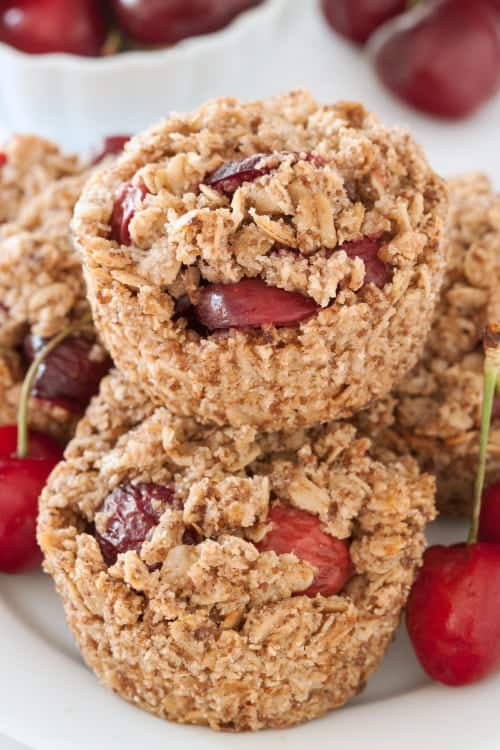
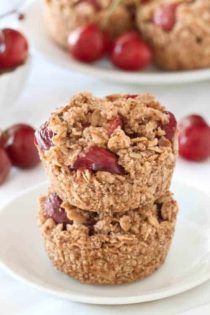
Gluten-free mini cherry pies have an oatmeal cookie-like crust and are ideal for picnics and parties!
When I started planning these mini cherry pies, I immediately thought of mini lattice-topped pies. I marvel at how cute they are and despite wanting to try myself, I’ve always hesitated, knowing that there’s no way my pies would come out looking as picture perfect as I’d like. So the lattice tops were out! I was also thinking gluten-free buttery and flaky pie dough may be a bit more finicky than I was in the mood for. I’m all about making things as fuss-free as possible so I just bypassed all of that with a streusel-like crust and topping very similar to the one I used in these gluten-free pumpkin pie streusel bars.
It seems like fresh sour cherries are hard to come by in my area and I’ve never been one for canned cherry pie filling, so I used fresh sweet cherries in these mini pies. The filling is only baked for 16 minutes, so while the cherries are quite tender, they don’t break down into a jammy type of filling. I was pretty disappointed when I saw that after taking the first batch out of the oven but after eating my first (and second and third) pie, I didn’t care!
Often when I post a gluten-free recipe, people ask for a dairy-free alternative. So I made these gluten-free mini cherry pies dairy-free right off the bat! Instead of butter, I used coconut oil and because of that one simple change, they’re also naturally vegan.
And since I knew people would ask, I also tried these with butter. Butter usually contains around 80% fat, whereas coconut oil is 100% fat. I frequently use them interchangeably but in crusts and streusel-like goodies, some experimenting is usually required to figure out the correct amount to sub for one another. At first, I added an additional tablespoon of butter to compensate for the lower fat content. That didn’t work. Then I added another tablespoon which didn’t work, either! The pies kept sticking to the liners. After several more attempts at a butter version, I decided that you all will just have to get some coconut oil if you don’t already have some. ;)
I brought these mini pies to a picnic and was worried that they may not hold up well, but they did so wonderfully and even made a 20-minute bumpy bike ride without issue! I refrigerated them for a few hours before the picnic, which helped firm them up even more and made them less prone to crumbling.
I’ve already tried a blueberry version and they were so good that I’m convinced I need to try more! What’s your favorite type of pie?
Gluten-Free Mini Cherry Pies
Ingredients:
For the crust and topping:
1 1/4 cups gluten-free oat flour*
2 cups gluten-free rolled oats
1 1/2 teaspoons ground cinnamon
2/3 cup brown sugar
1/4 teaspoon salt
3/4 cup refined coconut oil, melted**
For the filling:
2 cups pitted sweet cherries, quartered
2 tablespoons granulated sugar
1 tablespoon cornstarch
2 teaspoons lemon juice
1 teaspoon almond extract
pinch of salt
Note: If you need these to be gluten-free, make sure all your products are certified gluten-free.
Directions:
1. Preheat the oven to 375 degrees F. Line a muffin pan with 12 muffin liners. I recommend using foil or regular paper liners. These pies stuck to the bottom of my glassine baking cups.
2. In a medium mixing bowl, stir together the oat flour, oats, cinnamon, brown sugar and salt. Stir in the melted coconut oil until well combined.
3. Pat about 3 tablespoons (40 grams) of the crust mixture up the sides and on the bottom of each muffin liner.
4. Bake for 8-10 minutes or just until they start browning.
5. Remove from the oven and cool for 10 minutes while preparing the filling.
6. In a medium mixing bowl, stir together all the filling ingredients. Spoon a little over 2 tablespoons of mixture over each pre-baked crust and top with the remaining oat mixture (about 1 tablespoon per pie).
7. Bake for another 14-16 minutes or until the topping has lightly browned.
8. Remove from the oven and let cool for about 10-15 minutes or until cool enough to handle. Use a knife to carefully remove the pies from the molds and then remove the paper wrappers. If you have difficulties getting them out of their wrappers because the pies are too soft, let them cool slightly and then place in the refrigerator for about 10-20 minutes. If you don't remove the wrappers now, the pies may or may not stick to them once cool (it depends on the wrappers you use).
9. Serve warm, room temperature or cold.
Store at room temperature for up to 1 day. Refrigerate for up to 4 days. These hold their shape well at room temperature but if transporting or they'll be sitting in the heat, chilling the pies first for a few hours is recommended.
Notes:
* To make oat flour, grind rolled or quick oats in a coffee grinder or a small food processor until powdery.
** If you use unrefined rather than refined coconut oil, these pies may have some coconut taste to them.
Follow Jamie on Instagram. We love to see what you're baking from MBA! Be sure to tag @jamiemba and use the hashtag #mbarecipes!


Hi Erin
Just to say a huge THANK YOU
I work for a horticultural therapy charity; SAGE Greenfingers, in Sheffield England. I made these pies as a birthday treat for one of our volunteers and we shared them amongst the group at meal time; we all get together each lunchtime and share a communal meal made with produce from our allotments. We also enjoy cake and pies very much!
I had to ensure the pies were gluten, diary, nut and soya free and these did the job perfectly (I omitted the Almond essence)! Do you have any other recipes I might be able to use? You have some serious fans in England!
All the best
Spike
I’m thrilled that you enjoyed the pies so much! And how awesome that you all have a communal meal together. :) Here are some recipes that fit that description (just be sure to use coconut oil and dairy-free chocolate chips) – raspberry lava cakes, granola, strawberry rhubarb crumble, and mint chocolate chip brownies (you can easily omit the mint for regular brownies). I hope that helps and thanks a ton for your feedback!
I used 1 1/4 cups pumpkin purée, 2 lrg eggs, 1/2 cup honey, 1/2 tsp each of cinnamon and nutmeg, 1/4 tsp ginger, pinch of salt, 1/2 tsp vanilla and 1/4 cup coconut milk-combine well. I baked your crust initially for 6 minutes, added the pumpkin filling and baked for 10 mins, added the crumble topping then baked an additional 15 mins. They were great! Oh I also used coconut sugar in your crust recipe :)
Oh, wow. That’s super helpful and will save me a ton of time experimenting! They sound fantastic and I love that you used honey, coconut milk and coconut sugar. Thank you so much for sharing. :) I can’t wait to try your version!
I ended up trying them with pumpkin as there was some in the freezer I needed to use, they’re fabulous! Apple and strawberry rhubarb are going to be rocked next! Thanks for the recipe!
I’m so happy that they came out well for you! A pumpkin versions sounds great. Do you mind sharing how you made the filling? I’d love to try, too! Thanks so much for your feedback. :)
These look absolutely delicious, although I’m even more of a sucker for my favorite kind of pie – banana cream!
Thanks, Rachel! Cream pies are my favorite, too, but these were nice for a change. :) (and sorry for my slow reply!)
Do you think this would work well using apples and coconut sugar?
I haven’t tried using apples but I think it may work. The moisture content is totally different than cherries, so it’s just a guess, though! I’d cut the apples into thin slices and then cut each slice into about 3/4″ pieces so that they’ll fit easily. Coconut sugar shouldn’t be a problem and should go really well with the apples. I hope you’ll enjoy them!
Just pitted my home grown, organic cherries and put them up in the freezer til I came up with a gluten free recipe I can use them in. Thank you sooo much for this recipe, it’s perfect!
What a great use for your homegrown cherries! I hope that you’ll enjoy the pies. :)
these look super delicious :) yummy
https://aspoonfulofnature.wordpress.com/
Thank you, Anna!
These look super yummy! I bet you’d never guess they’re gluten free!
Thanks! And you’re right – they definitely don’t taste gluten-free. :)
Love all the cherry pie flavor in a compact and no-fuss dessert! So smart and totally delish :)
Thanks, Medha! :)
Think I could use strawberries instead?
I haven’t tried it but I think strawberries would be fine! My only concern would be that the strawberries may make the crust a little soggy if they’re super juicy. I hope you’ll enjoy the pies if you try them out!