This post may contain affiliate links. Please read our privacy policy.
Have you ever made cheesecake and felt stumped when you got to the part about making a water bath? Let’s explore both the how and the why of baking cheesecake in a water bath!
I have made hundreds of cheesecakes in my life.
Seriously! I’ve been running this website for years and in that time have shared dozens of cheesecake recipes with you.
All of those recipes have been tested multiple times. Add in all of the cheesecakes I have made just for fun or taken to family gatherings and all of the cheesecakes I made long before I started this website and, well…
…it’s a LOT of cheesecake.
The benefit to making that much cheesecake, aside from becoming extremely popular at potlucks, is that I have had plenty of opportunities to test the best cheesecake-making methods and recipes.
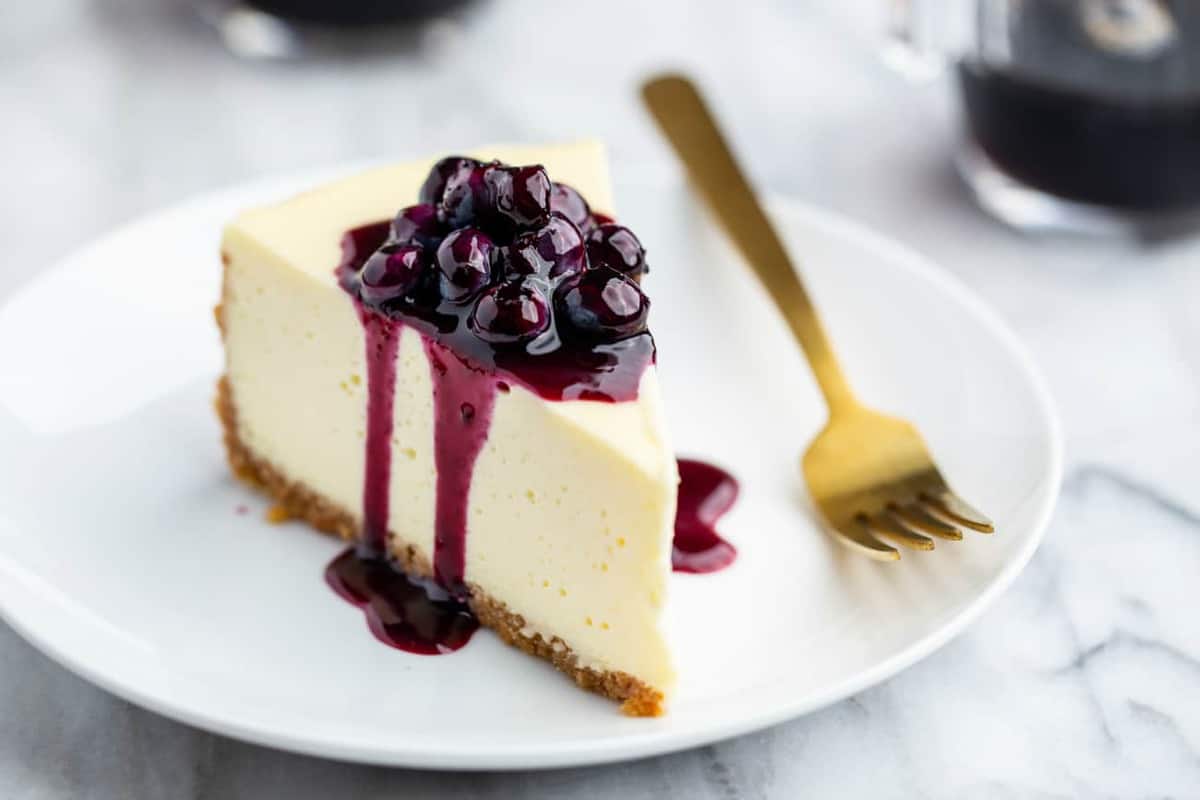
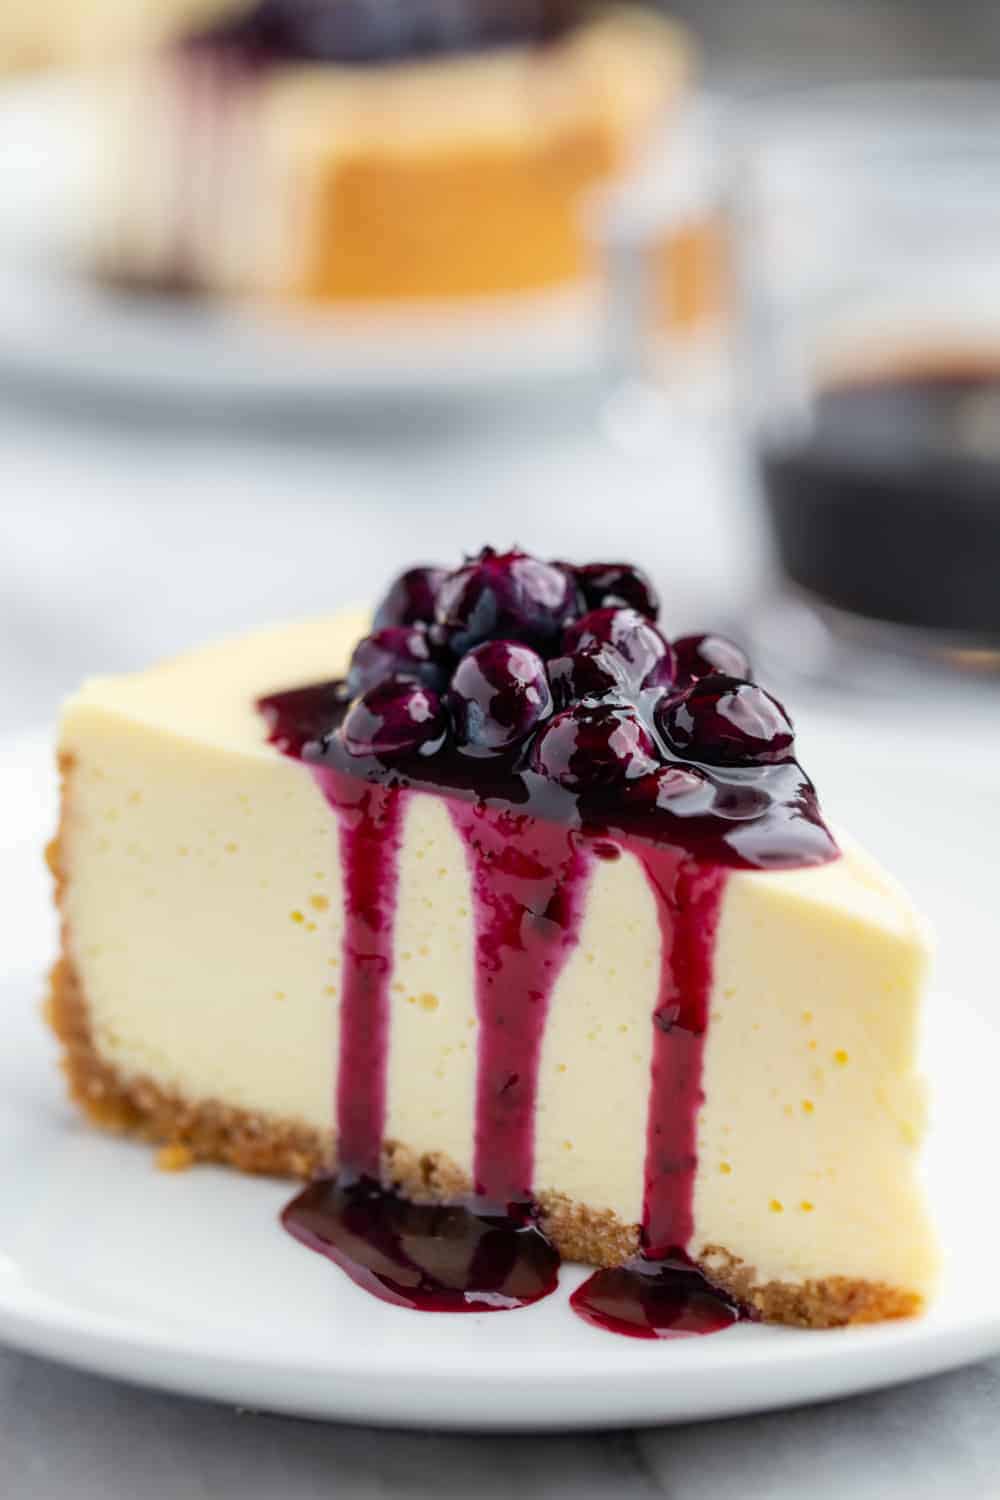
I know how to soften cream cheese quickly. I have memorized my graham cracker crust recipe. My vanilla cheesecake is practically tattooed on my arm. Homemade blueberry sauce topping? Perfected.
I’m practically a cheesecake professional at this point. And in my opinion? The best cheesecakes are made using a water bath.
I know that water baths can be intimidating for novice and advanced bakers alike. So let’s dive into why I think it’s best to use a water bath and my favorite leak-proof methods for making one!
Why use a water bath for cheesecake?
Before we get to the “how,” let’s talk about the “why.”
WHY do cheesecake recipes call for a water bath?
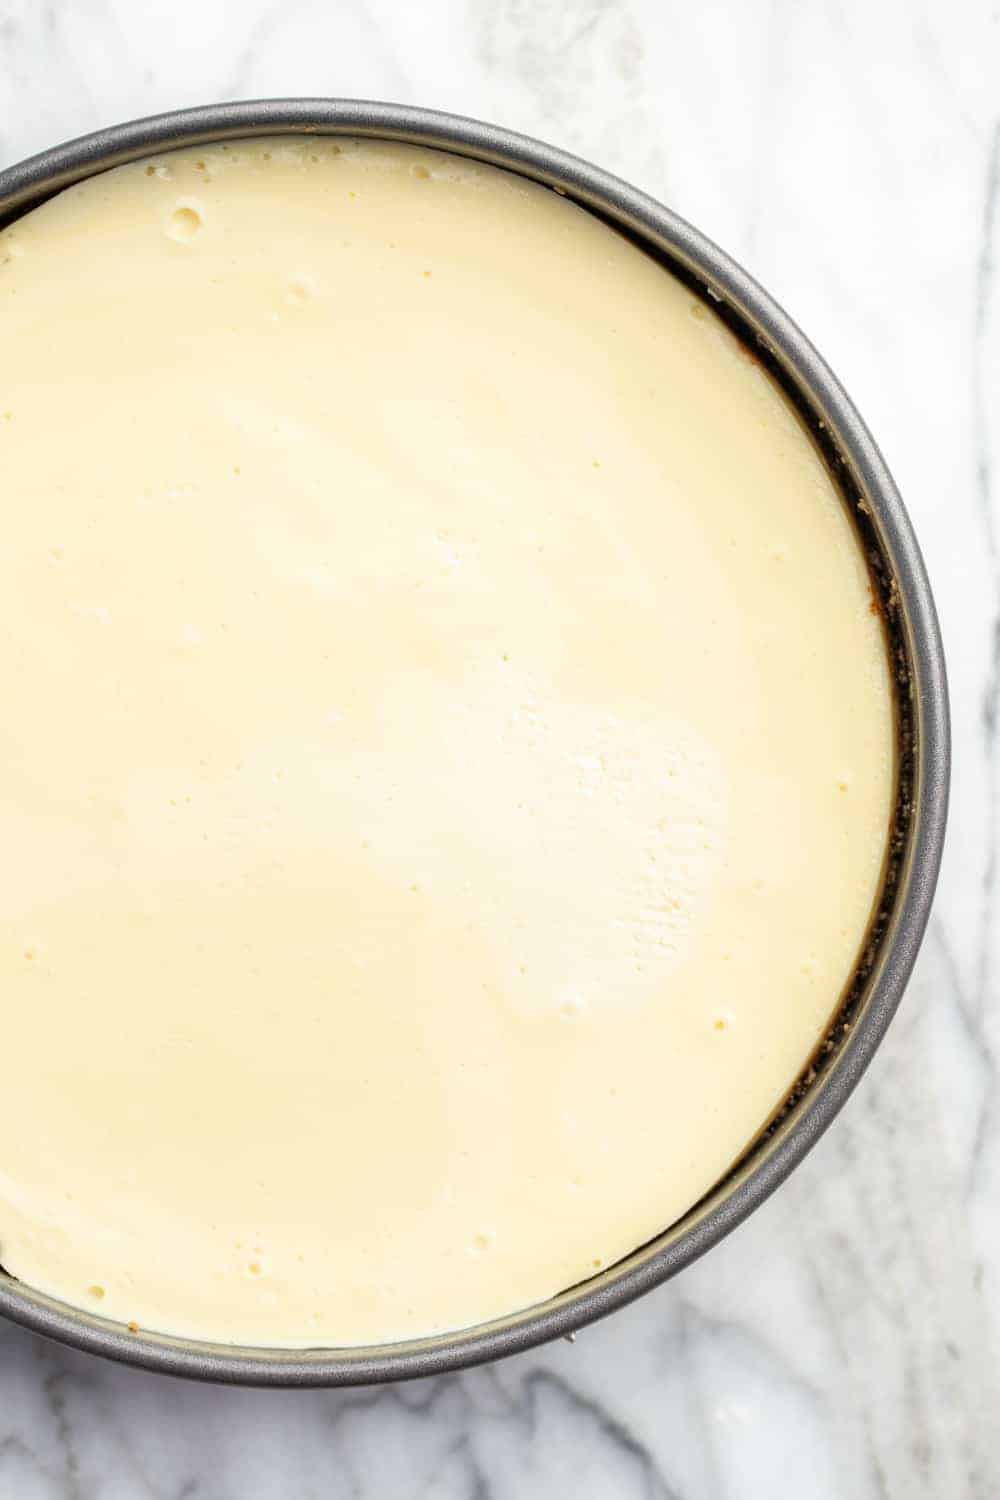
Believe it or not, cheesecake is actually pretty delicate. It would be very easy for the heat from the oven to cause the edges to overcook, the top to crack, or the whole thing to become rubbery.
By using a water bath, we keep the oven moist and help moderate the heat so that the edges do not cook faster than the middle of the cheesecake.
Yes, I have seen people make beautiful cheesecakes without using a water bath. But honestly? It’s kind of a gamble.
Baking a cheesecake without a water bath has just as much chance of going poorly as it does going well, so I always choose to take that extra insurance and use the water bath. I’d rather take one extra step than have to make an entire new cheesecake!
How to make a water bath for cheesecake: the traditional method
The biggest issue people tend to have with water baths is leaking. Again, I’ve done this a lot, so I’ve come up with a method that works best for me when making a traditional water bath.
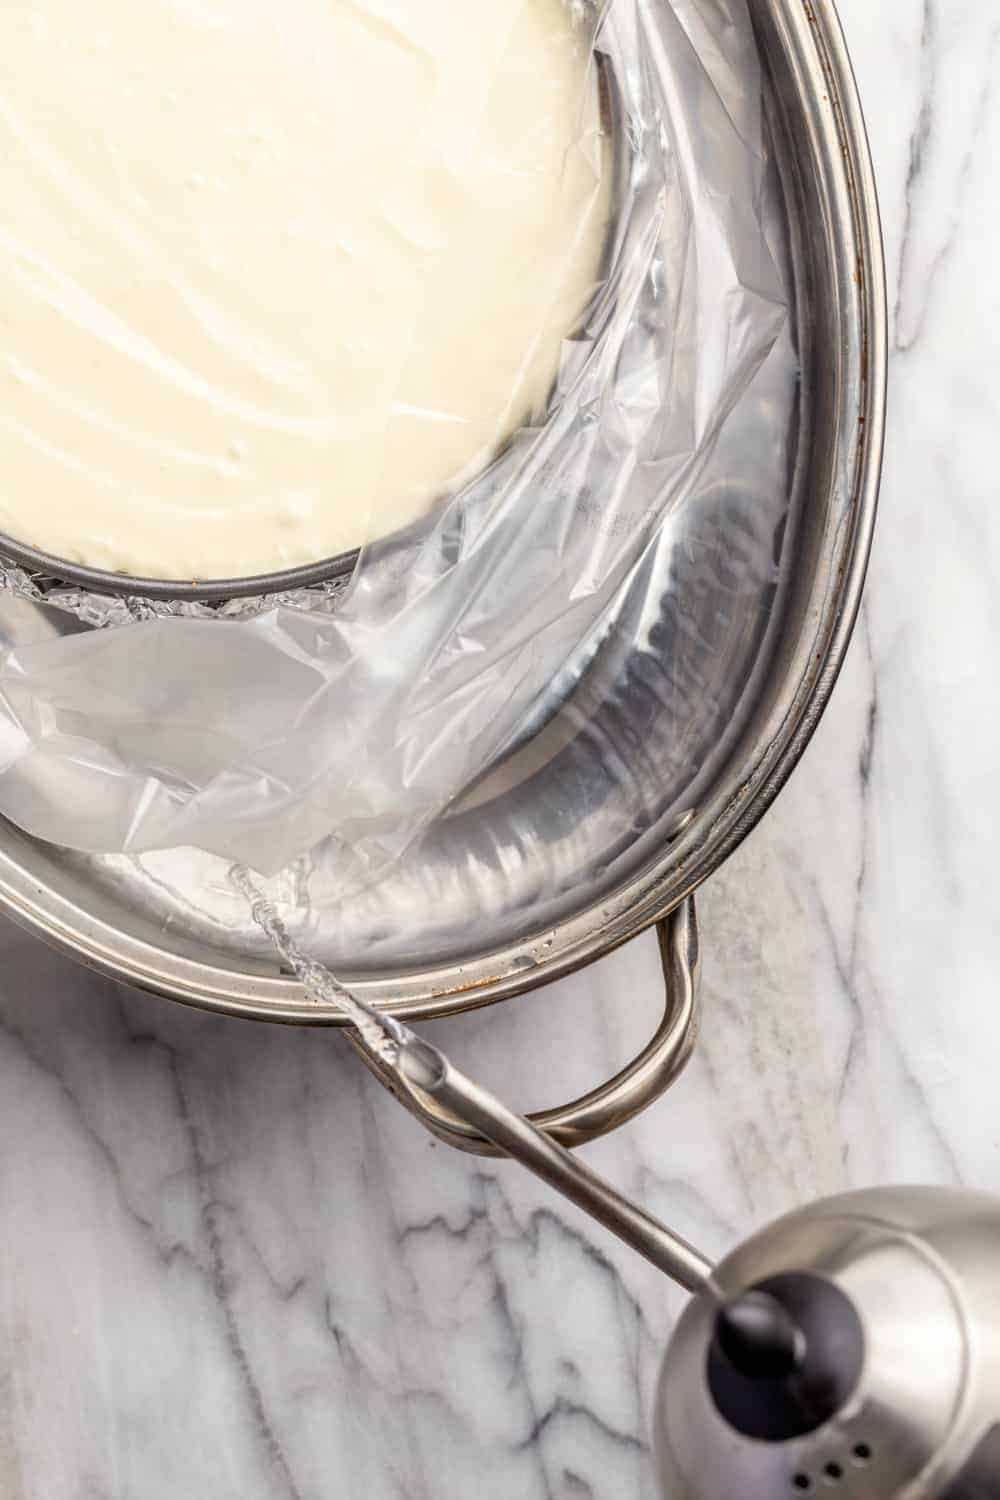
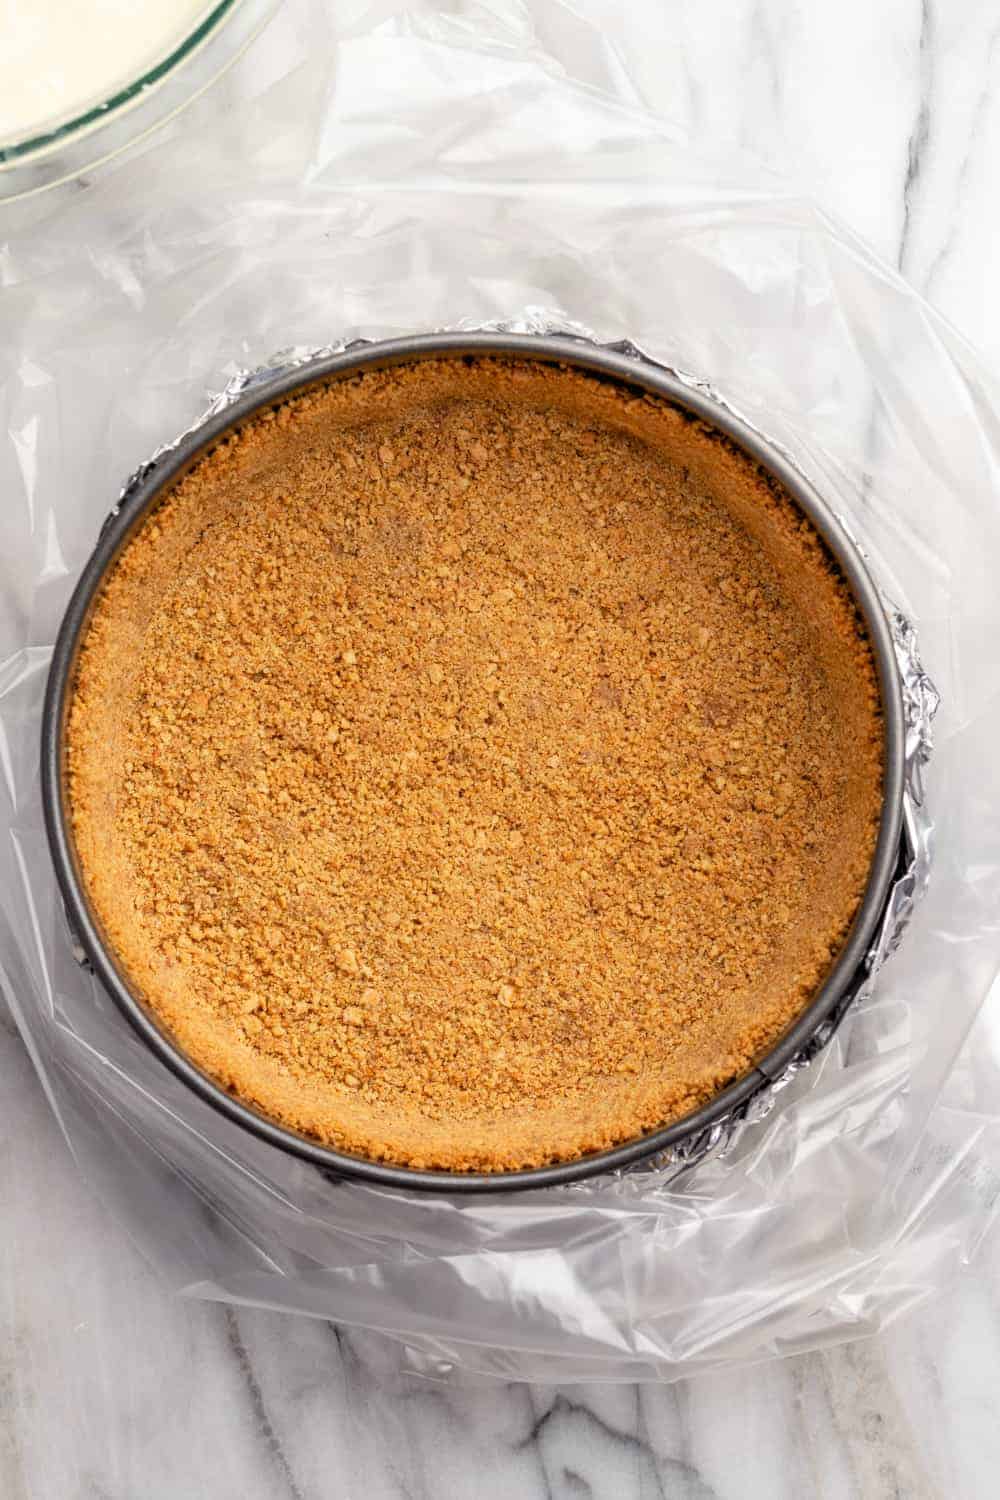
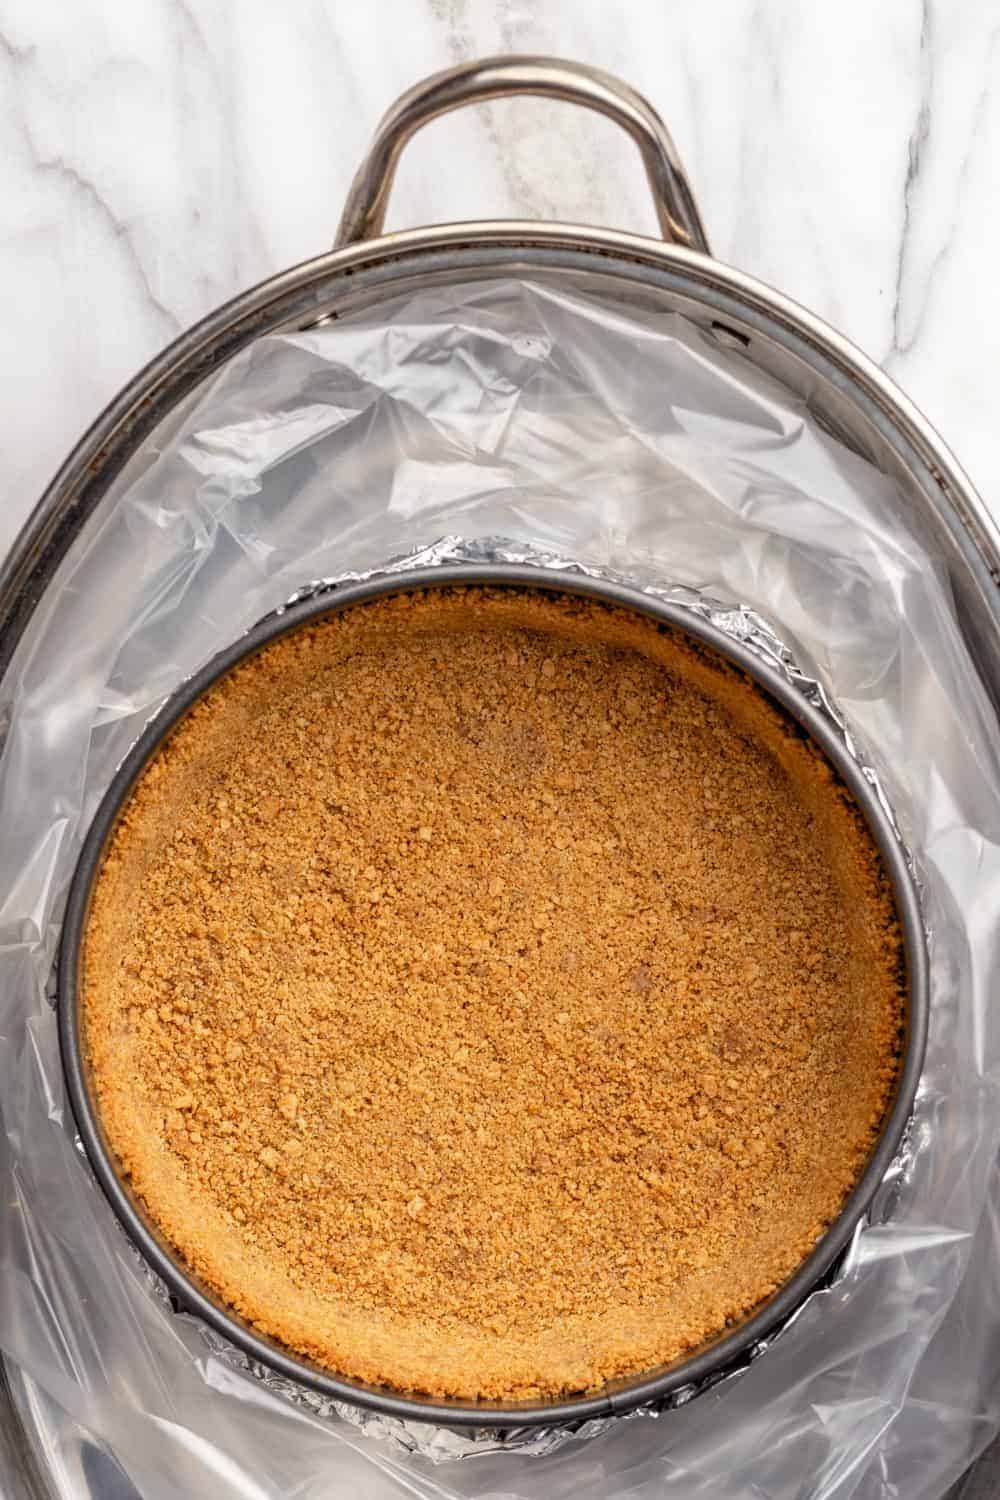
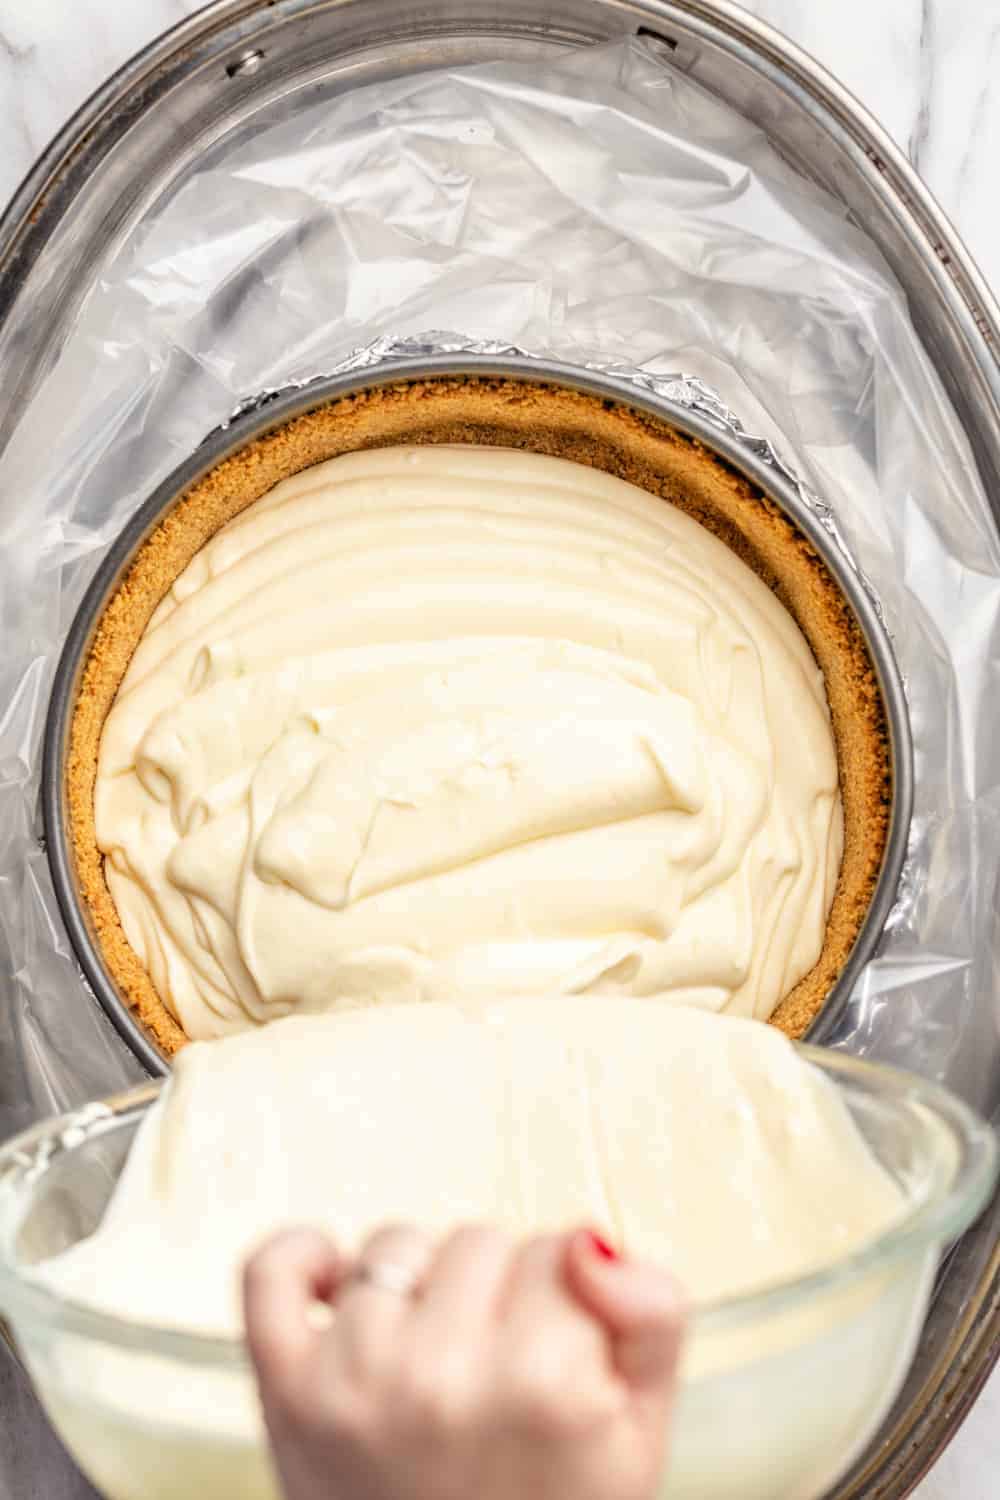
First, I prepare the springform pan itself. I like to tightly wrap the outside and sides of the pan with TWO layers of heavy duty foil.
Yes, two layers. Yes, heavy duty foil.
Why? Less chance of getting a hole through both layers!
Now, at this point I like to take the extra step of placing the foil-wrapped pan inside an oven bag while baking. It provides a little extra leakage insurance. Totally optional, but worth the effort!
This whole setup gets placed inside a larger pan. I like to use a roasting pan.
Now here is where I give you my two tips to keep things from spilling:
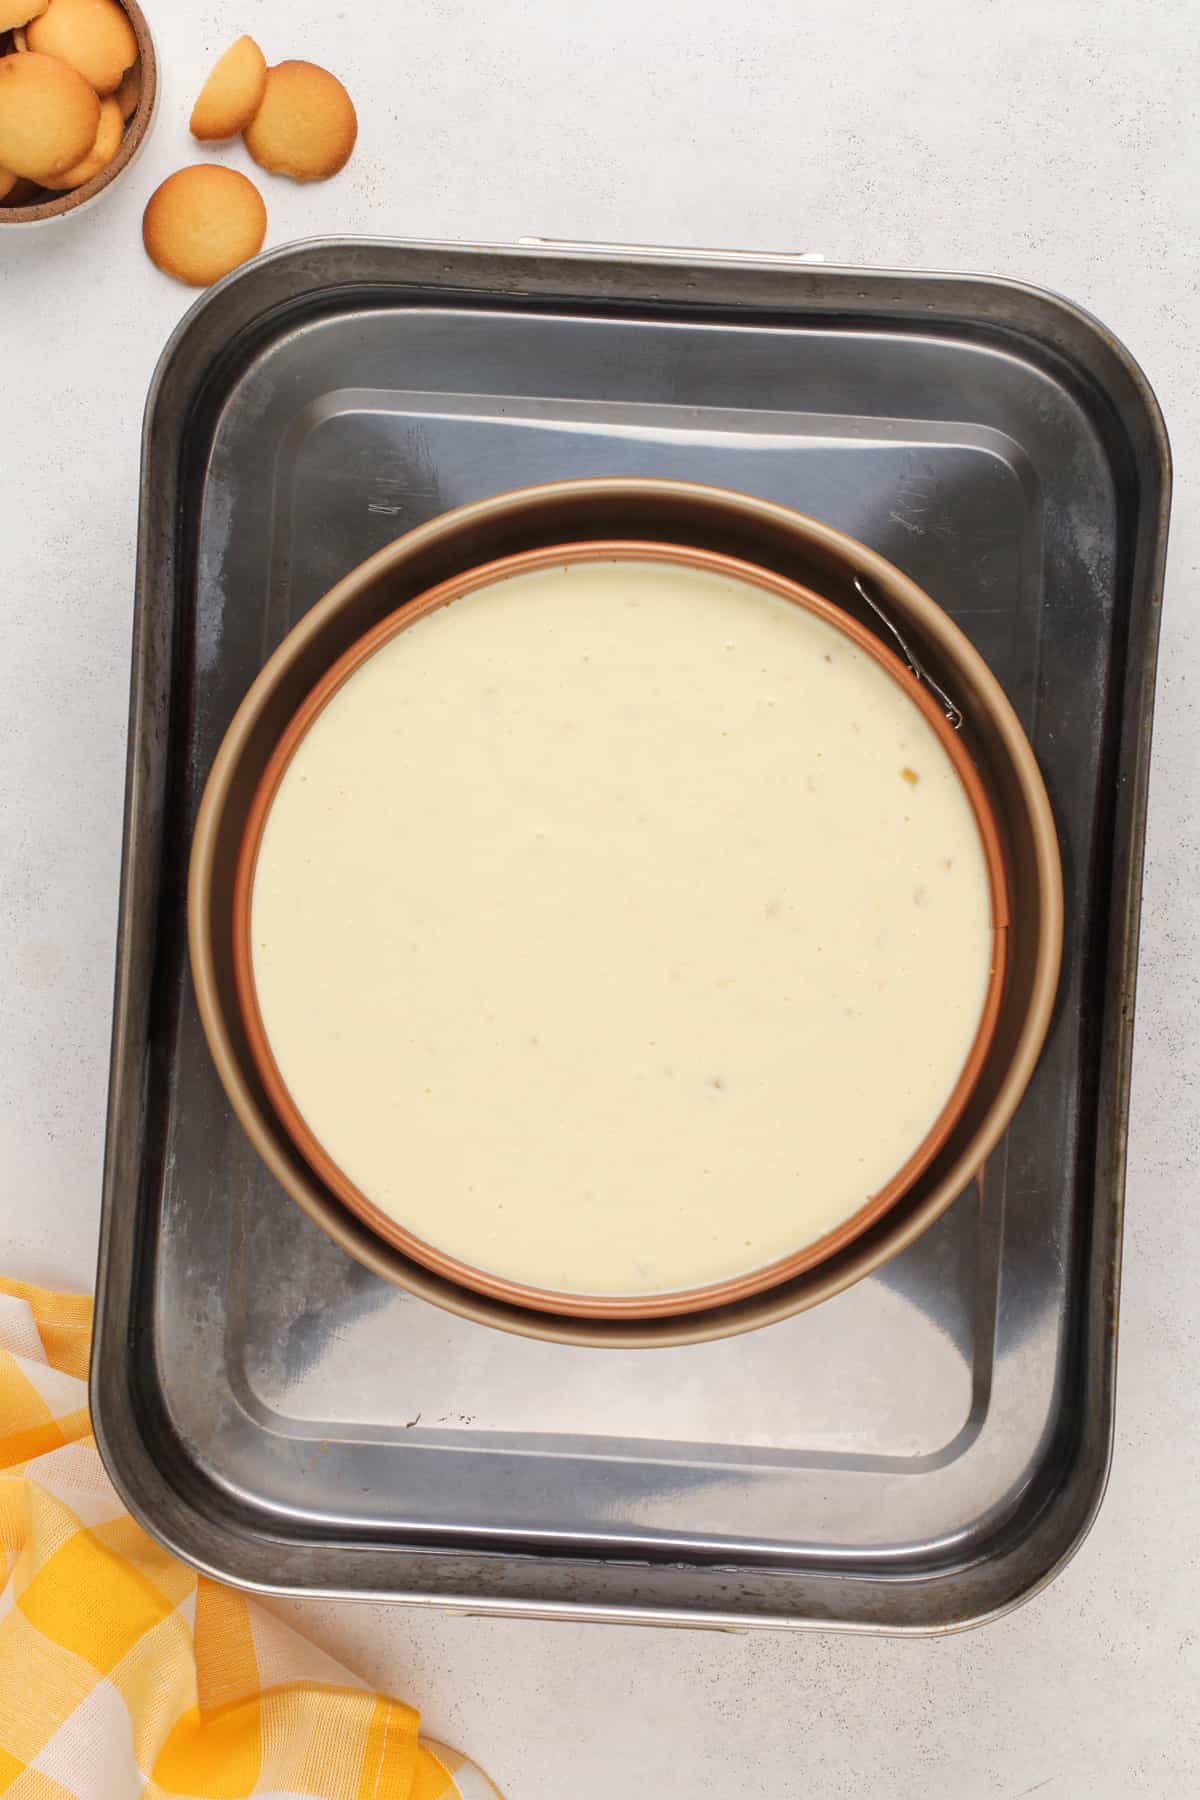
First: I get the springform pan set up in the oven bag and roasting pan before I add the cheesecake filling to the pan.
Second: Move the roasting pan onto your oven rack BEFORE adding the boiling water for the water bath.
Trust me, you don’t want to try to carry a pan half full of boiling water across the kitchen and get it into the oven without spilling it everywhere.
Once the roasting pan is on the oven rack, you can add the boiling water until it comes about halfway up the sides of the springform pan.
I know this sounds like a lot of steps, but they are really quite simple! I promise, the more you use a water bath when baking, the more it will become second nature.
My favorite leak-proof water bath method
Over the years, I discovered an even more leak-proof method than what I described above. And it is SO simple. Ready?
Grab your 9-inch springform pan and set it inside of a 10-inch cake pan.
Now both pans can go inside of your roasting pan. Boil the water and pour that into the roasting pan, outside of the 10-inch cake pan.
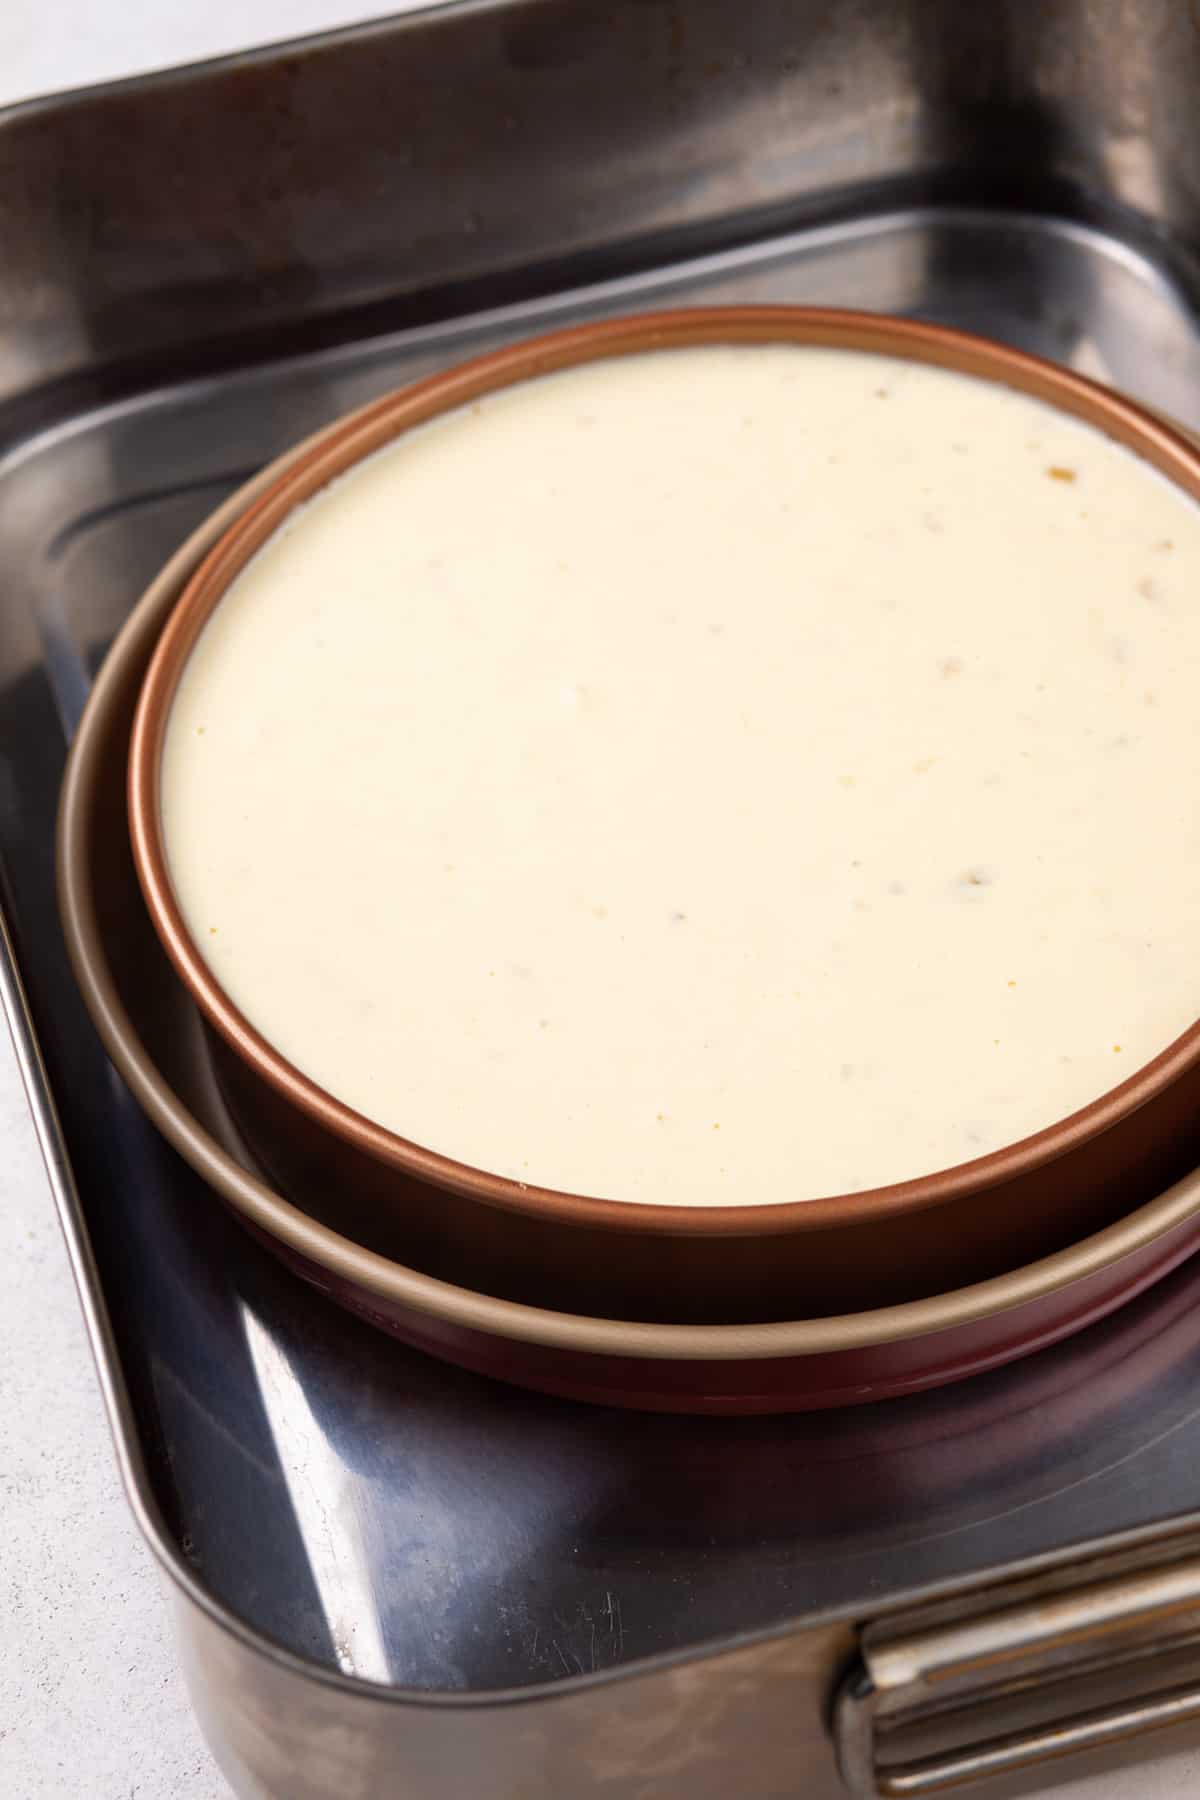
You will get all of the benefits of the water bath but with a much simpler process – and I can promise you there will be no leaks!
Just like with the traditional method, I do recommend placing the roasting pan on your oven rack before pouring in the water. This will help avoid any water sloshing around when trying to transfer the pan into the oven.
So now you know how to go forth and make perfectly baked cheesecake every time!


After having heavy duty aluminum foil leak a couple times I use a cookie tin which is slightly larger than the springform pan and has been waterproofed with RTV silicone to provide a dam for the water bath. So far after three years it has never failed me.
This is a great idea, Bruce!
Do you tie the cooking baag like you would with a turkey?
No, I do not tie the bag. It’s mainly used to cover the bottom and sides, with the top remaining open.
Thanks so much for stopping by.
-Jamie
I’m curious, when you mentioned covering the bottom of the springform pan before fastening the side, are you just covering the outside (bottom side) of the pan or are you covering the whole thing? I worry the foil would stick to the cheesecake if you covered the whole thing?
I cover the bottom disk inside the springform pan as well as the outside. :)
@Jamie, I’m wondering if the aluminum foil wrapped on the inside of the springform pan might tear when the cheesecake is cut with a knife, or do you remove the cheesecake to a plate before cutting? Is there a tip for removing the cheesecake from the pan?
Hi Nancy-
I remove the cheesecake to a serving plate or cutting board before slicing. I hope this helps.
-Jamie
@Jamie, How do you remove without breaking apart
Remove the cheesecake? Once it’s been refrigerated it should start to pull away from the sides of the pan and you can run a warm knife around the edges to help it release. Spraying your pan with nonstick cooking spray will help as well.
I use the silicone lids to wrap around the pan. it worked! Silicone lids to use for the cheesecake waterbath and to wrap my food in. perfect!
Awesome tip, JD!
How long do I place the cheese cake with the water bath in the oven for?
Hi Thanks for the tips – one question: do you let the cheescake cool in the water bath as well, and let temperature gradually go down? Or is best to take it out of the water bath before letting it cool (assuming there’s no water leakage already)?
thank you!
Dave
Hi Dave-
Once the cheesecake has rested in the oven with the oven turned off, I remove it from the water bath and to a cooling rack.
-Jamie
Thank you , I love your page
Thanks so much for stopping by, Patricia! I appreciate you taking the time to comment. Happy Baking!
-Jamie
Just curious but if you are using the roasting bag why do you even need the aluminum foil?
Hello! I like to use both for double insurance against leaks. Hope this helps! Happy baking.
Jamie
This cheesecake looks simply perfect! So tender and delicious ♥
Thanks so much for stopping by, Natalie! I appreciate you taking the time to comment. Happy Baking!
-Jamie
Hi there! Great tips here-
I’d like to ask a question. I am a sourdough bread baker, and often put a large cake pan filled with lava rocks in the bottom of my oven, and then fill with boiling water, to steam loaves while they bake. Keeps the crust soft longer so that a loaf has the chance to fully rise before the crust becomes too baked to allow further expansion.
Since I’m already set up for this method of steaming, would this steam in the bottom of the oven be enough for cheesecake, or does the water coming up the side of the cheesecake pan serve another purpose as well?
Thanks – great blog!
Hello! The water along the side of the pan helps keep the outside of the cheesecake from cooking faster than the center of the cheesecake. You could certainly try it with your setup, but in my experience, I like having the water bath around the cake pan. Hope this helps!
Jamie