This post may contain affiliate links. Please read our privacy policy.
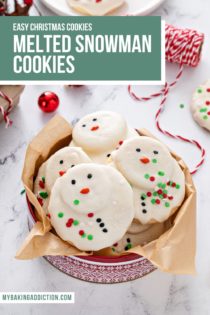
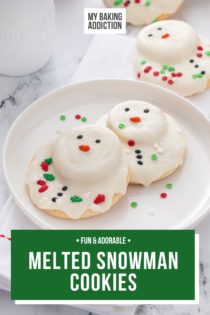
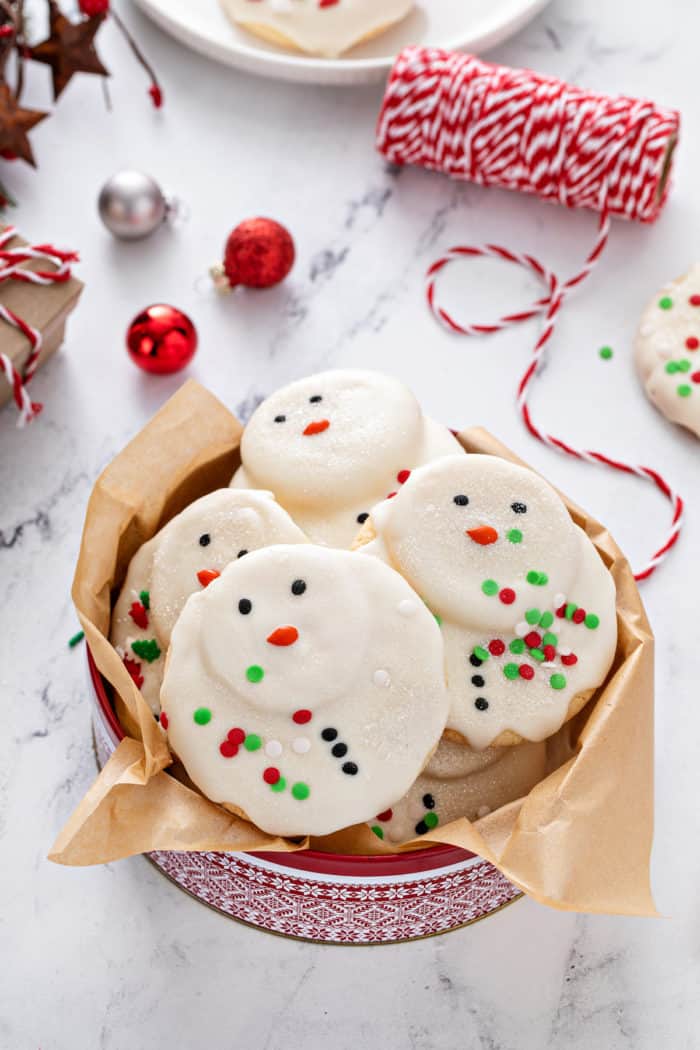
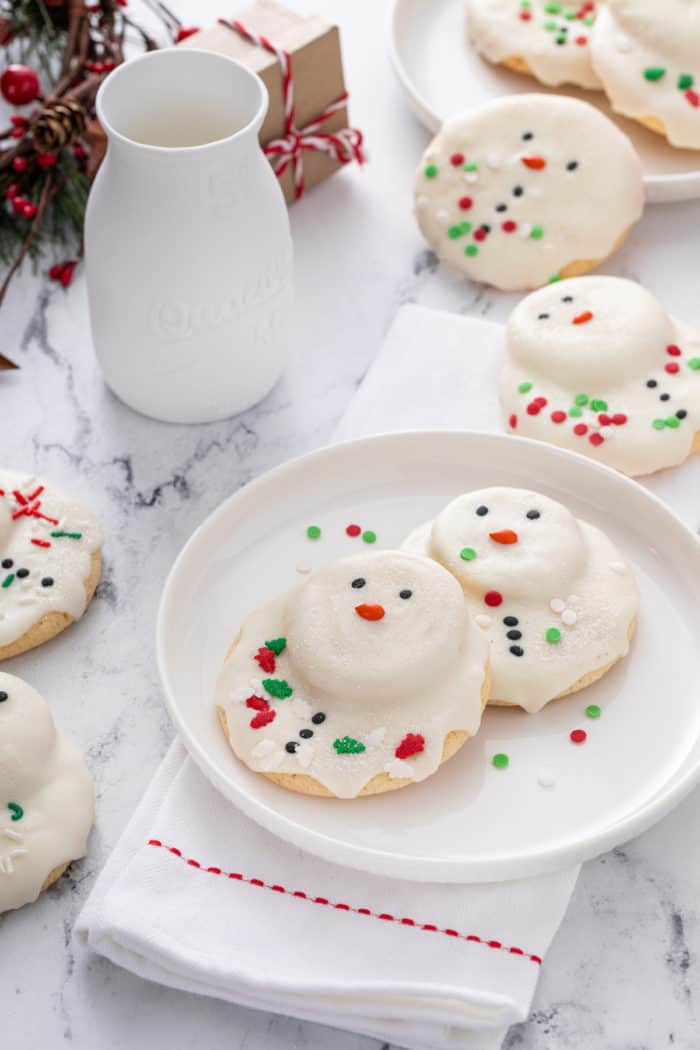
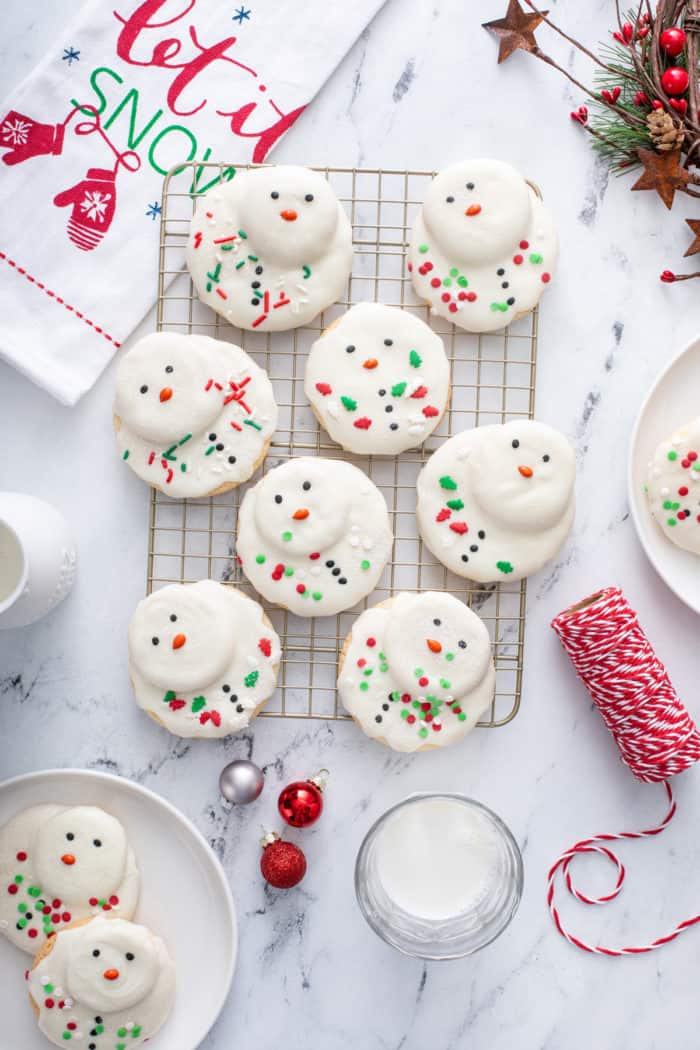
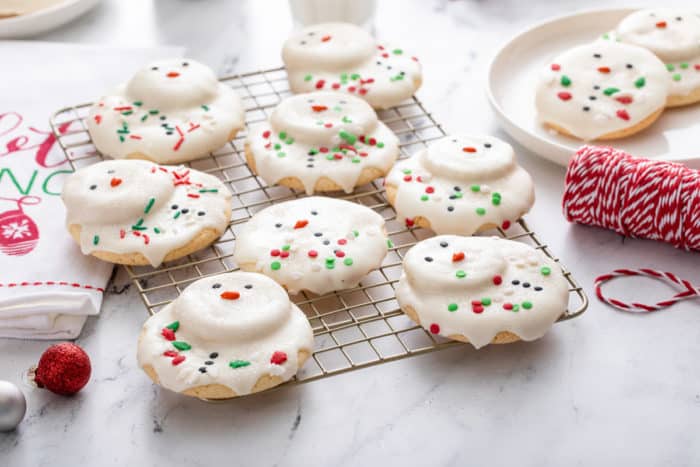
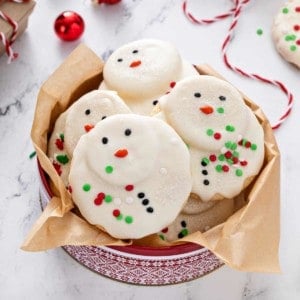
Melted snowman cookies are as adorable as they are scrumptious. Kids and adults alike will delight in seeing these on your holiday cookie tray!
I’ve said before that I love all the gorgeous decorated cookies that show up this time of year, but I simply don’t have the time, patience or skill to flood royal icing into things.
It’s why I always go the simple route with the icing on my gingerbread cookies, and why I love cute decorating “hacks” like I used on my snowflake sugar cookies.
So it shouldn’t be a surprise that I also love making these melted snowman cookies. They provide the same look and feel as those professionally decorated cookies with a fraction of the effort.
Imagine how precious these cookies would be alongside your peanut butter blossoms and almond crescent cookies at a holiday party??
WHAT ARE MELTED SNOWMAN COOKIES?
I promise there isn’t some kind of hidden meaning in the name “melted snowman cookies.” They are exactly what they sound like: sugar cookies decorated to look like melted (or melting) snowmen!
I’ve seen these done a few different ways over the years. Some folks like to use a marshmallow for the snowman heads, some folks add little hats with mini peanut butter cups.
I personally like to stack two sugar cookies to make the melted body and head and dress mine up with festive sprinkles.
The best part about this recipe is that, because the cookies are so dang cute, you can totally get away with using a sugar cookie mix for the cookies themselves.
I’ve said before I’m an equal opportunity baker – from my doctored cake mix recipe to these melted snowman cookies using a sugar cookie mix, I give you full permission to give yourself a break this holiday season.
But don’t worry – if you want to use a homemade sugar cookie recipe, I’ll teach you how to do that, too!
HOW TO MAKE MELTED SNOWMAN COOKIES
This recipe is really about the assembly and decorating technique. Once you have the basic idea down, you can dress up your snowmen in any way you want!
That makes these cookies super fun to make with kids. They will adore decorating their little snowmen!
What you’ll need
For the sugar cookies themselves, you will need:
- 1 pouch Betty Crocker sugar cookie mix
- ½ cup softened unsalted butter
- 1 large egg
Yep, that’s right. I just follow the instructions on the mix for making the dough, so you can substitute in your own favorite sugar cookie mix.

You could also use your favorite cut-out sugar cookie dough. Head down to the FAQs to find out more about that method.
For decorating the melted snowman cookies, you will need:
- For coating: 12 ounces white candy melts
- For the eyes and buttons: Black sugar pearls or black candy confetti
- For the noses: Orange candy-coated sunflower seeds or orange jimmies
- White sparkling sugar
- Various festive sprinkles
You could also use black cookie icing or edible food coloring markers to draw on stick arms. Sour candy belts also make adorable scarves.
Let your imagination run wild and have fun using your favorite candies to make the cutest little snowmen.
Making these melting snowmen
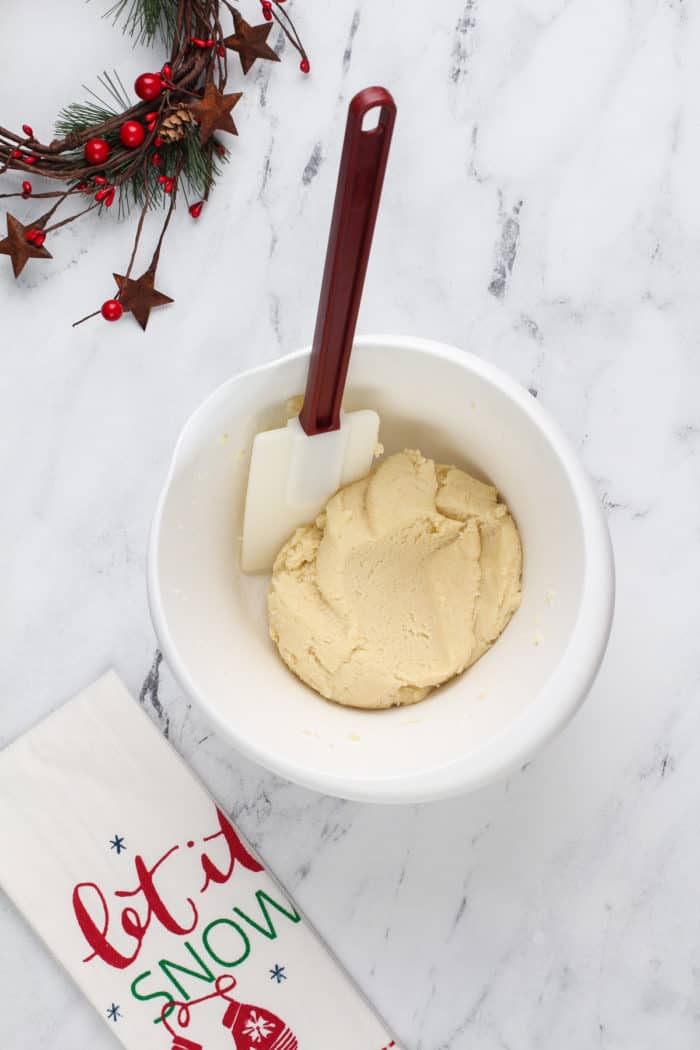
To make the sugar cookies, mix the cookie mix, butter, and egg with a stand mixer or a wooden spoon/spatula until you get a soft dough.
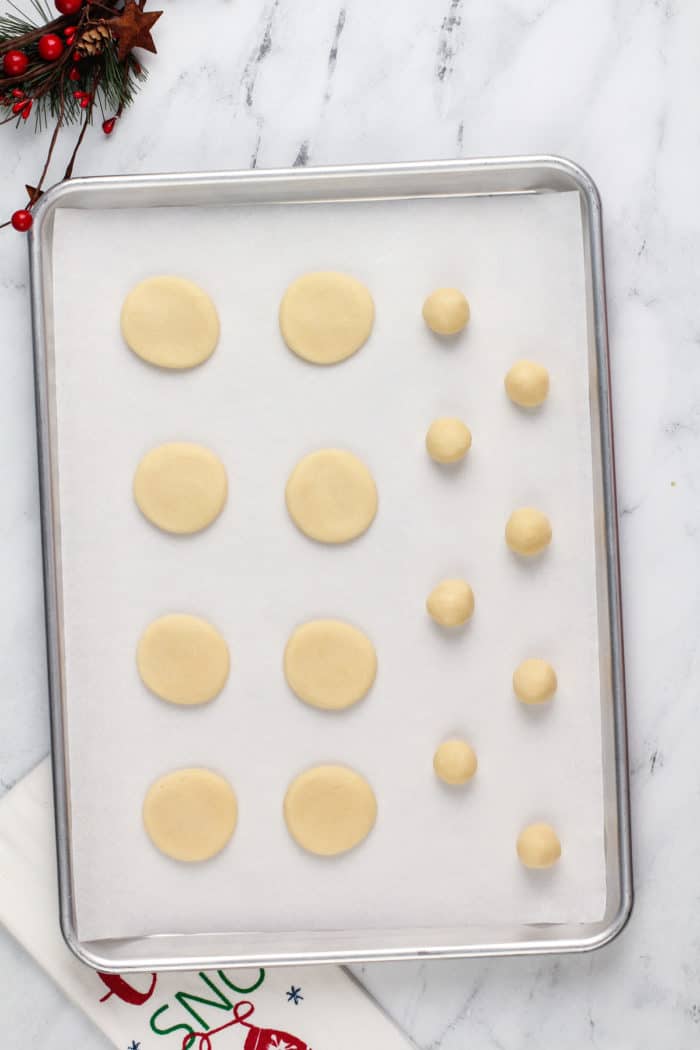
Portion out about ⅔ of the dough into walnut-sized balls. Flatten them slightly and place them on a lined baking sheet – these will become your snowman bodies.
Roll the remaining dough into marble-sized balls and place them on the baking sheet. Do not flatten these. They will become your snowman heads.
Don’t worry if your cookie balls aren’t 100% perfect. It will just add to the melting snowmen effect!
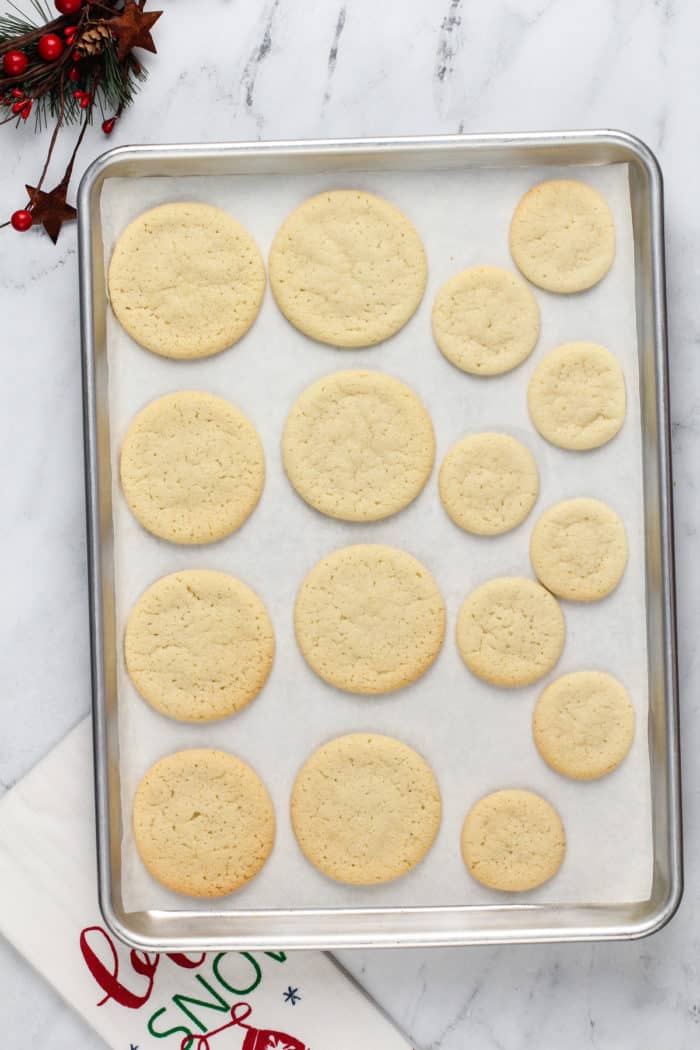
Bake the cookies for 8-10 minutes; the edges will be barely golden when they are done. Let the cookies cool on the baking sheet for about 5 minutes before moving them to a wire rack to cool completely.
Once the cookies have cooled, it’s time to decorate!
Bring a small pot of water with 1-2 inches of water in it to a simmer. Add the candy melts to a metal or glass bowl that fits on top of the pot without touching the water.
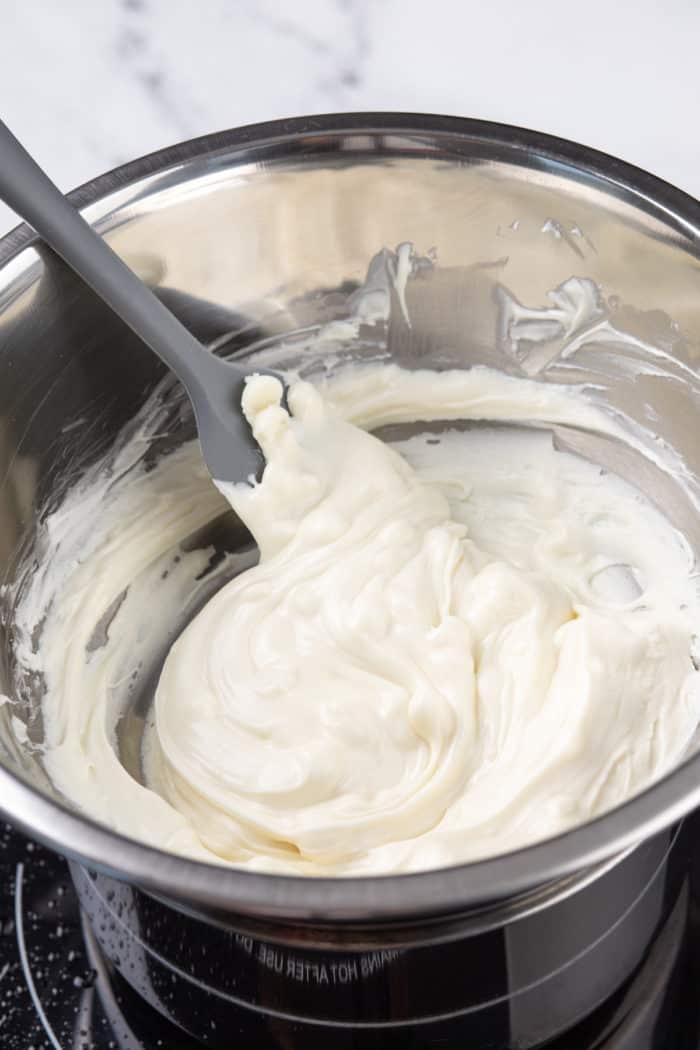
Set the bowl over the simmering water and stir the candy melts frequently until they are melted and smooth.
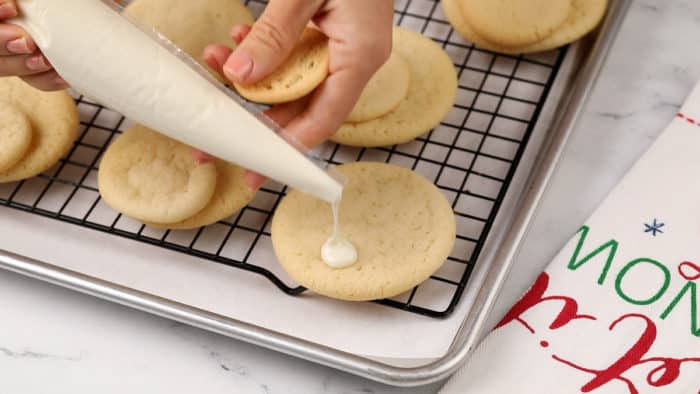
I like to place my cookies on a wire rack set over a piece of parchment paper for easy clean up later.
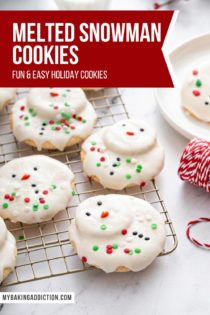
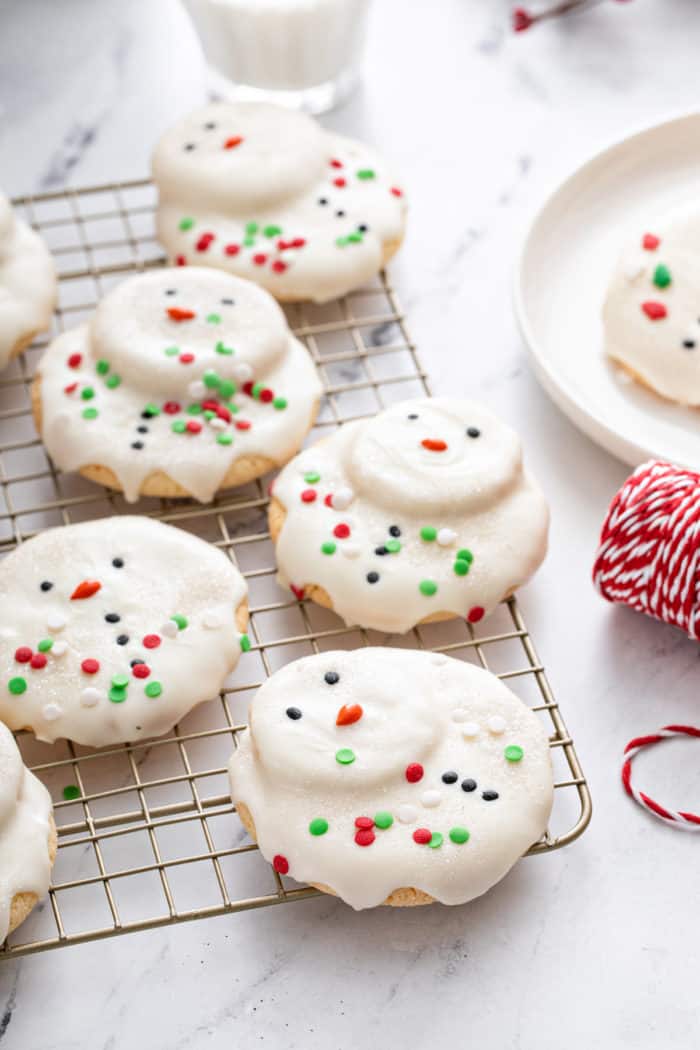
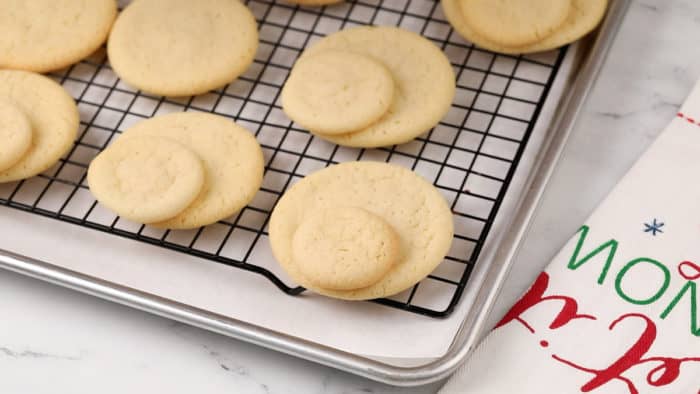
Place a dot of the melted candy coating on the bottom of each small cookie and “glue” it toward the edge of a larger cookie. You have now attached the heads to the bodies of your melted snowmen!
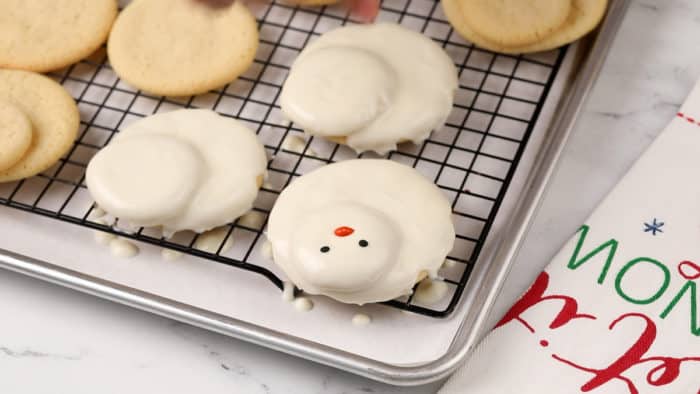
Once that has set, coat each cookie with the melted candy coating. I like to use a spoon to do this, allowing some of the candy melts to spill over the edge of the bottom cookie.
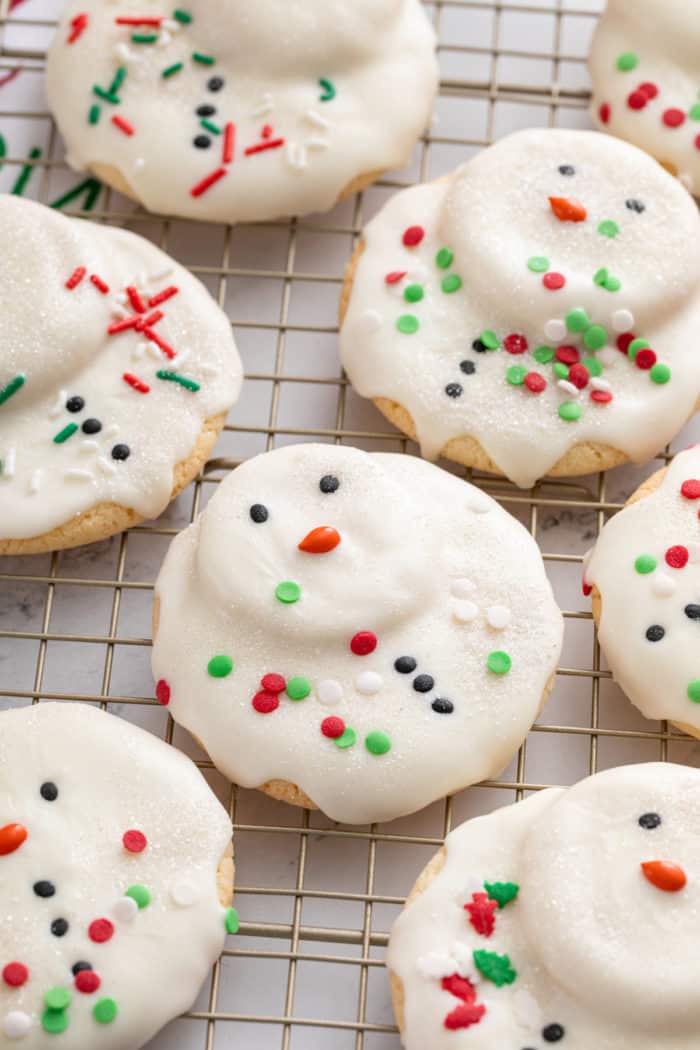
Immediately place two black sugar pearls or confetti pieces on the head (small cookie) for eyes and an orange candy-coated sunflower seed or jimmy in the center for the nose. I like to use a pair of kitchen tweezers for this.
Place three sugar pearls/confetti pieces as buttons on the bottom cookie. A sprinkling of white sanding sugar makes for a pretty finish, and festive sprinkles add a bit of flair to the snowmen.
Let the cookies dry completely before storing them in an airtight container at room temperature.
FAQS
How long do these melted snowman cookies last?
Store melted snowman cookies in an airtight container at room temperature (away from heat, though!), and they’ll stay good for 4-5 days.
Can I freeze melted snowman cookies?
Freezing and thawing these cookies is hit or miss. It can be hard to thaw them without moisture affecting the candy decorations.
Instead, I recommend freezing the un-decorated cookies. They’ll last up to 3 months in the freezer, and then you can pull them out and decorate them whenever you’re ready.
Can I make the cookies from scratch instead of using a mix?
Absolutely! You can use your favorite cut-out sugar cookie recipe, if you like. (I personally don’t have any patience so I like to use a no-chill sugar cookie recipe.)
Cut 2- to 2.5-inch circles for the bodies and 1-inch circles for the heads.
Keep in mind that if you make your own dough, you may end up with more than 16 cookies and may need more than 12 ounces of the candy melts.
Where can I find all of the decorations needed for these melted snowman cookies?
If you have a large, well-stocked grocery store, you may be able to find everything you need in the baking aisle there.
Many craft stores, such as Michael’s and Joann Fabrics, also sell cake and cookie decorating supplies, especially Wilton brand.
Speciality decorating and baking shops are also a great resource for all kinds of cookie decorating supplies. You can often even pick up professional-grade sheet pans and cake pans at these stores, sometimes for cheaper than you might find them at your typical kitchenware shops.
And don’t forget, there’s always the internet! You can order just about any decorating item online these days, which is especially convenient if you don’t have time to go shopping or live in a rural area.
Lastly, keep in mind that my list of supplies is just a suggestion. You can always get creative with your decorations, such as using mini chocolate chips for eyes and mini M&M’s for buttons.
Can I use something other than candy melts to coat the cookies?
I have made these melted snowman cookies a bunch over the years, and I personally think that the candy melts are the easiest thing to work with. They melt and coat the cookies smoothly and hold up well to storage.
That said, I have also used vanilla almond bark in the past. It’s a little bit harder to get a smooth coating, but it does work.
You can also use white chocolate, but keep in mind that it’s going to be a lot more finicky than the candy melts. I only suggest using it if you have experience with it, just to cut down on unnecessary frustration and stress during the busy holiday season!
Do I have to use two cookies? Is there an even easier shortcut?
Want to make an even easier version of melted snowman cookies? I’ve got you.
Simply roll all of your dough into walnut-sized balls and slightly flatten before baking. Decorate these cookies to look like completely melted snowmen!
If you go this route, you could even swap in other flavors of cookies. Try using peanut butter cookies or chewy lemon sugar cookies.
Help! I can’t get the decorations in the right place!
I get it! Getting those little sugar pearls and sunflower seeds in the right place can be tricky.
I have a pair of kitchen tweezers that I use for picking up the decorations and setting them in place. You can grab sets of kitchen (or plating) tweezers on Amazon – please don’t just use the tweezers you keep in your bathroom. You’ll be surprised how often you will use tweezers in the kitchen once you have them.
But remember that melting snowmen aren’t perfect, either. So don’t be too hard on yourself if your melted snowman cookies aren’t 100% perfect. It just adds to their charm!
Melted Snowman Cookies
Ingredients
- 1 package Betty Crocker sugar cookie mix 1 pound 1.5 ounces
- ½ cup unsalted butter softened
- 1 large egg
- 12 ounces white candy melts
- Black sugar pearls or black candy confetti for eyes and buttons
- Orange candy-coated sunflower seeds or orange jimmies for noses
- White sparkling sugar
- Various festive sprinkles
Video
Instructions
- Preheat oven to 375°F. Line a baking sheet with parchment paper.
- In a large bowl or in the bowl of a stand mixer fitted with the paddle attachment, add the cookie mix, butter, and egg. Mix with a wooden spoon or the mixer until a soft dough forms.
- Roll about ⅔ of the dough into walnut-sized balls for the snowman bodies. Flatten them slightly and place on the prepared baking sheet. Roll the remaining dough into marble-sized balls for the snowman heads and place them on the cookie sheet; do not flatten these. You should have an equal number of bodies and heads.
- Bake 8-10 minutes or until the edges are barely golden. Cool on the baking sheet for about 5 minutes, or until cookies are firm enough to be transferred to a cooling rack. Cool completely before decorating.
- Bring a small pot with 1-2 inches of water to a simmer. Place the candy melts in a metal or glass mixing bowl that fits on top of the pot without touching the water. Set the bowl over the simmering water, stirring frequently until the discs are melted and smooth.
- Set a piece of waxed or parchment paper under the cooling rack with the cookies.
- Place a dot of the melted candy coating on the bottom of a small cookie, adhering it toward one edge of a larger cookie. Once that has set, spoon coating over the entire cookie, allowing some to spill over the edge of the bottom cookie.
- Immediately place two black sugar pearls or confetti pieces on the small cookie for eyes and an orange candy-coated sunflower seed or jimmy in the center for a carrot nose. Place three sugar pearls or confetti sprinkles as buttons on the bottom cookie. If desired, decorate with other festive sprinkles and a sprinkling of white sanding sugar all over the snowman.
- Allow to dry completely, then store in an airtight container.
Notes
Nutrition
Nutrition information is automatically calculated, so should only be used as an approximation.


These are adorable! So fun that they’re easy to make too.
Yes, super easy and oh, so cute! Thanks for stopping by, Barbara!
These are too stinkin’ cute! You’re so creative with your holiday baking.
Thanks so much, Sarah. We had so much fun making these!
-Jamie
These are adorable Jamie!
Thanks so much, Natalie!
I am dying over the cuteness of these cookies. Love them!
Thanks so much, Emily!
These cookies are adorable!!!
Thanks so much, Jessica!
Aw, such a cute idea! I just love those little faces :)
Thanks so much for stopping by!
-Jamie
These cookies are literally making my heart swoon. Yes, it’s going pitter patter. And I love Betty Crocker products! They are good. I like using B.C. frosting on cookies. SO good!
Thanks so much, Laura! I appreciate you stopping by – happy holidays to you and yours!
-Jamie