This post may contain affiliate links. Please read our privacy policy.

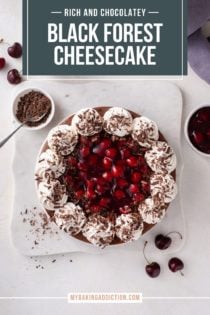
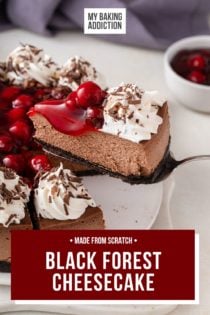
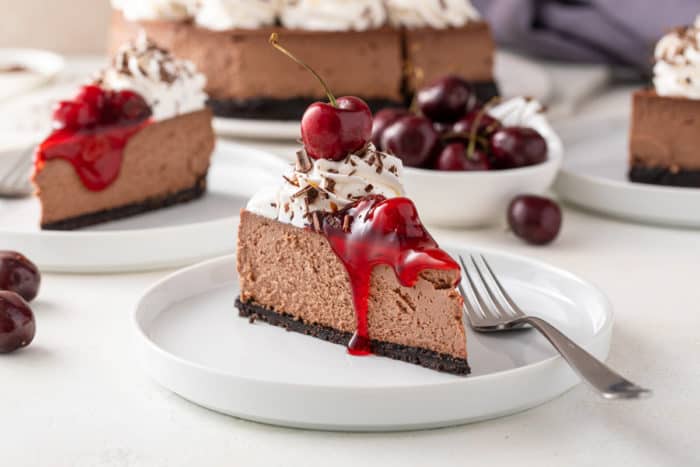
Black forest cheesecake is inspired by the classic black forest cake. Featuring a rich chocolate cheesecake topped with cherry pie filling and whipped cream, this decadent cheesecake is perfect for sharing with friends or your special someone for Valentine’s Day.
I love cherries and I love chocolate, but I don’t often combine the two together.
This black forest cheesecake reminded me that I should combine the two more often.
I mean, the people who love chocolate-covered cherries are really onto something. Rich chocolate paired with sweet cherries…that’s a winning combination.
If you or a loved one agree, I’ve got just the dessert for you to make for Valentine’s Day this year.
What is Black Forest Cheesecake?
Black forest cheesecake is a twist on the classic black forest cake.
Black forest cake is a rich chocolate layer cake that is filled with whipped cream and cherries.
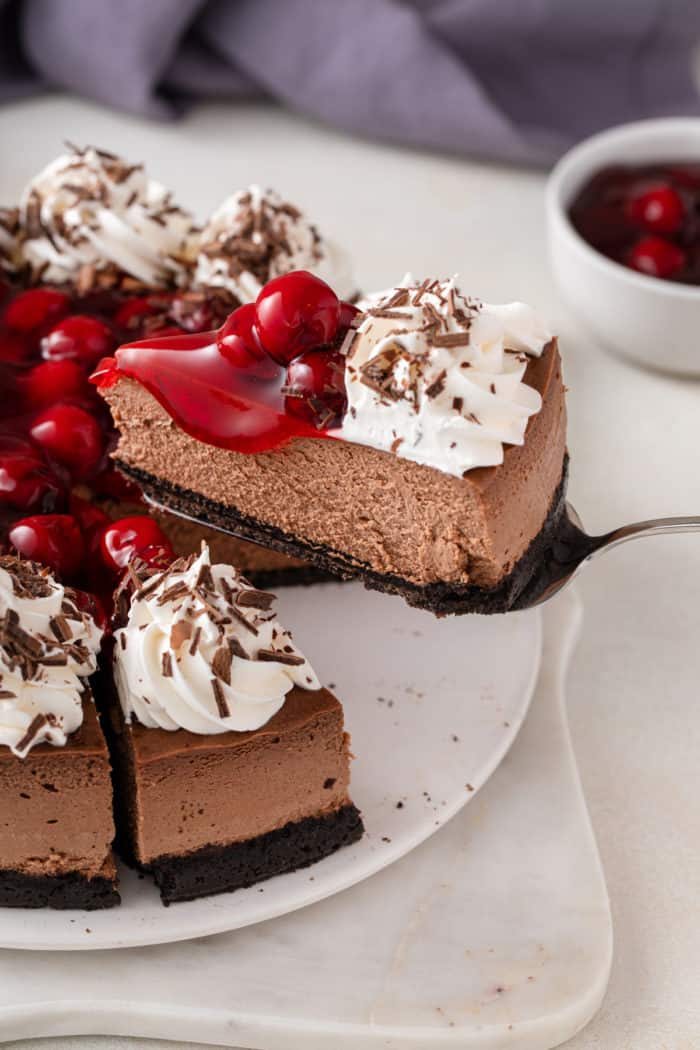
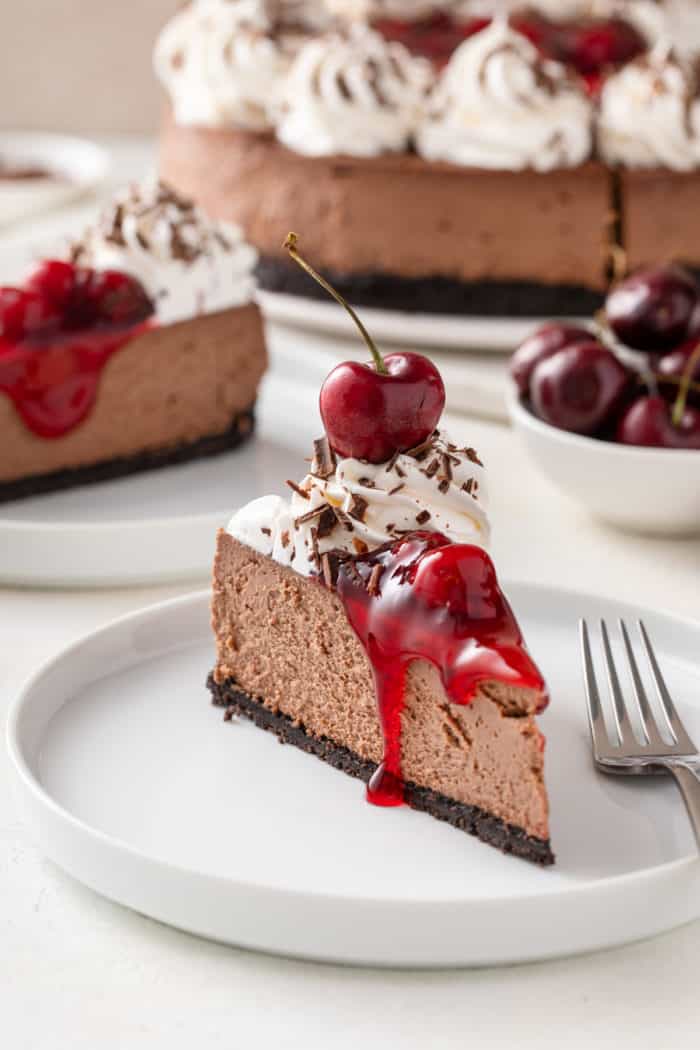
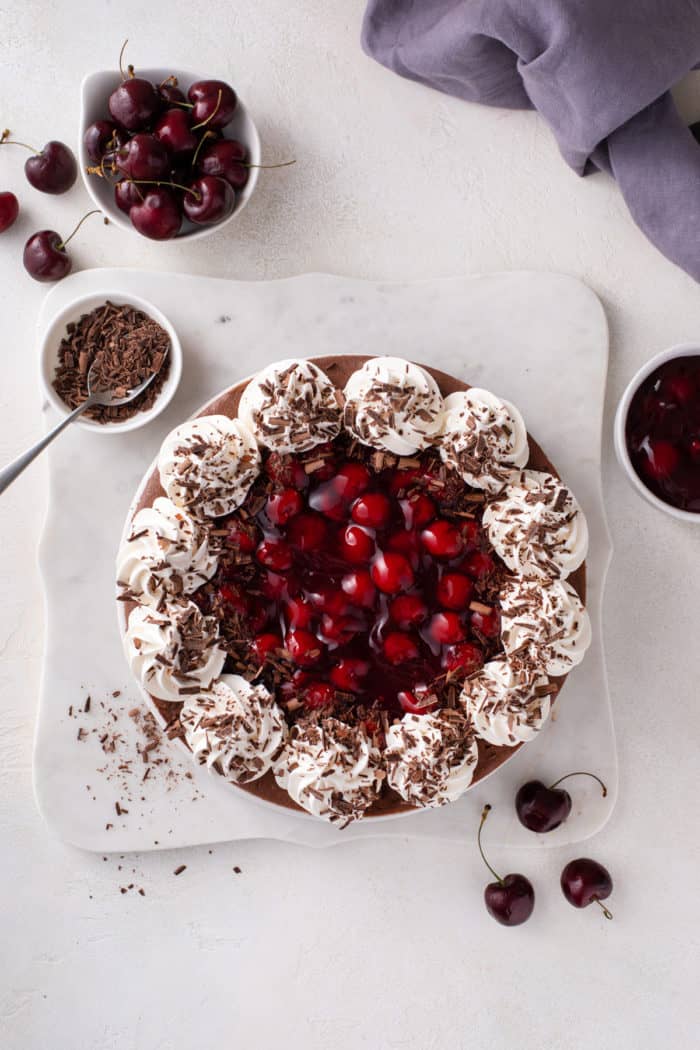
We’ve replicated that here with a rich chocolate cheesecake base topped with cherry pie filling and lightly sweetened whipped cream. Oh, and chocolate shavings. You can’t forget those!
It is common for black forest cake to include a bit of cherry liqueur, such as kirsch. This black forest cheesecake recipe does not automatically include any kirsch, but there are some ways to incorporate it if you desire. (Check out the FAQ section below!)
If you have a special someone in your life who loves chocolate and cherries, this is the perfect dessert to make them for Valentine’s Day!

Pin this now to find it later
Pin ItHow to Make Black Forest Cheesecake
Black forest cheesecake is rich and decadent and so impressive, but it’s much easier to make than you would think.
Ingredients you’ll need
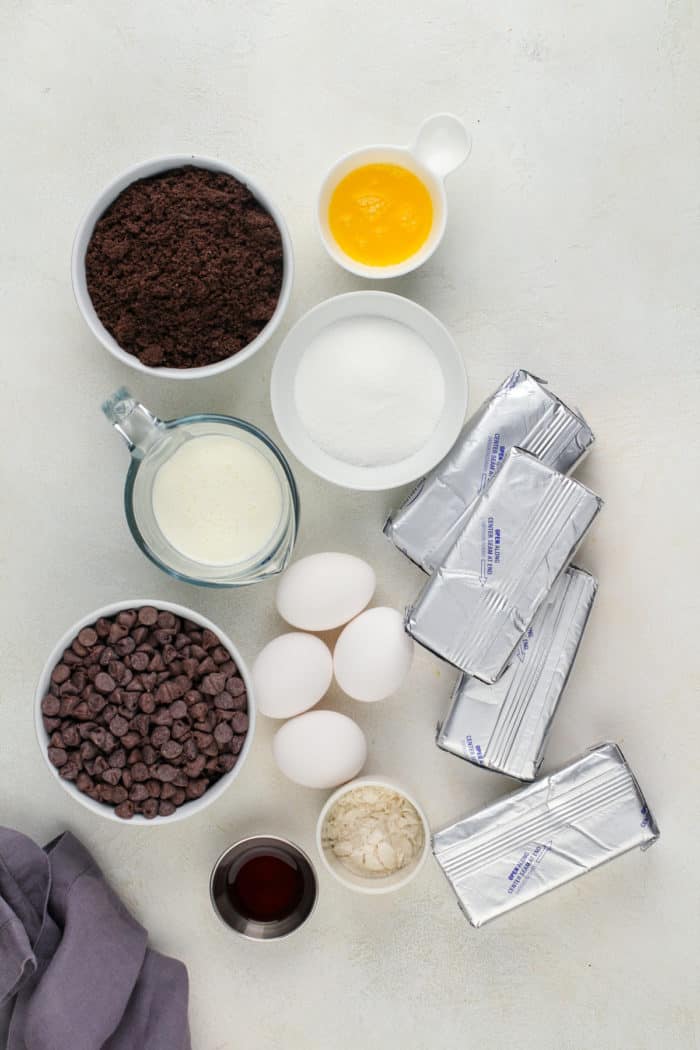
The base of this cheesecake is my rich chocolate cheesecake. For the crust and cheesecake, you will need:
- 20 Oreo cookies, crushed in a food processor until they form fine crumbs
- 3 tablespoons melted unsalted butter
- 32 ounces room-temperature cream cheese
- ½ cup granulated sugar
- 4 large eggs, at room temperature
- 2 teaspoons pure vanilla extract
- ½ cup heavy cream
- 2 cups semisweet chocolate chips
- 2 tablespoons all-purpose flour
When portioning out the oreo cookies for the crust, you will use the entire cookie – filling included. Just drop the whole thing in your food processor and pulse until you get fine crumbs.
Your cream cheese and your eggs need to be at room temperature before you get started on the filling. If you forget to set them out ahead of time, check out my tips for softening cream cheese and bringing eggs to room temperature.
There are some key toppings you will need to turn this chocolate cheesecake into a black forest cheesecake:
- Homemade cherry pie filling
- whipped cream
- chocolate shavings
I prefer to use my homemade cherry pie filling and homemade whipped cream for this cheesecake, but you could use your favorite brand of canned cherry pie filling and even Reddi-wip if you prefer. I won’t tell!
Making this black forest cheesecake
Start by preparing your springform pan for the water bath. You can wrap the pan in foil for a traditional water bath (more details in my post on how to bake a cheesecake in a water bath), but I have a little hack for you.
Hot tip!
My foolproof way to avoid leaks is to place the 9-inch springform pan inside of a regular 10-inch cake pan. This whole thing goes into a larger pan, such as a roasting pan.
Spray the springform with nonstick cooking spray and set it aside.
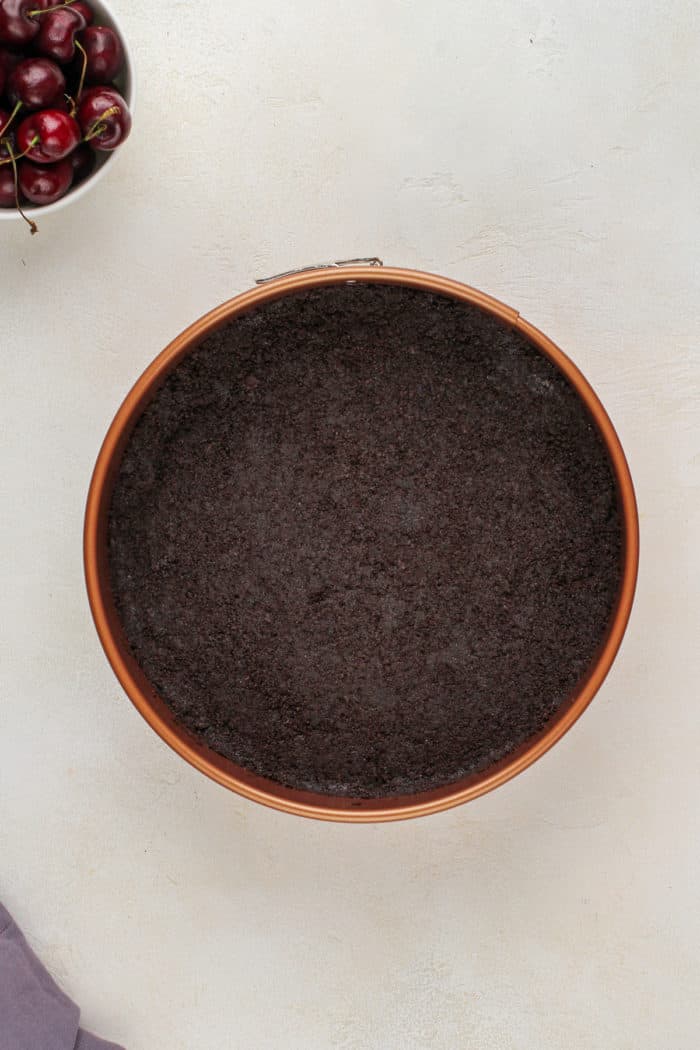
For the crust, stir together the crushed oreo cookies and the melted butter. Press this mixture into the bottom of the prepared pan and bake for 8 minutes. Let cool on a wire rack.
For the black forest cheesecake filling, warm the heavy cream in a small saucepan over medium heat. Place the chocolate chips in a heat-safe bowl.
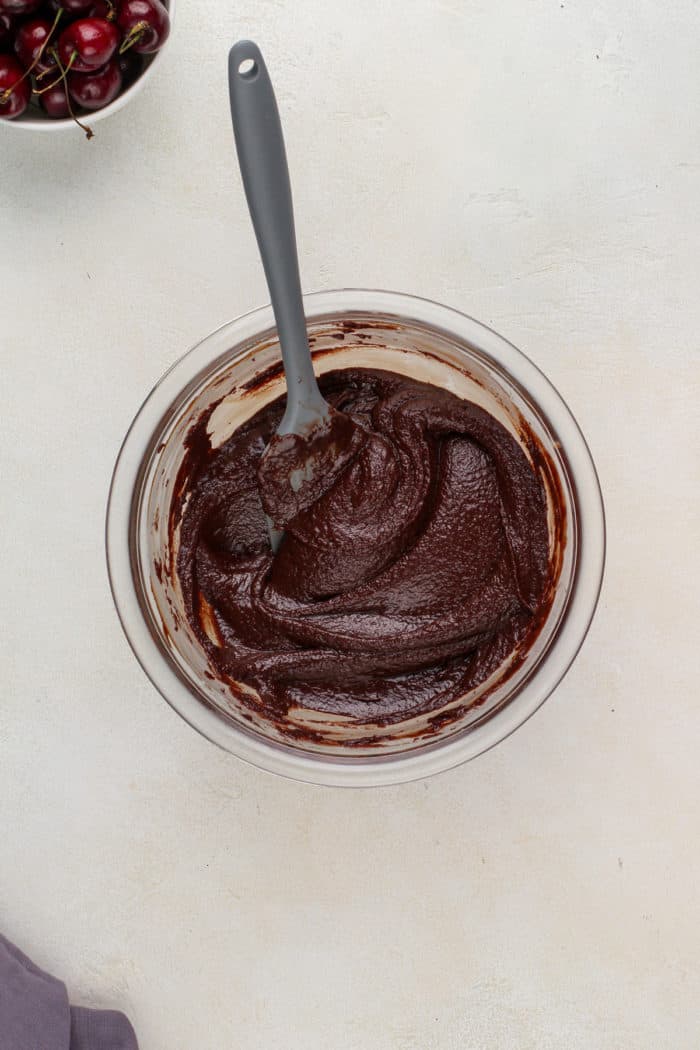
Once the cream is very hot but not boiling, pour it over the chocolate and let this mixture rest for 3-4 minutes. Whisk until the chocolate is smooth and well combined. (Hint: you just made chocolate ganache!)
Let the ganache cool while you continue with the filling.
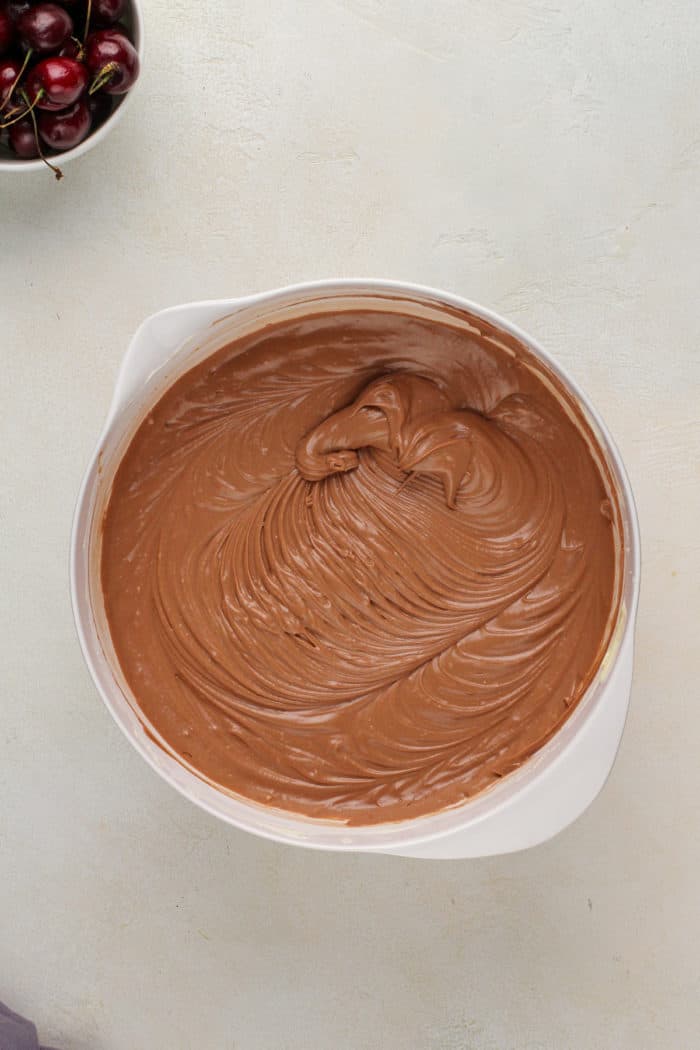
With a mixer, beat the cream cheese until smooth. Add the sugar and mix until combined, then add the eggs, one at a time, making sure to fully incorporate each one before adding the next.
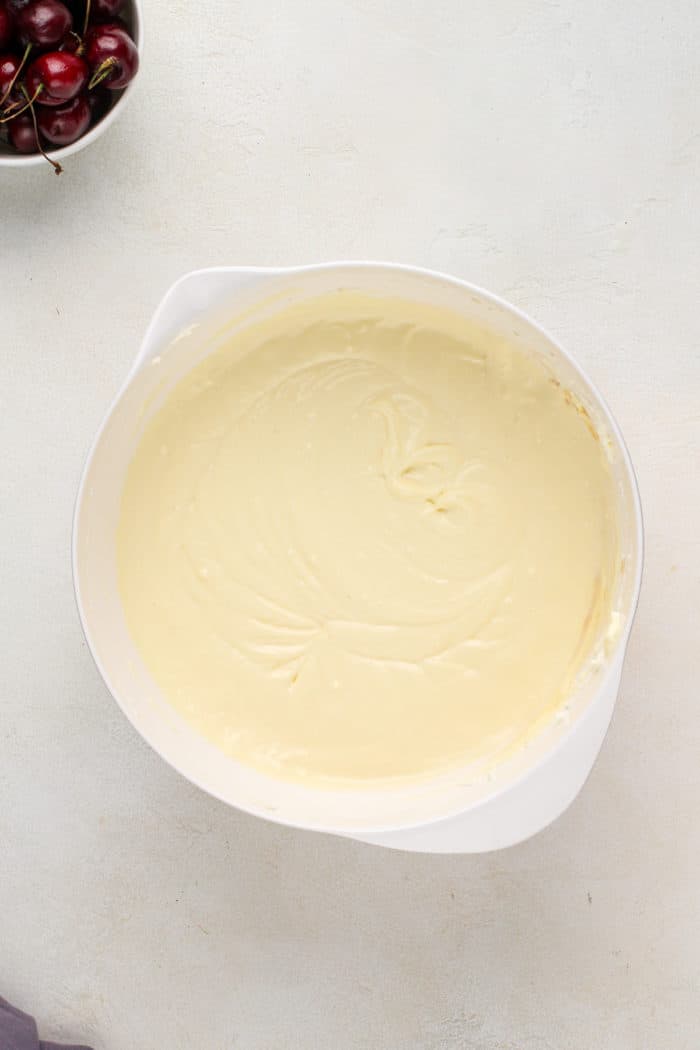
Make sure you also scrape down the sides of the bowl with a spatula so everything gets well mixed.
Add the vanilla and mix to combine.
Add the chocolate ganache. Once it is well combined, add the flour and mix one last time until the filling is completely smooth.
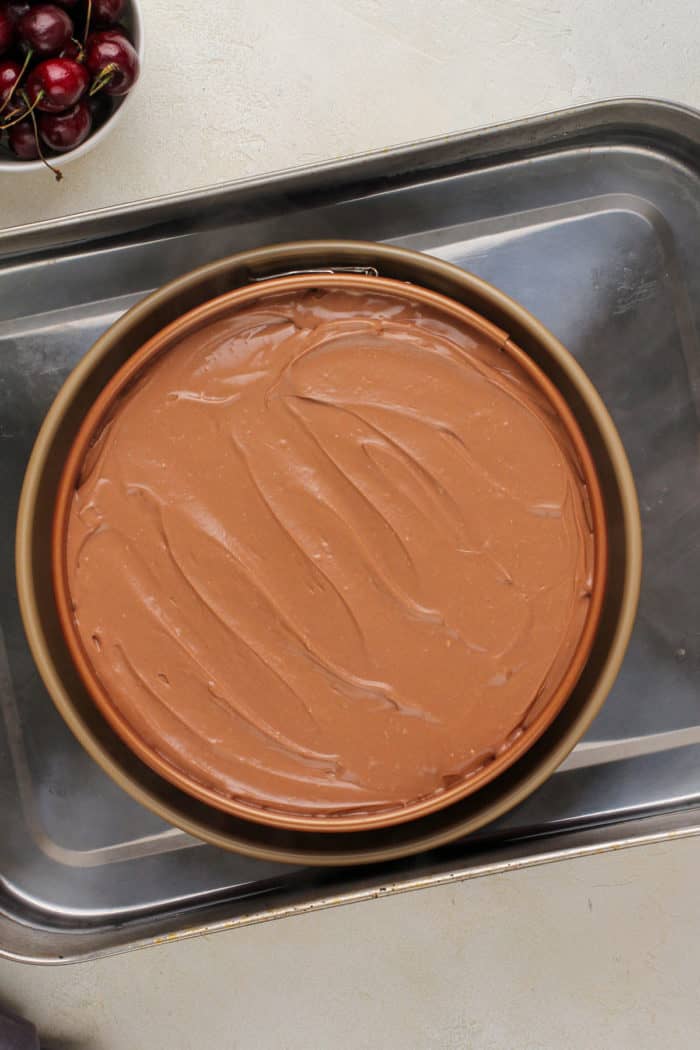
Pour the filling into the prepared crust. Place the springform and cake pan (or the wrapped springform) into your roasting pan and pour boiling water into the roasting pan.
Bake the cheesecake for 60-70 minutes, or until the edges are set but the center still has a slight jiggle to it.
Now, turn off the oven but leave the cheesecake inside. Crack the oven door and let the cheesecake rest in there for 1 hour.
After 1 hour, remove the cheesecake from the water bath and place it on a cooling rack to finish cooling. Once cool, cover and refrigerate for at least 8 hours.
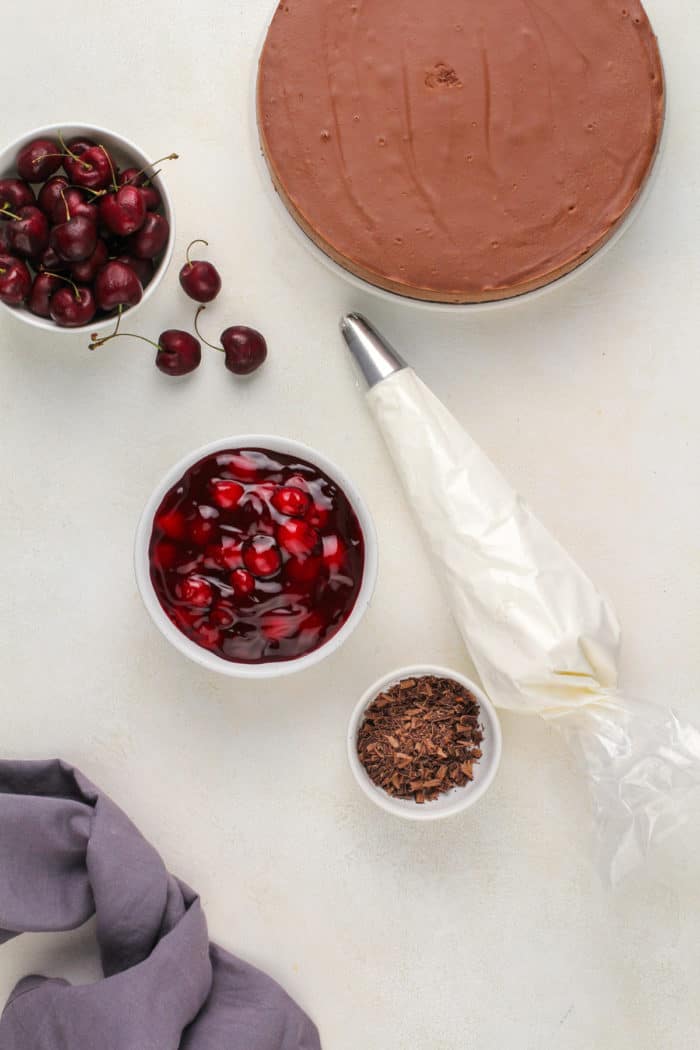
When you’re ready to serve, top the cheesecake with the cherry pie filling, whipped cream, and chocolate shavings.
Storage and Make-Ahead Tips
Store your black forest cheesecake in the refrigerator for up to 3 days. If you aren’t planning to serve it right away, I recommend storing it without the toppings. Wait to add the toppings until right before you plan to serve it.
Just like with my eggnog cheesecake or caramel apple cheesecake, you can also prep the components ahead of time and freeze them until you’re ready to serve.
Make the chocolate cheesecake up to 1 month ahead of time. Place the cooled cheesecake on a cardboard round and cover it tightly with plastic wrap.
Wrap the cheesecake in foil and freeze for up to 1 month for the best flavor. When you’re ready to eat it, thaw it at room temperature for a couple of hours or in the refrigerator overnight.
You can also make the cherry pie filling up to 3 months in advance. Freeze the pie filling in an airtight container or zip-top freezer bag. Let it thaw in the refrigerator overnight before using.
When you’re ready to enjoy your black forest cheesecake, all you need to do is make some whipped cream (this will take less than 5 minutes) and assemble the cheesecake!
Recipe FAQs
Kirsch (or cherry liqueur) is a common addition to black forest cake. This black forest cheesecake doesn’t automatically include any, but you can absolutely add some.
You have a couple options if you want to add kirsch to this recipe. You can add 2-3 tablespoons to the cheesecake filling or add it while making your cherry pie filling.
Absolutely. If you haven’t already topped the cheesecake with the cherry pie filling and whipped cream, simply wrap any leftover slices in a layer of plastic wrap followed by a layer of foil. Place in a zip-top bag and freeze for up to a month.
If you already topped the cheesecake, place the leftover slices – with the toppings – on a parchment-lined baking sheet. Place the entire baking sheet in the freezer for about 2 hours.
Once the slices of cheesecake are frozen solid, wrap them and freeze them for up to a month.
The whipped cream may not hold up well after freezing and thawing, but the cherry pie filling will hold up fine. You can always add more whipped cream later!
You can! One of my favorite tricks is to mix cheesecake filling in the bowl of a food processor. It’ll be full, but it’ll get the job done!
Here’s my favorite water bath hack to prevent leaks:
Place a 9-inch springform pan into a 10-inch regular cake pan. Both pans can now go into your roasting pan.
Pour the boiling water into the roasting pan, outside of the 10-inch cake pan. You will get all of the benefits of baking with a water bath without the risk of leaks. Win!
Black Forest Cheesecake

Ingredients
For the crust:
- 20 Oreo cookies crushed in a food processor until they form fine crumbs
- 3 tablespoons unsalted butter melted
For the cheesecake:
- 32 ounces cream cheese room temperature
- ½ cup granulated sugar
- 4 large eggs room temperature
- 2 teaspoons pure vanilla extract
- ½ cup heavy cream
- 2 cups semisweet chocolate chips
- 2 tablespoons all-purpose flour
For the topping:
- Homemade cherry pie filling
- whipped cream
- chocolate shavings
Video
Instructions
- Preheat oven to 350°F.
- Tightly wrap a 9 inch springform pan in heavy duty foil. This step prevents leaks when using a water bath. I also take the extra step by placing the foil wrapped spring form pan inside an oven bag while baking, but this is optional (see recipe notes below for more info on this process). Lightly spray the springform pan with nonstick cooking spray. Set aside.
- Mix together the Oreo cookie crumbs and butter and press them into the bottom of your pan. Bake in preheated oven for 8 minutes and place on a wire rack to cool.
- Begin to boil a pot or kettle of water for the water bath.
- In a small saucepan over medium heat, warm the heavy cream until very hot, but not boiling. Place chocolate chips in a heat safe bowl. Pour the hot cream over the chocolate and allow it to sit for about 3-4 minutes. Whisk the cream and chocolate until smooth and thoroughly combined. Set aside to cool while you prepare the filling.
- In the bowl of your stand mixer fitted with the paddle attachment, beat the cream cheese until smooth. Add sugar and mix until combined. Add eggs, one at a time, fully incorporating each before adding the next. Make sure to scrape down the bowl in between each egg. Add vanilla and mix until combined.
- Add in the chocolate mixture and beat until it is fully incorporated into the cheesecake filling. Add in the flour and mix until combined. Scrape down the sides of your bowl and beat again until the mixture is completely smooth.
- Pour batter onto the prepared crust. Place prepared pan(s) into a larger pan – like a roasting pan and pour boiling water into the larger pan until halfway up the side of the cheesecake pan. Bake for 60-70 minutes. The edges will appear to be set, but the center will still have a slight jiggle to it. At this point, turn off the oven, but leave the door cracked and allow the cheesecake to rest in the cooling oven for one hour.
- After one hour has passed, carefully remove the cheesecake from the water bath and place on a cooling rack to cool completely. Once the cake is completely cooled, place it into the refrigerator for at least 8 hours.
- Before serving, top with cherry pie filling, whipped cream and chocolate shavings.
Notes
Nutrition
Nutrition information is automatically calculated, so should only be used as an approximation.


Looking so yummy.
I bake a lot and this is one of the best desserts we have ever had–it’s DELICIOUS!!!!!!!!!!
The only change I would suggest is to add the chips to the saucepan of cream to make sure all the chips are melted. I tried the recipe way and they did not all melt so I had random bits of chocolate chips in my filling. By adding to the saucepan if they did not all melt, reheat and stir.