This post may contain affiliate links. Please read our privacy policy.
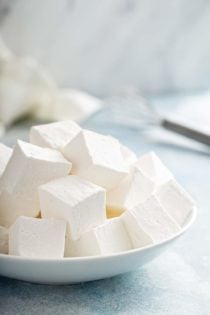
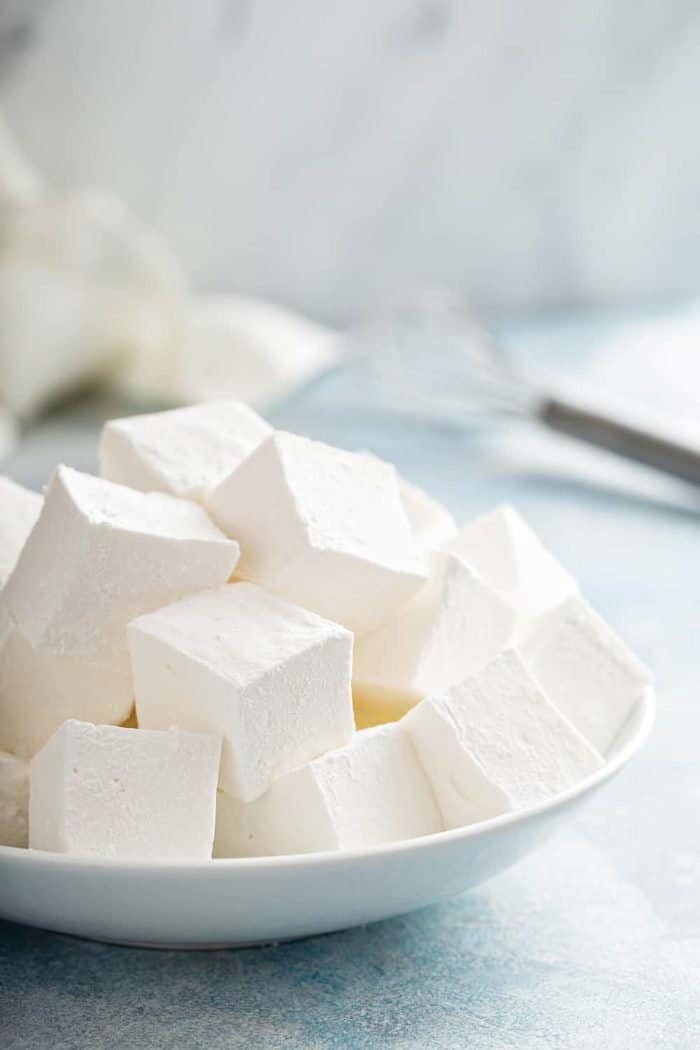
Homemade Marshmallows will absolutely change the way you view marshmallows. These sweet, flavorful, soft candies are infinitely better than what you’d buy at the grocery store. They make a great gift or addition to any s’more or cup of hot cocoa.
If you happened to catch my post yesterday for Citrus Poppy Seed Cake, you may remember me telling you guys that Elle is going through quite the phase with fresh oranges.
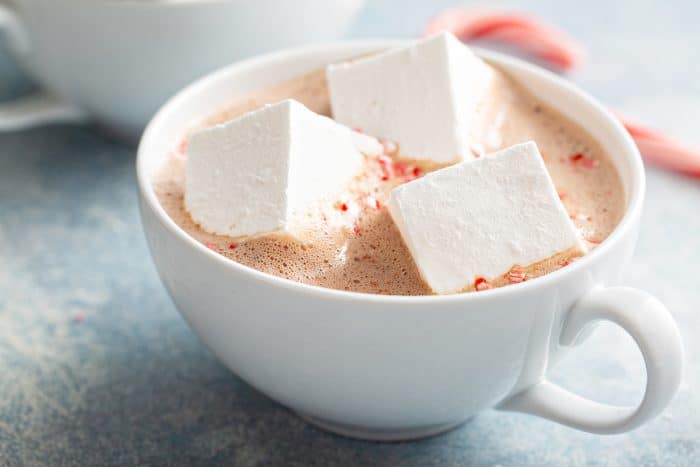
Well, she’s also in a serious hot cocoa phase as well – ’tis the season. We’ve even made hot cocoa bombs, which are actually way easier than they may seem. And they’re a great little project on a cold afternoon.
The other day I came downstairs to find Elle in the kitchen filming a tutorial on her iPad so she could “teach people how to make her FAMOUS peppermint hot cocoa.” I mean, the girl was taking it pretty seriously and even pulled out the mallet to crush the candy canes to make her “secret topping” – which is basically candy cane dust.
So what better way to indulge her hot cocoa phase than with a batch of homemade marshmallows?
ARE HOMEMADE MARSHMALLOWS WORTH IT?
I have been enjoying marshmallows since I’ve been old enough to chew. I’ve never been really picky as to what types of marshmallows I’ll indulge in.
I’m content with them straight out of the bag or melted between two graham crackers. Or between two cookies for salted caramel s’mores.
And I’m pretty much a self-professed Peeps addict – as long as they’re stale. Yep, you read that right. Stale.
When I decided to make my own hot cocoa mix to gift to friends, I thought that homemade vanilla marshmallows were only a natural accompaniment. I mean what’s hot chocolate without the marshmallows, right?
I always anticipated that making marshmallows would result in sticky catastrophe and that I’d end up with less-than-delicious marshmallows. How could it be worth the effort?
However, I can honestly tell you that after having one – or 5 – of these homemade marshmallows, it may be a little difficult going back to the bagged version from the grocery store.
These homemade marshmallows have such a rich and velvety texture. I couldn’t stop making hot chocolate as an excuse to eat more!
HOW TO MAKE MARSHMALLOWS
Making these marshmallows isn’t hard. You just have to know the steps to take.
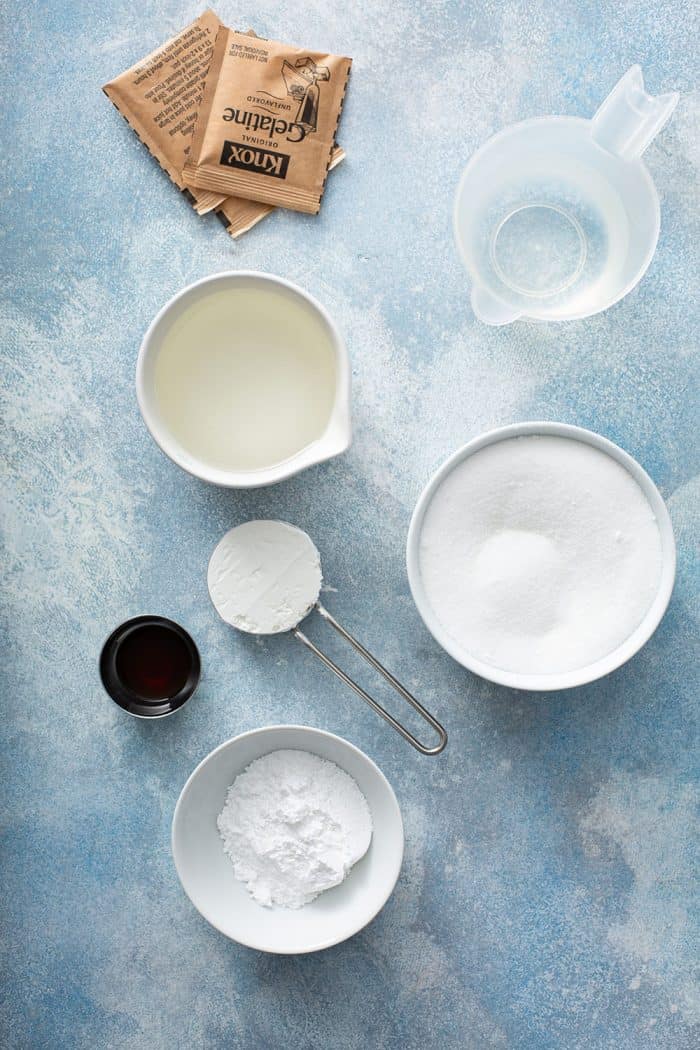
Any time I make candy, whether it’s Pecan Brittle or these soft bites of heaven, I always measure out all of my ingredients and have them ready to go before I get started:
- 3/4 cup water, divided
- 3 (.25 ounce) packages unflavored gelatin
- 2/3 cup light corn syrup
- 2 cups granulated sugar
- 1 tablespoon vanilla extract
- 1/4 cup cornstarch
- 1/4 cup confectioners’ sugar
Start by lining a 9×9-inch baking dish with plastic wrap and spray it liberally with nonstick cooking spray.
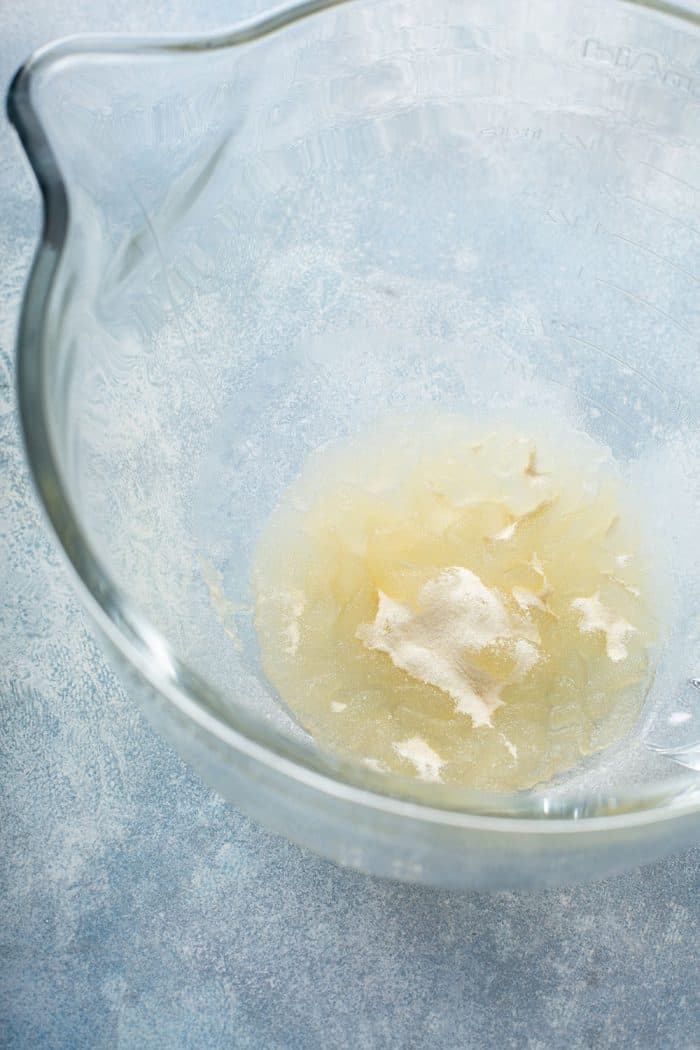
Put ½ cup of the water in the bowl of a stand mixer fitted with the whisk attachment. Sprinkle the gelatin over the top of the water to soak. Don’t stir it!
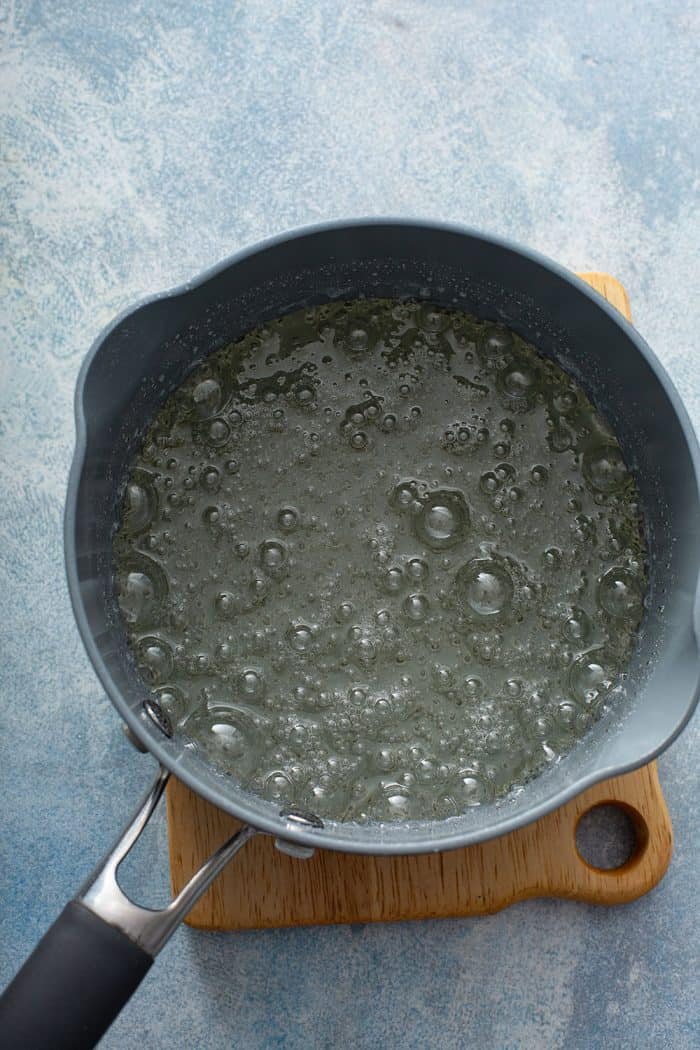
While the gelatin is soaking, add the other ¼ cup of water, corn syrup, and granulated sugar in a saucepan over medium. Bring the mixture to a boil and then let it boil hard for 1 minute.
Here’s where you need a bit of coordination and a steady hand!
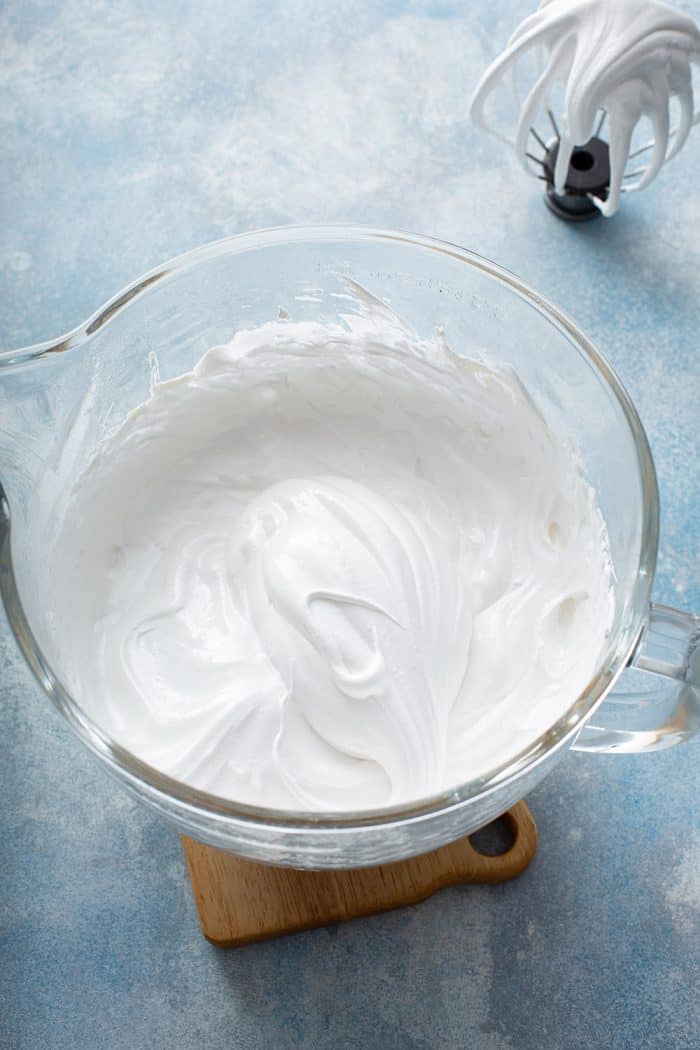
VERY carefully pour the hot sugar mixture into the gelatin mixture and beat on high speed for 12 minutes. Yes, 12 minutes!
Beat until the mixture is fluffy and forms stiff peaks. Add in the vanilla extract and beat until just combined.
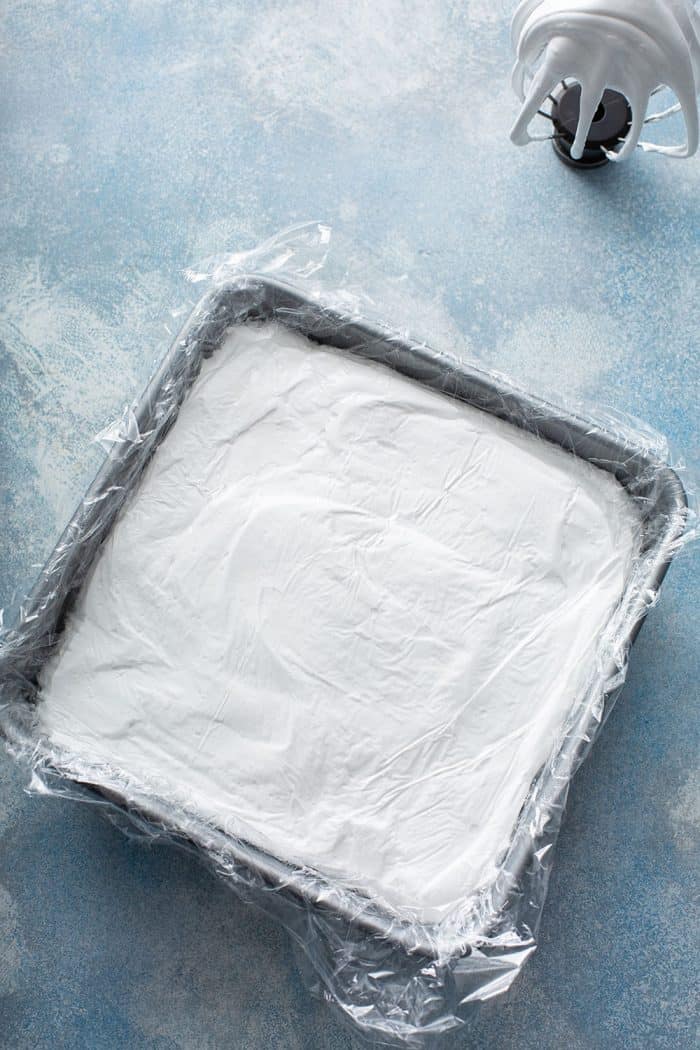
Pour the marshmallow mixture into the prepared baking dish and use a greased spatula to smooth the top. The mixture is super, super sticky, so make sure anything you touch it with is greased with the nonstick spray.
Place a piece of greased plastic wrap on top of the candy, pressing it down lightly to seal it to the top of the marshmallow.
And now we wait! Let the candy rest for at least 4 hours or overnight.
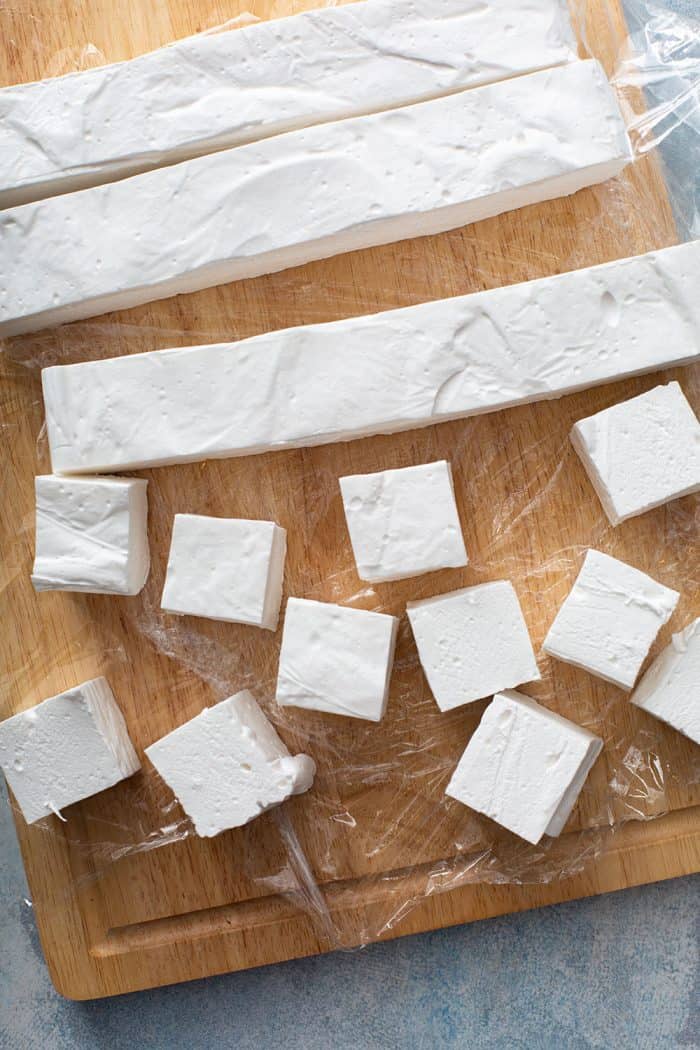
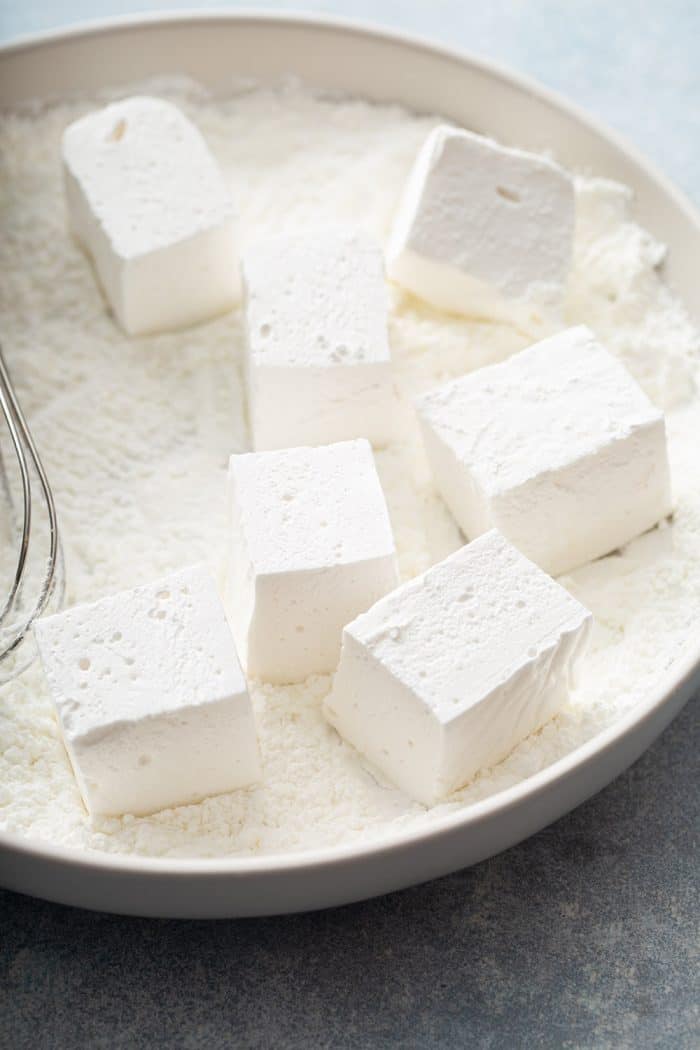
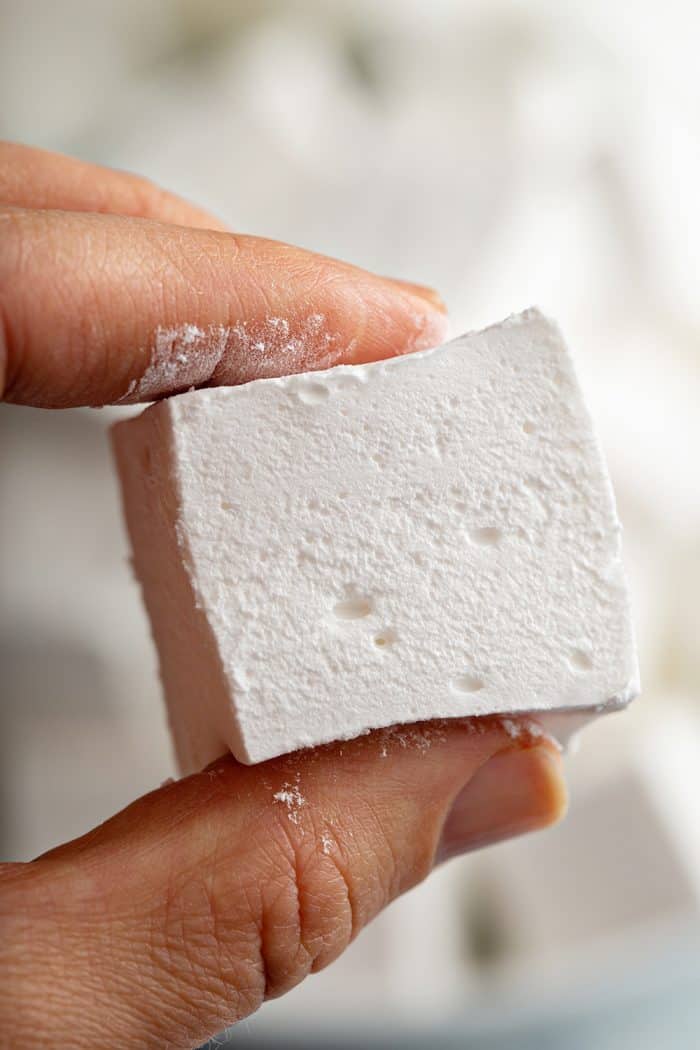
Later that evening (or the next day), mix together the cornstarch and confectioners’ sugar in a shallow bowl. Use oiled scissors, an oiled knife, or even an oiled pizza cutter to cut the marshmallow into strips and then into 1-inch squares.
Dredge the candies lightly in the cornstarch mixture and store in an airtight container.
HOW TO CHANGE UP THIS RECIPE
I love these marshmallows just the way they are. They’re sweet and the vanilla flavor is just perfect.
But because they are a bit of a blank slate, it’s easy to make them your own by adapting the recipe a bit!
Here are some fun ways to change up this recipe:
- Add ½ teaspoon of peppermint extract along with the vanilla extract for a festive touch.
- Add powdered freeze-dried strawberries or raspberries to the cornstarch and confectioners’ sugar dredge for a fruity twist, like in strawberry marshmallows.
- Add a few drops of food coloring for some pretty pastel colors.
- Add in confetti sprinkles with the vanilla to coordinate with any holiday or occasion.
- Use small oiled cookie cutters to cut them into shapes such as hearts or stars.
- Dip them in chocolate for chocolate-covered marshmallows.
WHAT TO DO WITH HOMEMADE MARSHMALLOWS
So what do you do with homemade marshmallows?
I mean, eating them straight from the container is always an option!
They also make incredible s’mores and would be heavenly on top of a s’mores cheesecake or marshmallow strawberry shortcake.
And they’ll make the best cup of hot chocolate or batch of chocolate-covered marshmallows you’ve ever had.
Don’t forget that they’d make a super special holiday gift! Package them up – either on their own or along with the fixings for hot chocolate or s’mores – and ruin all of your friends for marshmallows, too.
Homemade Marshmallows

Equipment
Ingredients
- ¾ cup water divided
- 3 envelopes unflavored gelatin .25 ounces each
- ⅔ cup light corn syrup
- 2 cups white sugar
- 1 tablespoon pure vanilla extract
- ¼ cup cornstarch
- ¼ cup confectioners’ sugar
Video
Instructions
- Line a 9×9 inch baking dish with plastic wrap and spray with non-stick cooking spray. Spray another piece of plastic wrap to cover the top, and set aside.
- Place 1/2 cup of water in the bowl of an electric mixer fitted with the whisk attachment, and sprinkle gelatin on top of water to soak.
- While gelatin is soaking, combine 1/4 cup of water, corn syrup, and sugar in a saucepan. Bring the mixture to a boil over medium heat. Boil the mixture hard for 1 minute.
- Carefully pour the hot sugar mixture into the gelatin mixture and beat on high for 12 minutes with an electric mixer, until the mixture is fluffy and forms stiff peaks. Add in vanilla extract and beat until just combined.
- Pour the marshmallow mixture into the prepared baking dish, using a greased spatula to smooth the top. Cover the candy with the piece of prepared plastic wrap, pressing it down lightly to seal the covering to the top of the candy.
- Allow the marshmallow candy to rest for 4 hours or overnight. Mix together cornstarch and confectioners’ sugar in a shallow dish. Using oiled scissors or an oiled kitchen knife, cut the marshmallow candy into strips, then into 1 inch squares. Dredge the marshmallows lightly in the cornstarch mixture and store in an airtight container.
Nutrition
Nutrition information is automatically calculated, so should only be used as an approximation.


Can you use sheet gelatin? How many/what weight would be used for this recipe?
Hi Mel-
I haven’t made these marshmallows with gelatin sheets, so I am unsure of the weight adjustment.
-Jamie
I’ve made these several times and they’ve turned out so well. They were a big hit at the bonfire the other night. We all agreed that homemade marshmallows make s’mores even better!
I am so happy to hear you enjoy this recipe! Thanks so much for stopping by and leaving your feedback!
-Jamie
My daughter and I made these marshmallows. They turned out excellent.
So happy to hear you enjoyed the marshmallows!
-Jamie
Can you use these to make rice crispy treats?
You sure can! Hope you enjoy!
Jamie
@Jamie, Just wondering how this would relate to the marshmallows that the Rice Krispie recipe calls for.
Can I make these in silicone molds for fun shapes?
I haven’t tried this, so I can’t attest to the result. They would need to be VERY well greased in order for the marshmallows to release, but in theory it could work. If you give it a try, let me know how it turns out. Happy baking!
Jamie
Mine came out very soft and moist, I’m a complete newbie and have no idea how to fix it. Can I make it with less sugar/ without vanilla? Its way too sweet for me
Hi Shaun – I have not tried to lower the amount of sugar and would be cautious about doing that. Candy is a pretty exact science, and I can’t say for sure if they would turn out if you adjust the ratios too much.
Can I add stuff into or on top of the marshmallows such as sprinkles or chocolate?
Also, what do you mean when you say to cut with an “oiled knife”, what oil should I use? (I’m not a professional baker and get confused easily).
Hi Kayla – Yes, you could try folding in sprinkles, toasted coconut, or mini chocolate chips. To oil your knife, you can just spray both sides with nonstick cooking spray before slicing; you will probably need to spray it multiple times while cutting to make sure it doesn’t get gummed up. Happy baking!
Jamie
I was very nervous to try this,but boy am I glad I did!! Really quite easy and everyone loved them!! Great for making smores!! 5-Stars☆☆☆☆☆
So happy to hear that, Cindy! Thanks so much for stopping by and sharing your feedback. Happy baking!
Jamie
I was really surprised that these worked without having to worry about taking the temp of the sugar mixture! I doubled the recipe and they never got to stiff peaks because my mixer wasn’t up for the doubling work.. but somehow they still turned out amazing! Thanks for making such a forgiving and tasty recipe.
I’m so happy to hear this, Vanessa! Thanks so much for stopping by and sharing your feedback! Happy baking –
Jamie
Also this recipe is forgiving. I followed your suggestion to have everything laid out and ready. When the mixture was finished and in the pan and I was cleaning up I found a small dish with vanilla extract. It had been about 20 mins since I had filled the pan. I was able to use the plastic wrap to carefully lift the marshmallows out of the pan and place it on a cookie sheet. I placed the vanilla on top and used the plastic wrap to mix the vanilla in. Rotating it carefully. I put new plastic wrap sprayed with nonstick in the pan and was able to put marshmallow mixture back in without problems. But I will not do that again.