This post may contain affiliate links. Please read our privacy policy.
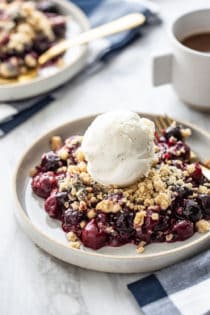
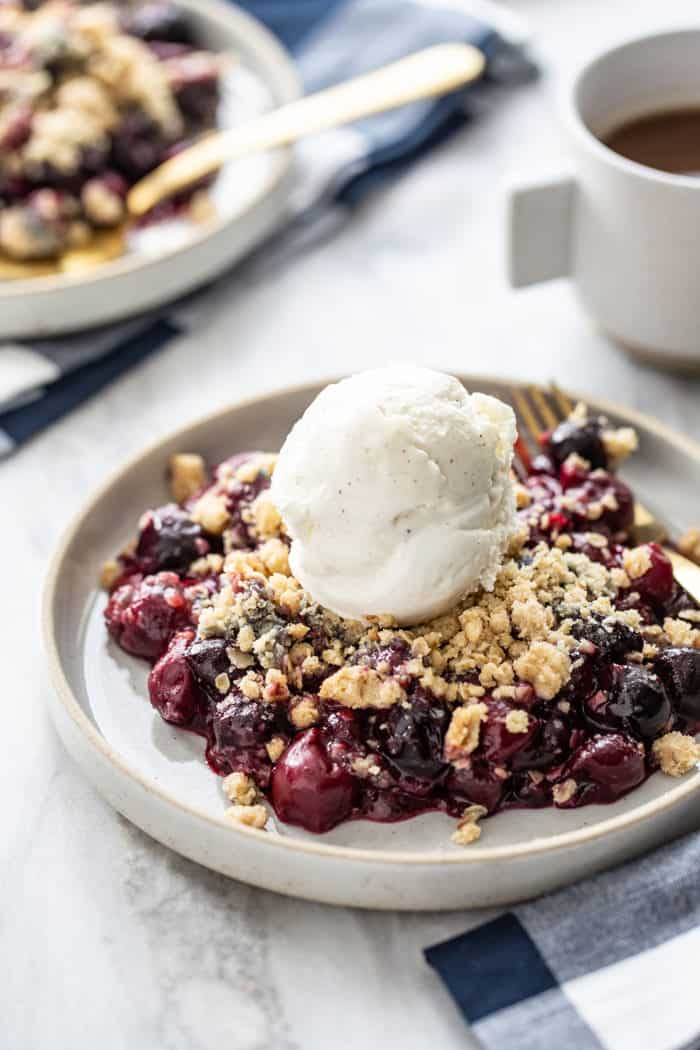
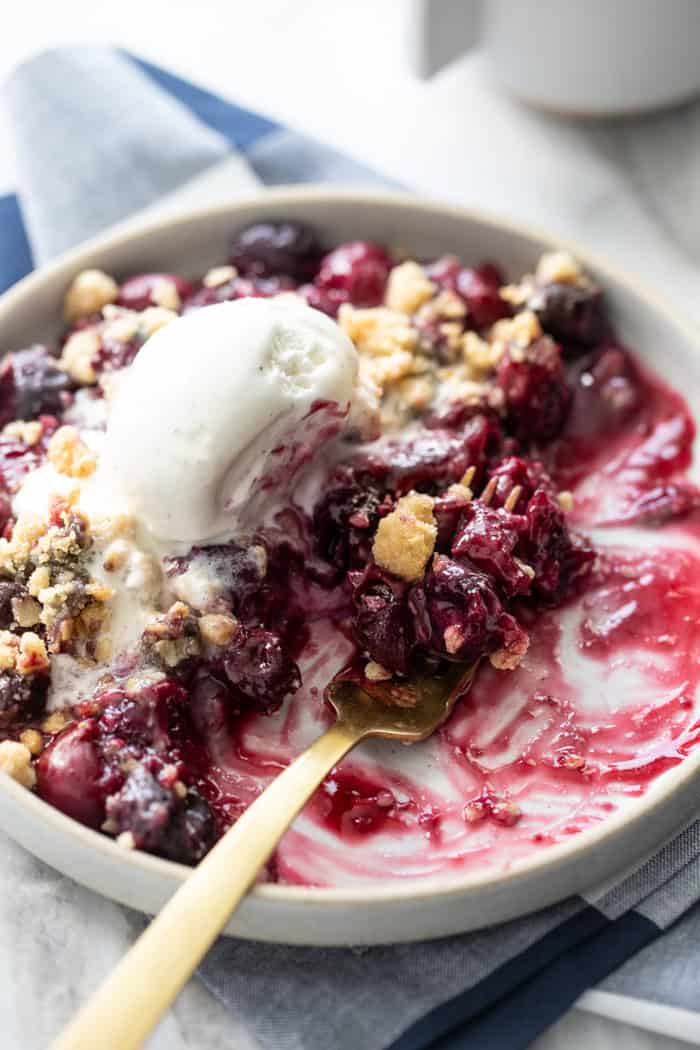
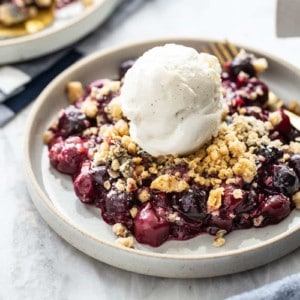
Cherry Crisp is simple, quick, and delicious. Top it with a scoop of vanilla ice cream for the ultimate weeknight dessert.
Last week I was tidying up our pantry and realized that I haven’t used my ice cream maker in quite some time. So I pulled it forward on the shelf, gave it a good wipe down and decided that I need to teach my girl how to make some homemade ice cream.
I scanned the fridge and pantry to see if we had everything on hand to whip up a simple vanilla ice cream base, but it was a no-go because I had used the rest of the cream for a delish Alfredo sauce last week.
So I totally switched gears and decided I was in the mood for a crisp – cherry crisp to be exact.
And I just so happened to have all of those ingredients on hand – complete with a pint of vanilla bean ice cream in the freezer.
No worries though, we’ll get to the homemade vanilla ice cream as soon as I pick up some more heavy cream on our next grocery trip.
My quick and easy cherry crisp recipe
Cherries sort of feel like the ultimate summer fruit. I mean, sure, you can usually find fresh cherries year-round these days, but they are crazy expensive and not that sweet in the off-seasons.
But ripe summer cherries? Those are sweet and juicy and almost impossible to stop eating.
Honestly, give me a bowl of fresh cherries and a dollop of homemade whipped cream and I’m a happy camper.

But I will never turn down a serving of freshly baked Cherry Crisp, either.
If we’re going to make a Cherry Crisp, we might as well make it quick and easy to throw together, right? That’s why my favorite recipe for this summer classic uses cherry pie filling.
But don’t worry if you don’t want to use the canned stuff – I’m going to show you how to use those beautiful fresh summer cherries to make this recipe, too!
What’s the difference between a crisp and a cobbler?
Before we talk about how to make this Cherry Crisp recipe, have you ever wondered what the real difference is between a crisp and a cobbler?
Both desserts are baked with a layer of fruit filling and a layer of some sort of pastry topping. The difference between the pastry topping is what makes it a crisp or a cobbler (or even a crumble!)
- Cobblers have a drop biscuit topping, a pie crust-like topping, or even a cakey topping (like with Easy Peach Cobbler).
- Crisps have a streusel topping that has oats in it, making the topping…well, crispy! Strawberry rhubarb crisp is a great example.
- Crumbles are similar to crisps but traditionally don’t have any oats in the streusel topping, like in Apple Crumble. Although these days the lines are a little bit blurred between crisps and crumbles and sometimes the names are used interchangeably.
Crisps are my personal favorite, but you know I’ll never turn down a good cobbler or crumble!
How to make my cherry crisp
If you’re short on time and energy, you could totally make this recipe with your favorite canned cherry pie filling. I know I wouldn’t judge you for it!
But if you have some beautiful fresh or even frozen sweet cherries on hand, I encourage you to make this recipe using my Homemade Cherry Pie Filling.
You don’t even have to make the pie filling the same day you want to make the crisp. You can refrigerate the prepared pie filling for up to 3 days or even freeze it for several months before using it to make your crisp.
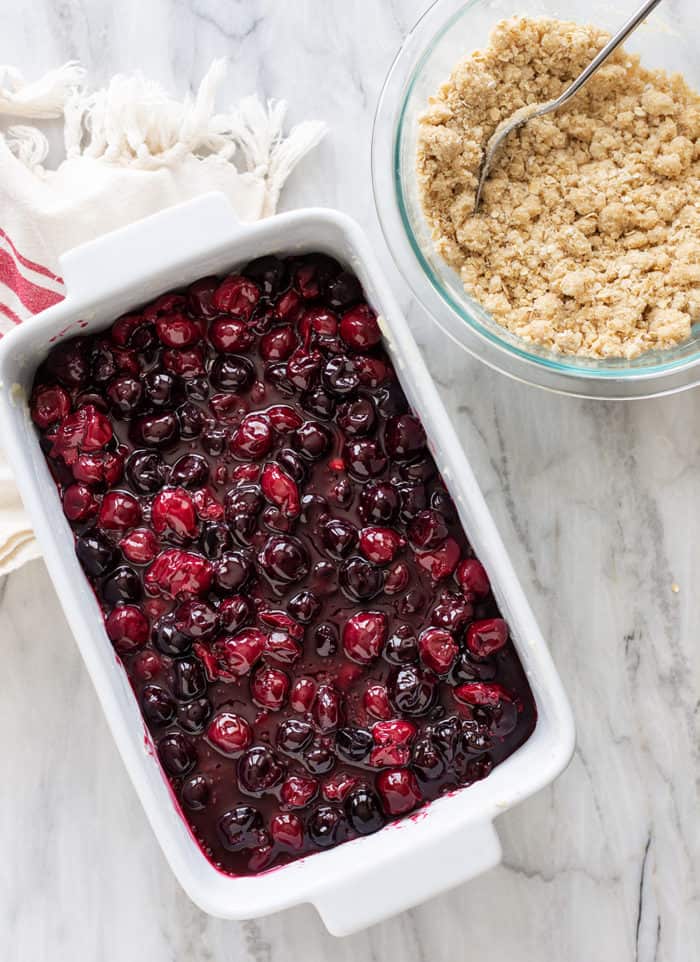
When you’re ready to make the crisp, pour your cherry pie filling of choice into the bottom of a 2-quart baking dish.
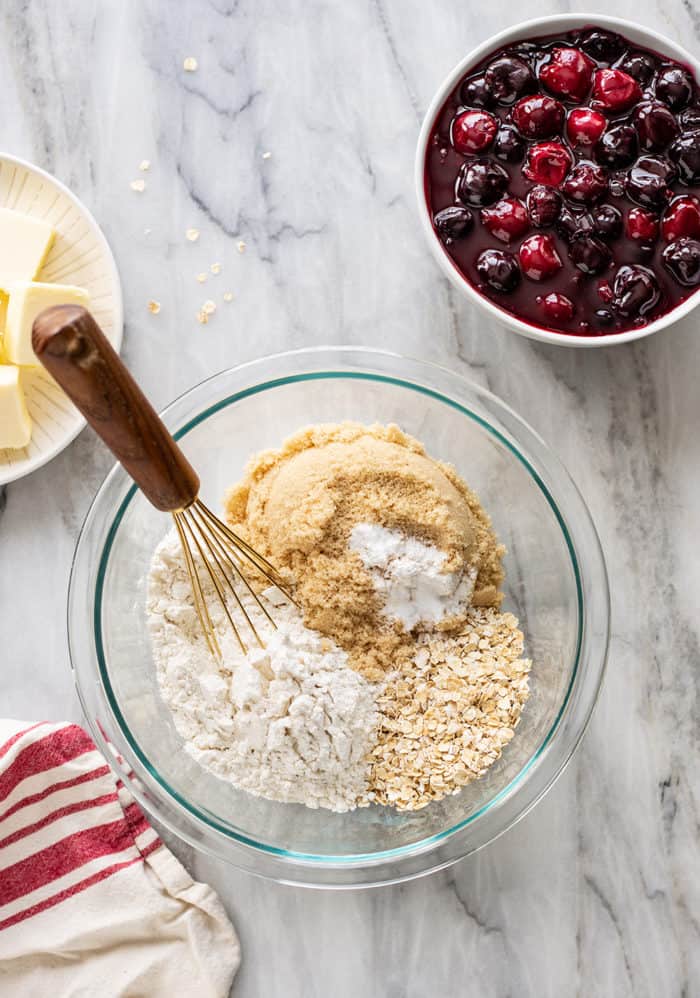
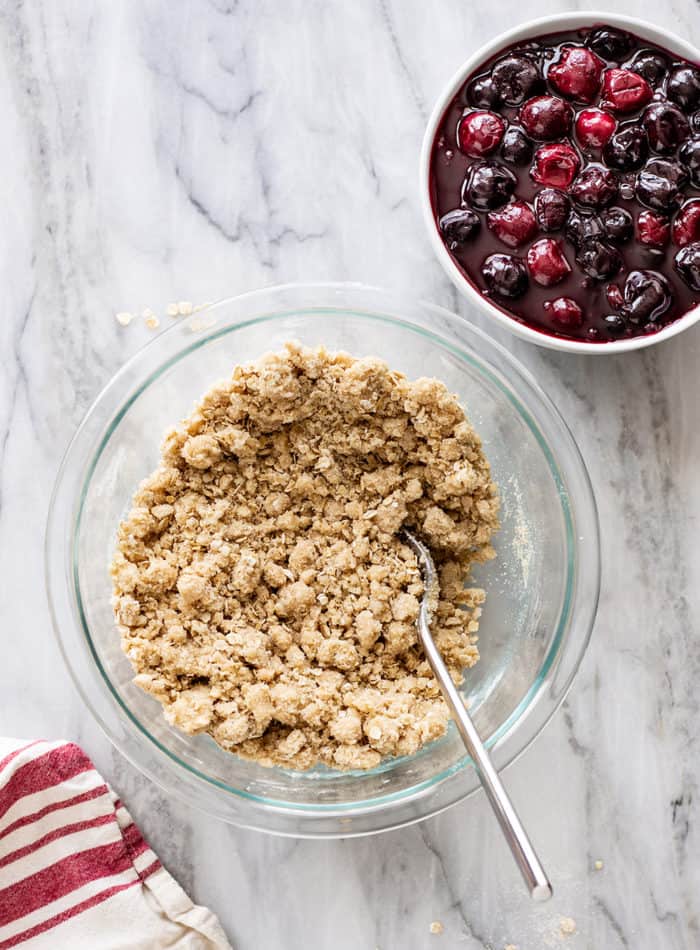
For the topping, I use the same yummy oat topping that I make for my Berry Crisp. If it ain’t broke, don’t fix it.
Stir together the flour, baking powder, baking soda, oats and brown sugar in a bowl. Drizzle in melted butter and mix until crumbs form.
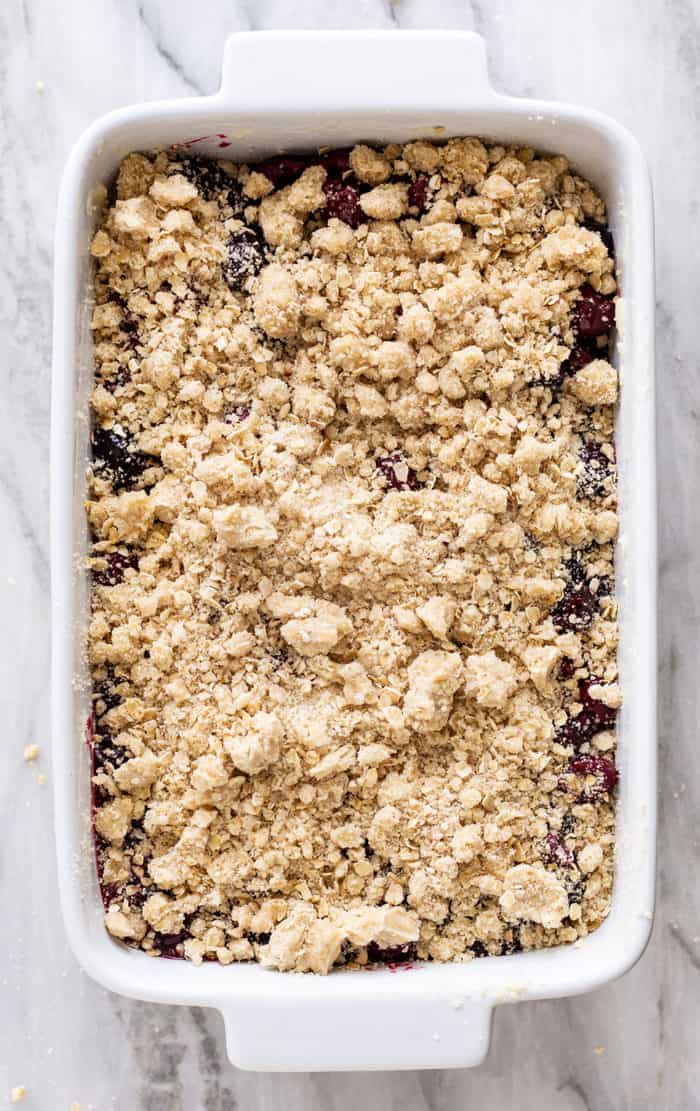
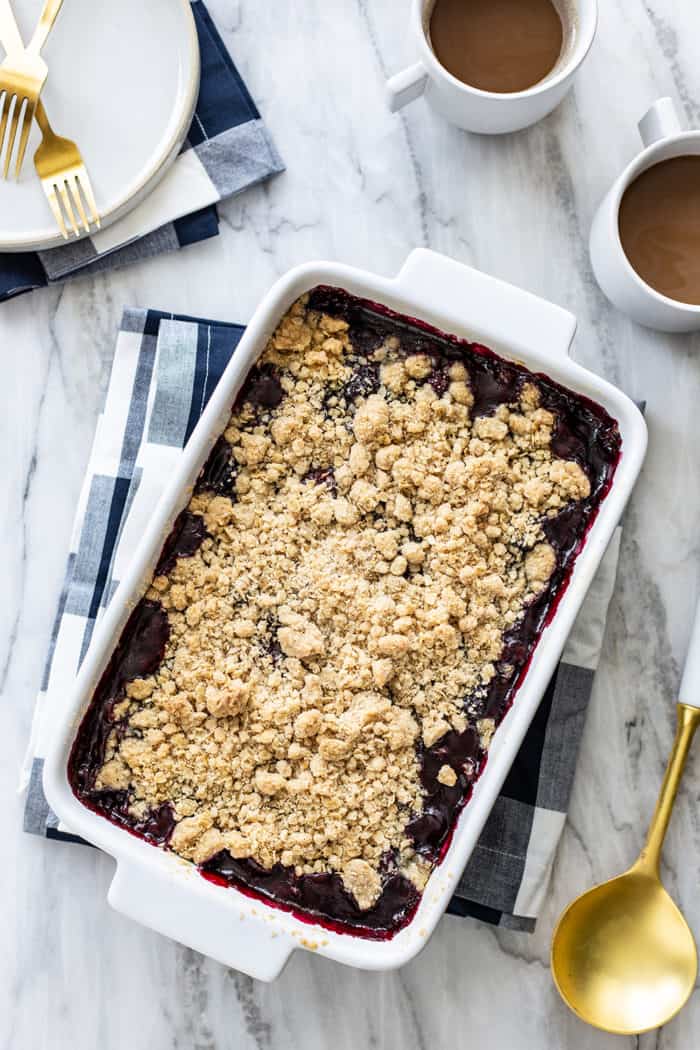
Sprinkle the topping evenly over the pie filling and bake for about 40 minutes, until the fruit is bubbly and the topping is golden.
If you’ve prepped the pie filling ahead of time (or are using canned pie filling), this crisp will take you less than 10 minutes to throw together and get into the oven.
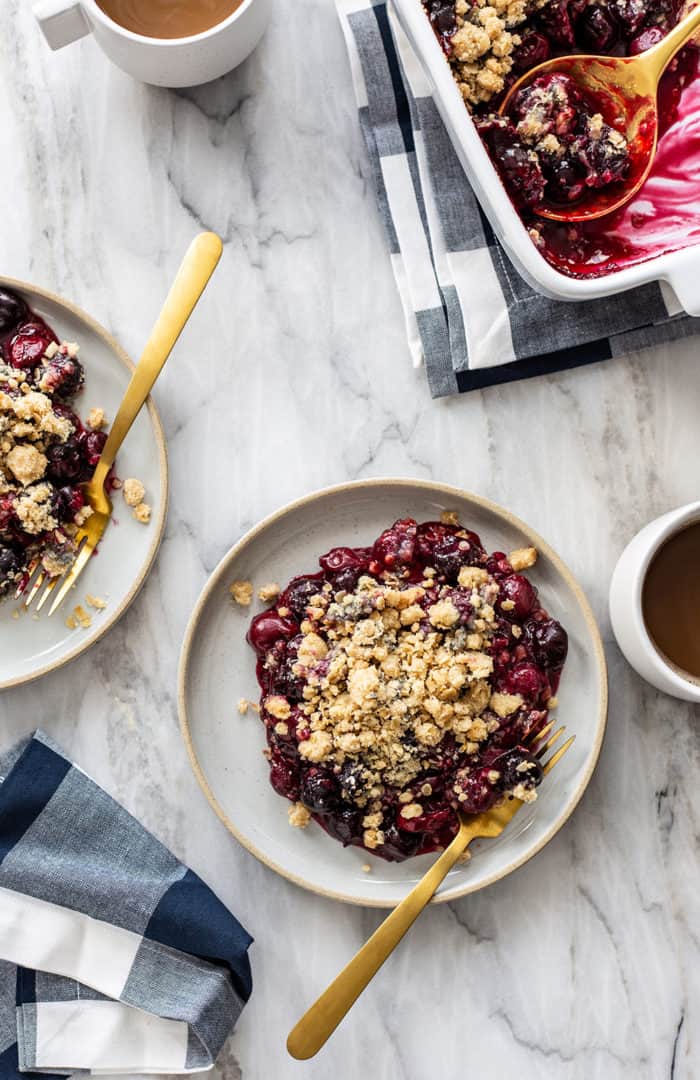
I like to serve my Cherry Crisp warm with a scoop of vanilla ice cream, but that’s just me. Don’t let me tell you how to live your best life.
Cherry Crisp
Equipment
Ingredients
- 1 batch homemade cherry pie filling or 1 (21-ounce) can cherry pie filling
- ⅔ cup all-purpose flour
- ¼ teaspoon baking powder
- ¼ teaspoon baking soda
- ⅔ cup quick-cooking oats
- ⅔ cup light brown sugar
- 6 tablespoons unsalted butter melted
Instructions
- Preheat oven to 350°F. Butter a 2-quart casserole dish.
- Pour cherry pie filling into the prepared dish.
- Stir together the flour, baking powder, baking soda, oats and brown sugar. Drizzle in the butter and mix until incorporated.
- Crumble mixture over cherry pie filling.
- Bake in preheated oven for 35-40 minutes.
- Serve warm with vanilla ice cream.
Notes
- If you don’t like a lot of crisp topping, feel free to cut it in half. But personally, I feel like there is never too much crisp topping.
Nutrition
Nutrition information is automatically calculated, so should only be used as an approximation.
You may also like

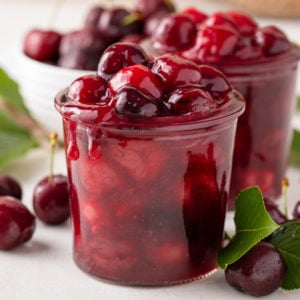
Homemade Cherry Pie Filling
Equipment
Ingredients
- 5 to 6 cups fresh pitted cherries about 2 1/2 to 3 pounds
- ½ cup water
- 2 tablespoons freshly squeezed lemon juice
- ⅔ cup granulated sugar
- 4 tablespoons cornstarch
- ¼ teaspoon almond extract optional
Video
Instructions
- In a saucepan over medium heat, combine cherries, water, lemon juice, sugar and cornstarch.5 to 6 cups fresh pitted cherries, 1/2 cup water, 2 tablespoons freshly squeezed lemon juice, 2/3 cup granulated sugar, 4 tablespoons cornstarch
- Bring to a boil; reduce heat to low and cook, stirring frequently, for about 5-10 minutes. You'll know the filling is done when it is thick, the cherries have released their juices, and the "goo" goes from being an opaque pinkish color to a clear, deep red color.
- If using, stir in almond extract. Cool slightly before using as a topping.1/4 teaspoon almond extract
Notes
- If using sour cherries, you will need to adjust the amount of sugar. I’d recommend starting about ¾ cup and working your way up if more sweetness is needed.
- Refrigerate leftover fresh cherry pie filling in a sealed container for up to 3 days.
- Feel free to swap frozen pitted cherries for the fresh cherries. There is no need to thaw them before making the filling.
- This recipe freezes beautifully.
- Makes enough to fill a 9-inch pie crust for a homemade cherry pie.
Nutrition
Nutrition information is automatically calculated, so should only be used as an approximation.


I used six cups frozen organic sweet cherries, and it came out GREAT! Only thing I might change is a little more lemon, and a little less sugar as personal preference. I prefer a little more tart/less sweet.
Thank you for sharing this recipe.
My family loved this! Granddaughter asked for it again on her 12th birthday
I made this cherry filling to go along with your Cherry crisp recipe- both of which turned out lovely! I will say, I cut the sugar to 1/2 cup instead of 2/3c because the cherries here are SO sweet this year. Even with my sweet tooth and cutting the sugar a little, the filling is crazy sweet- I probably will cut it by half next time and hope it still turns out. Thanks for the recipe!
This was just what I was looking for. Everything turned out delicious! Thank you for sharing this.
So happy to hear you enjoyed the recipe, Ryan! Thanks for stopping by and leaving your feedback!
-Jamie
Could you use self rising flour and bypass the baking powder and baking soda?
Hello! I haven’t attempted this recipe with this substitution, so I am not sure of the result. If you happen to give it a try, I’d love to know how it turned out. Thanks so much for stopping by.
-Jamie
Found and made this last year. Found and made again tonight. Yummy
Yay! So happy to hear you enjoyed the recipe. Thanks so much for stopping by and leaving your feedback.
-Jamie
Nice easy to make and good
This is exactly what I was looking for! Next time I might add less brown sugar,but other than that it was perfect. Other recipes add cinnamon and nutmeg which makes no sense to me. I like the simplicity of this crumb and will be using it in the future.
So happy to hear you enjoyed the crisp, Christine! Thanks so much for stopping by and leaving your feedback!
-Jamie