This post may contain affiliate links. Please read our privacy policy.
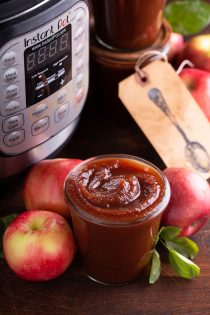
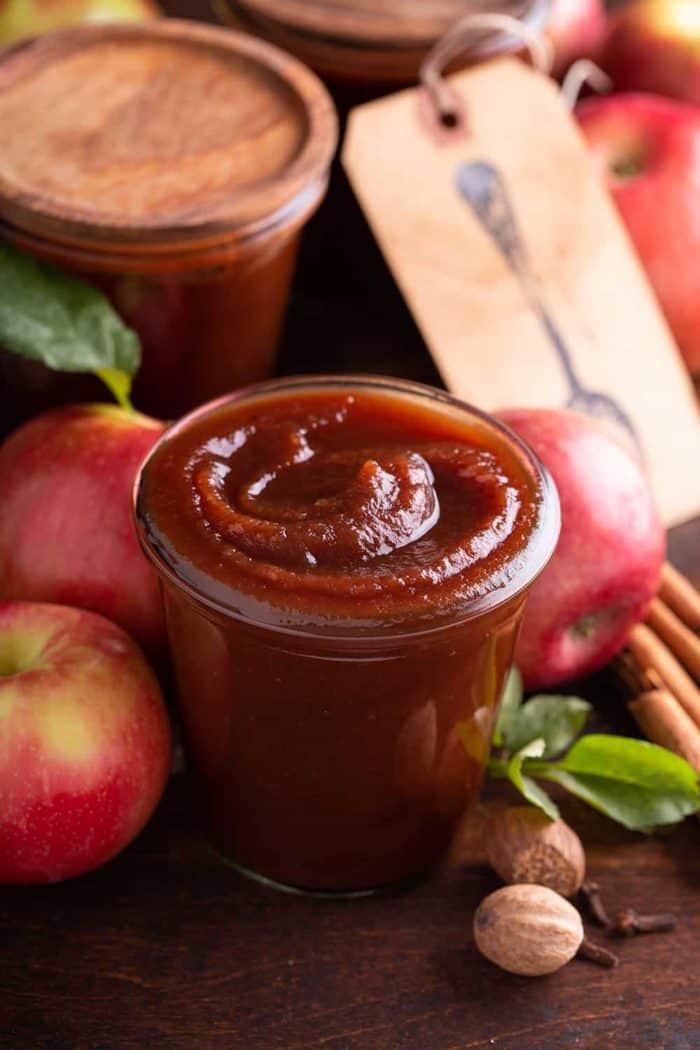
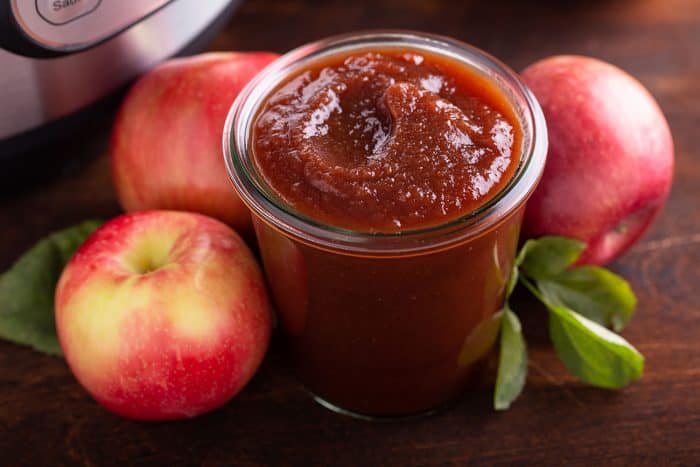
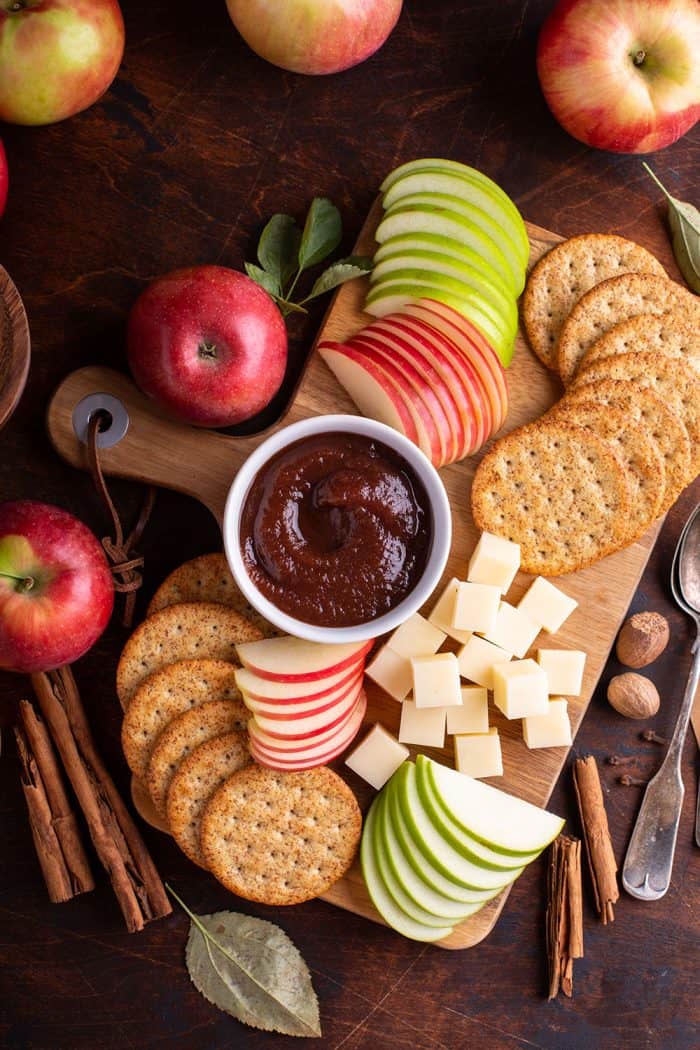
Making apple butter at home is so much easier than you think! This Instant Pot Apple Butter takes just a few hours to make, but will taste like it simmered on the stove all day long. Enjoy it on toast or package it up for a fall gift!
Every year right around this time, we usually venture to a local apple orchard with E’s school for a fall field trip.
However, given the current circumstances, field trips aren’t exactly happening right now, but we’re still yearning for a little fall fun.
Instead of a field trip, we’re going to take a family trip and head to our favorite orchard to pick up pumpkins, cornstalks and loads of apples for all kinds of recipes like our favorite Crockpot applesauce, caramel apple crisp and this super simple homemade apple butter conveniently made in an Instant Pot.
HOW TO MAKE APPLE BUTTER IN THE INSTANT POT
Apple butter is one of those things I used to buy at the orchard every fall and think to myself, “This must be so hard to make.”
After all, it is so thick and rich and flavorful, it must take forever and be tricky to make, right?
Turns out, I was totally wrong. When I finally screwed up my courage and tried making Slow Cooker Apple Butter, I realized – it’s actually really easy to make at home!
The only downside is that making it in the slow cooker does take about 12 hours. Even though it’s almost all hands-off time, it’s still a bit of a time investment.
I’ve used my Instant Pot to speed up slow cooker recipes before – like using it to turn my Easy Crockpot Pulled Pork into Instant Pot Pulled Pork – so I figured, why not try that with apple butter, too?
I was excited when I realized that cooking the apple butter in the Instant Pot cut the cooking time down from 12 hours to just 3 hours. And it’s still super easy!
(No Instant Pot? Try making stovetop apple butter instead.)
To make Instant Pot Apple Butter:
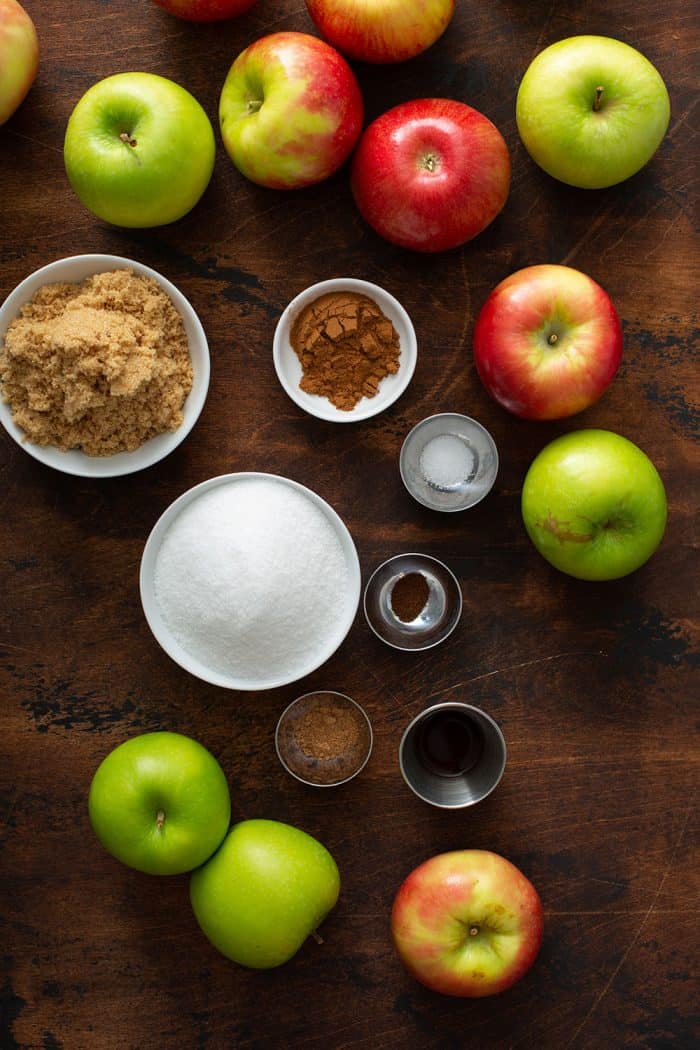
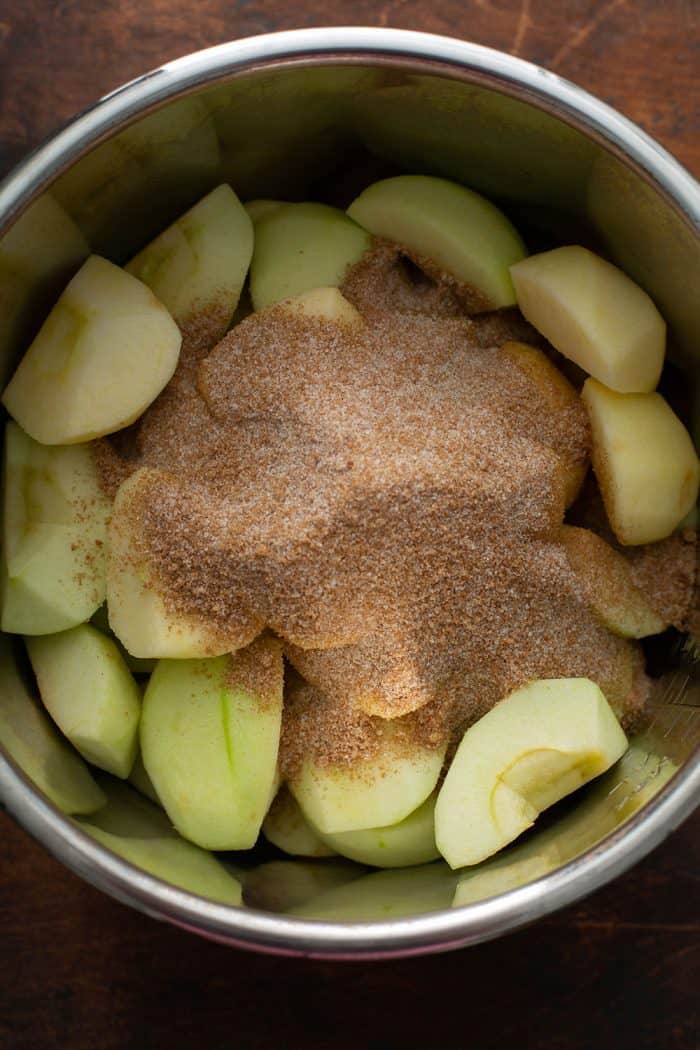
- Peel, core, and quarter 6 ½ pounds of apples
- Add the apples, sugar, and spices to the Instant Pot
- Cook on high pressure for 90 minutes, with a 10-minute manual release
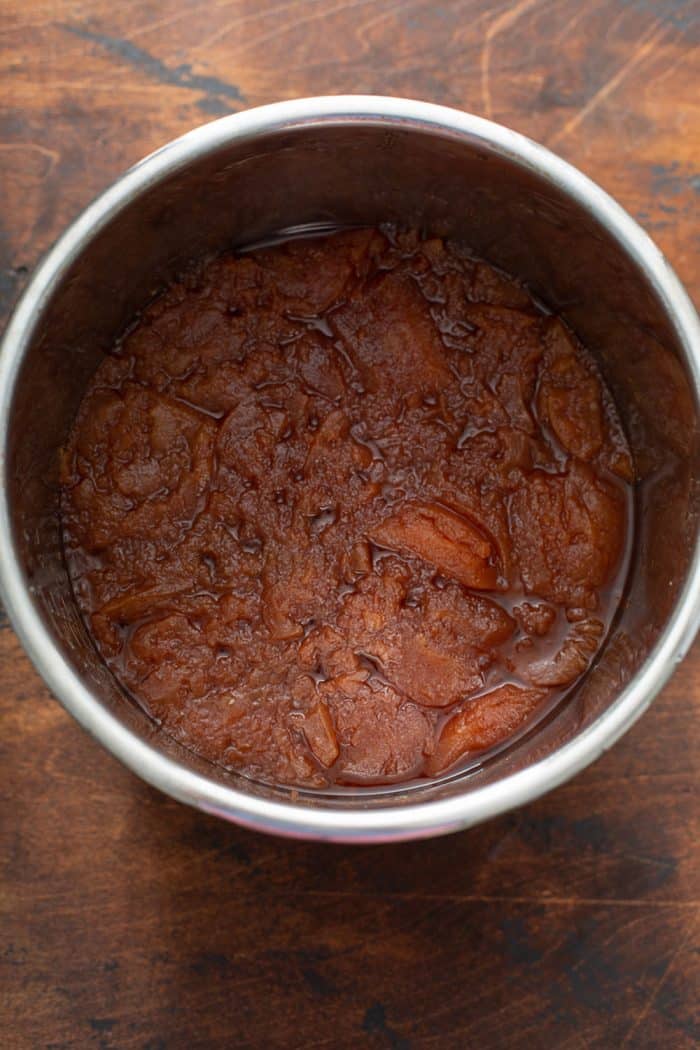
- Puree the mixture using an immersion blender
- Cook on “slow cook” for 2 more hours with the lid propped open
Just like with the slow cooker version, most of the 3 hours is hands-off time. The most work you’ll do for this recipe is peeling the apples.
If you don’t mind if the apple butter is perfectly silky smooth, you could certainly leave the peels on. But I don’t mind spending a few minutes peeling apples, so I like to take that extra step.
THE BEST APPLES FOR APPLE BUTTER
I like to use a mix of apples whenever I make apple butter or even Crockpot Applesauce.
Since all apple varieties have different levels of sweetness and tartness, using a mix will get the best flavor.

Generally speaking, softer varieties of apples such as Fuji, Golden Delicious, McIntosh, or Jonagold work better since they cook down faster.
I used a mix of Granny Smith, Gala, and Fuji when making this Instant Pot Apple Butter. Even the crisper varieties broke down well for a smooth apple butter.
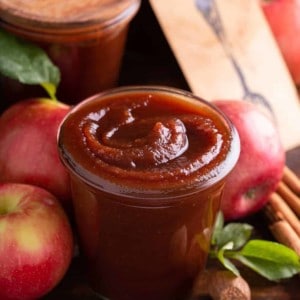
HOW TO STORE YOUR APPLE BUTTER
I had never tried canning apple butter until recently, but it’s actually easier than I thought it would be! Learn how to can apple butter for a long-term storage solution.
You know what I have a lot of experience with? Freezing stuff. It’s why I have a big freezer in my garage.
You can store the finished apple butter in jars or other airtight containers in your fridge for up to a week, but I like to freeze it for up to 3 months.
Just make sure you leave plenty of room at the top of the jar so it doesn’t break after the apple butter freezes. Don’t ask me how I know to warn you about this.
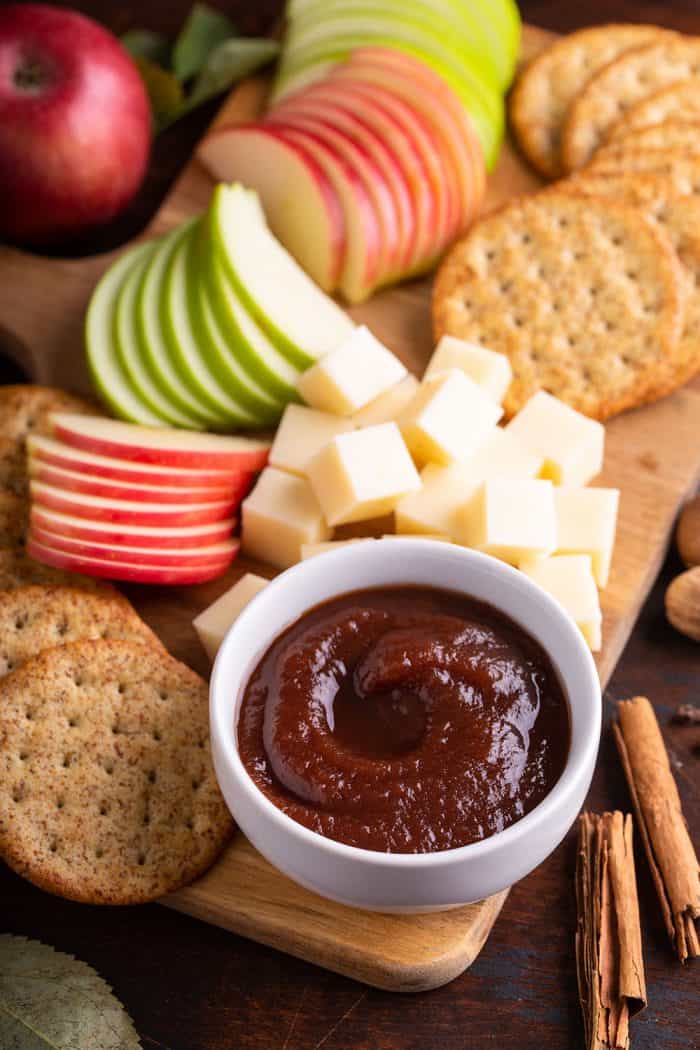
Whether you’re spreading your apple butter on a slice of English Muffin Bread or Cinnamon Swirl Bread for breakfast, turning it into apple butter cinnamon rolls, or serving it alongside Potato Rolls or Buttermilk Biscuits at a holiday dinner, you’ll be glad you took a few hours to make apple butter at home.

Instant Pot Apple Butter
Equipment
Ingredients
- 6 ½ pounds apples peeled, cored and quartered
- 1 cup granulated sugar
- 1 cup light brown sugar lightly packed
- 1 tablespoon ground cinnamon
- ½ teaspoon freshly grated nutmeg
- ¼ teaspoon ground cloves
- ¼ teaspoon salt
- 1 tablespoon pure vanilla extract
Instructions
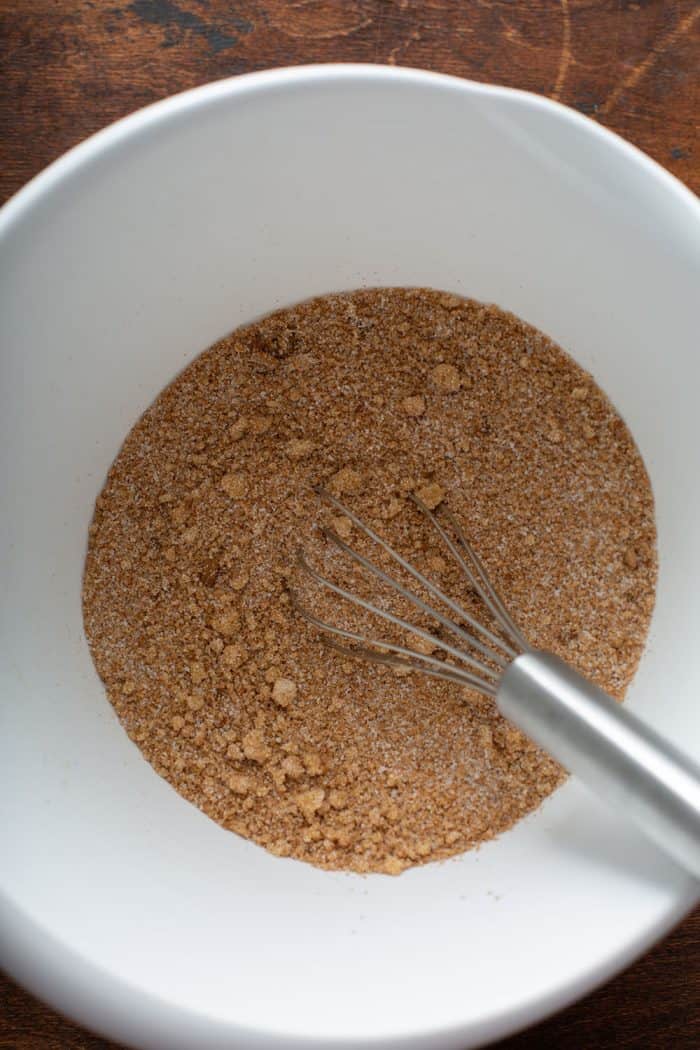
- Place the apples in a 6-quart Instant Pot. In a medium bowl, combine sugars, cinnamon, nutmeg cloves and salt. Pour the mixture over the apples and mix well.
- Turn Instant Pot to “Manual” and pressure cook on high pressure for 90 minutes. Allow to natural release for 10 minutes before releasing any remaining pressure.
- Use an immersion blender to puree the apple butter until smooth.
- Turn Instant Pot to “Slow Cook” and cook on high for about 2 hours, stirring occasionally, with the lid propped on about halfway to allow steam to release. (Do not latch lid.)
- Stir in vanilla.
- Spoon the mixture into sterile containers, cover and refrigerate for up to two weeks or freeze.
Notes
Nutrition
Nutrition information is automatically calculated, so should only be used as an approximation.


You can make 4oz jars of apple sauce with no spices or extras. Pass along to moms with babies starting to work towards solid foods. Then add the spices for apple butter or apple sauce for older kiddos or your adult size kiddos. You can get frozen or 6lb10oz cans of Cling Peaches and make Peach Butter using the same ingredients drain the peaches. It will have much more liquid and take longer to cook down.
I will make this, but I wonder how effective a hand held electric mixer would be instead of a blender. I like chunky applesauce, so I thought chunky apple butter would be good. Would the resulting “coarse” texture impede the evaporation of liquid and thereby extend the slow cook time to reach the desired thickened consistency?
After the two hours with the lid cocked on the slow cooker my apple butter is still runny. I added no liquid. I did 90 minutes pressure cooker first.
How can I thicken it?
You would just need to keep cooking it down until it reduces to your liking. Hope this helps.
Jamie
This is bliss! Thanks for sharing the recipe.
I made this recipe twice, two batches. I followed the instructions, exactly as described, and everything turned out awesome both times. The apple butter tastes delicious, fruity! Just like mentioned, it took more like 3 1/2 hrs on slow cook to thicken to the consistency I wanted. I used a cup of brown sugar and only 1/2 cup of Splenda. Also, I preferred the taste without the vanilla at the end. This is a simple and wonderful recipe. Thank you for posting it. It’s a keeper!
So glad to hear you enjoyed the recipe! Thanks so much for stopping by and leaving your feedback!
-Jamie
Delicious! Tastes like fall
This is the first recipe I’ve tried on your website and I must say, I am quite impressed. The only problem I had with this apple butter is the consistency. Is it supposed to have the consistency of applesauce? I followed the recipe to the T. Thank you!
Hi Millicent – Once you blend it, it should be super smooth and silky, and slightly thicker than applesauce. You may need to cook it for a bit longer in the 2nd phase if yours isn’t quite thick enough. Hope this helps!
Jamie
Thanks for this very straightforward and successful method using the instant pot. To speed up the second part of the cooking, I used the sauté setting for 15 or 20 minutes to get things reducing faster, and then switched to slow cook to avoid too much spattering. (I also used about 1/4 cup water to start with, as in other recipes I have gotten the dreaded BURN notice.)
As to the taste: I tend not to like things too sweet, so I reduced the sugar by at least a third, and it still came out tooth-achingly sweet, at least to my taste. I adjusted with a bit of lemon juice, and added more salt, which certainly helped. My apples may have also been a little sweet. Still, if you’re like me, and you want to taste more apple and less sugar, I would seriously reduce the 2 cups of sugar called for in this recipe.
Thanks so much for stopping by and sharing your feedback, Peter! Happy baking!
Jamie
I checked the comments and unless I missed it I didn’t notice anyone else with this problem but in my instant pot I keep getting the food burn constantly. I wound up having to switch it to slow cook. Anyone else having this problem in an instant pot
Hi Doreen – Unfortunately it seems like different models of Instant Pots behave differently. I have made this many times without getting a burn warning, but some folks find that they need to add 1/2 cup of water or apple juice at the beginning to avoid getting a burn warning. Check the notes in the recipe card for some more details on that. Hope this helps! Happy baking –
Jamie
I added the vanilla at the beginning on accident. Will this effect the recipe?
Hi Mike – It will be fine. The flavor just might cook off – you can always add more vanilla at the end. Hope this helps! Happy baking –
Jamie